The best quilting machine markers are heat-erasable, water-soluble, or air-erasable markers designed specifically for fabric marking, with heat-erasable being most reliable for quilting projects.
Choose quilting machine markers based on your fabric type, quilting method, and removal preference – always test any marker on fabric scraps before using on your final project.
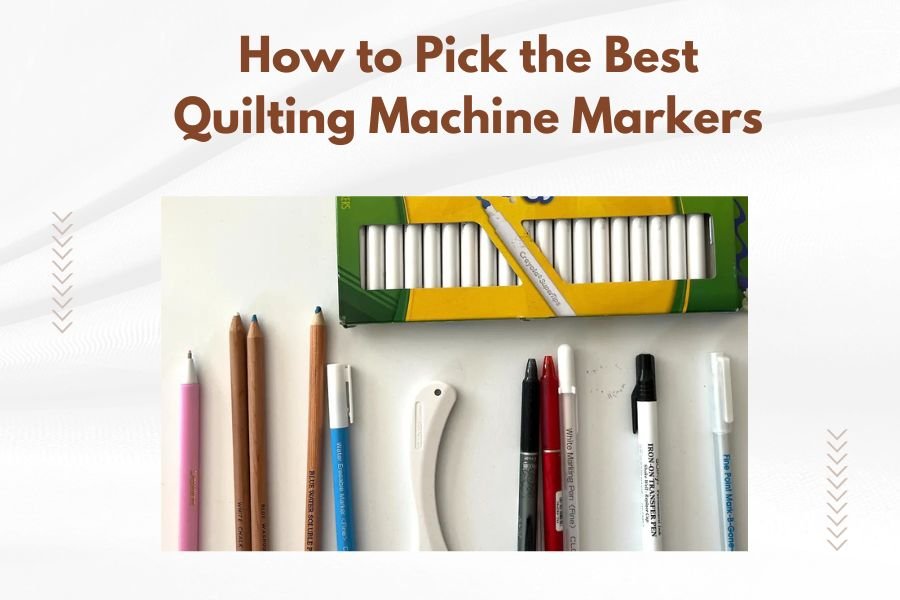
What Makes a Good Quilting Machine Marker
You need a marker that shows up clearly on your fabric but disappears completely when you want it gone. Sounds simple, right? Well, there are more factors to consider than you might think.
The best quilting machine markers share three key traits. They mark cleanly without bleeding. They remove easily without staining. And they work well with your specific fabric and thread choices.
Visibility on Different Fabrics
Your marker needs to show up on both light and dark fabrics. Many quilters I found online keep multiple marker types on hand for this reason. A blue water-soluble marker works great on white cotton but disappears on navy fabric.
Light-colored markers work best on dark fabrics. White, silver, or yellow markers show up clearly on deep blues, blacks, and rich reds. Dark markers like blue or purple work well on light and medium fabrics.
Clean Removal Properties
The worst feeling? Finishing a beautiful quilt only to find marker lines that won’t come out. I researched this problem and found that marker removal depends on fabric content, heat exposure, and time.
Some markers become permanent when heated by your iron or dryer. Others fade naturally over time. The key is knowing which type you’re using and following the removal instructions exactly.
Types of Quilting Machine Markers
Each marker type has its place in quilting. Understanding when to use each one will save you headaches later.
Heat-Erasable Markers
These markers disappear when you apply heat with an iron. They’re perfect for machine quilting because you can mark your entire quilt top, then remove all lines with one final pressing.
Heat-erasable markers work best on cotton and cotton blends. They’re reliable and predictable. Just remember – once you apply heat, those lines are gone forever. So finish all your quilting before pressing.
Best Uses for Heat-Erasable
Use these for complex quilting patterns where you need lines to stay visible for hours or days. They’re also great for marking quilting templates or ruler work.
Water-Soluble Markers
Water-soluble markers wash out with plain water or a damp cloth. They come in various colors and tip sizes. Blue is most common, but you’ll also find pink, purple, and other colors.
These markers work well for short-term marking. But I found that some water-soluble markers can become permanent if left too long or exposed to heat before washing.
When to Choose Water-Soluble
Pick water-soluble markers for projects you’ll finish quickly. They’re perfect for marking seam lines, placement guides, or simple quilting designs you can complete in one session.
Air-Erasable Markers
Air-erasable markers fade on their own over 24-48 hours. No heat or water needed. They’re convenient but can disappear while you’re still working.
These work best for quick marking jobs. Mark a small section, quilt it, then move on. Don’t try to mark your entire quilt at once with air-erasable markers.
Air-Erasable Advantages
No cleanup required. You don’t risk setting the marks with heat or worry about washing them out. They just vanish naturally.
Choosing the Right Marker for Your Fabric
Fabric content affects how markers perform. What works on 100% cotton might fail on polyester blends or specialty fabrics.
Cotton and Cotton Blends
Most quilting markers work well on cotton. Heat-erasable markers are especially reliable on cotton fabrics. Water-soluble markers also perform consistently on cotton.
Cotton handles heat well, so you can safely use an iron to remove heat-erasable marks. It also absorbs water-soluble markers evenly and releases them during washing.
Synthetic Fabrics
Polyester and synthetic blends need more careful marker selection. Some synthetic fabrics hold onto marker pigments more stubbornly than cotton.
Air-erasable markers often work best on synthetics. They don’t rely on washing or heating for removal, which can be tricky with synthetic fabrics.
Dark and Light Fabric Considerations
Dark fabrics need light-colored markers. White chalk markers or silver markers show up clearly on dark blues, blacks, and deep purples.
Light fabrics work with most marker colors. Blue and purple water-soluble markers are popular choices for white and light-colored cottons.
Testing Your Markers
Never use a new marker on your finished quilt top without testing first. This simple step prevents heartbreak later.
How to Test Properly
Cut a small piece from your actual quilt fabric. Mark it with your chosen marker. Wait the expected time. Then try to remove the marks using your planned method.
Test on both the fabric front and back. Sometimes markers behave differently on each side. Also test with your thread and batting if possible.
What to Look For
Complete mark removal is your goal. But also watch for fabric discoloration, texture changes, or residue. The fabric should look and feel exactly like it did before marking.
Testing Timeline
Don’t rush your test. Leave marks on for the same amount of time you expect them to stay on your real project. If you’ll work on your quilt over several days, test for that long.
Application Techniques
How you apply marker lines affects both visibility and removal. Light, consistent pressure works better than heavy marking.
Pressure and Line Weight
Use the lightest pressure that still creates visible lines. Heavy pressure pushes marker deeper into fabric fibers, making removal harder.
Practice on scraps until you find the right pressure for each marker type. Your goal is clear, thin lines that mark your path without over-saturating the fabric.
Marking Tools and Rulers
Quilting rulers with marker-friendly edges help create straight, even lines. Look for rulers with slightly raised edges that guide your marker without catching.
Templates and stencils also help you mark consistent shapes and patterns. Make sure your marker tip fits through stencil openings without dragging.
Common Marking Mistakes
Even experienced quilters make marking mistakes. Learning from these common errors saves time and frustration.
Using the Wrong Marker Type
Using water-soluble markers on fabrics that can’t be washed creates problems. Same with heat-erasable markers on heat-sensitive fabrics.
Match your marker type to your fabric and finishing process. If you plan to wash your finished quilt, water-soluble markers are fine. If you’ll only dry clean, choose air-erasable or heat-erasable instead.
Marking Too Far Ahead
Marking your entire quilt top at once seems efficient. But marker lines can fade, shift, or become permanent if left too long.
Mark small sections as you go. This keeps lines fresh and reduces the risk of permanent marking.
Time Limits to Remember
Air-erasable markers: Use within 24 hours. Water-soluble markers: Remove within a few days. Heat-erasable markers: Most stable over time but avoid accidental heat exposure.
| Marker Type | Best For | Removal Method | Time Limit |
|---|---|---|---|
| Heat-Erasable | Complex patterns, cotton fabrics | Iron heat | Several days to weeks |
| Water-Soluble | Quick projects, washable fabrics | Water or damp cloth | 24-48 hours |
| Air-Erasable | Synthetic fabrics, immediate use | Natural fading | 24 hours |
Marker Removal Best Practices
Proper removal keeps your quilts looking professional. Each marker type needs specific removal techniques.
Heat-Erasable Removal
Use a medium-hot iron without steam. Press firmly over marked areas. The lines should disappear immediately. If some marks remain, increase heat slightly and try again.
Let fabric cool completely before handling. Sometimes marks reappear when fabric cools, especially in humid conditions. A second pressing usually solves this.
Water-Soluble Removal
Start with a damp cloth for small areas. For larger projects, rinse in cool water or wash according to fabric care instructions.
Don’t use hot water first. Hot water can set some marker types permanently. Always start cool and increase temperature if needed.
Storage and Care
Proper marker storage extends their life and maintains performance. Heat, light, and air exposure affect marker quality over time.
Storing Different Marker Types
Store markers horizontally when possible. This keeps ink or chalk evenly distributed. Caps should fit tightly to prevent drying out.
Keep markers away from heat sources and direct sunlight. A cool, dry drawer or storage box works well for most marker types.
When to Replace Markers
Replace markers when lines become faint or inconsistent. Also replace if removal becomes difficult or incomplete during testing.
Old markers can fail unpredictably. Fresh markers give you confidence that your marking will work as expected.
Conclusion
Choosing the best quilting machine markers comes down to matching marker type to your fabric, project timeline, and removal preferences. Heat-erasable markers offer the most reliability for complex quilting projects on cotton fabrics. Water-soluble markers work well for quick projects on washable materials. Air-erasable markers suit synthetic fabrics and immediate-use situations.
Always test new markers on fabric scraps before using them on finished projects. This simple step prevents marking disasters and gives you confidence in your chosen tools. Remember that proper application technique and timely removal are just as important as selecting the right marker type. With the right markers and techniques, you can mark your quilting lines clearly and remove them completely, leaving only beautiful stitching behind.
What happens if quilting machine marker lines don’t come out completely?
Try the removal method again with slightly more heat or moisture. For stubborn water-soluble marks, wash in cool water with a small amount of detergent. For heat-erasable marks, increase iron temperature gradually. If marks still remain, they may have become permanent due to time or improper storage.
Can you use regular pens or pencils for quilting machine marking?
Regular pens and pencils are not recommended for quilting. They can be permanent, may bleed through fabric, or create lines that are difficult to remove. Pencil marks can also become permanent when heated with an iron. Always use markers specifically designed for fabric.
How long do quilting machine markers typically last before drying out?
Most fabric markers last 12-24 months with proper storage and occasional use. Markers used frequently may dry out sooner, while rarely used markers can last longer. Store markers horizontally with caps tightly closed to maximize their lifespan.
Is it safe to use quilting machine markers on vintage or delicate fabrics?
Exercise extreme caution with vintage or delicate fabrics. Always test in an inconspicuous area first, such as a seam allowance. Consider using the gentlest option like air-erasable markers, or look for archival-quality marking tools designed specifically for delicate textiles.
What should you do if you accidentally use a permanent marker on your quilt?
Act quickly if you accidentally use permanent marker. Try dabbing (not rubbing) with rubbing alcohol on a cotton swab for small marks. For larger areas, commercial ink removers designed for fabric may help, but test first. In many cases, permanent marker cannot be completely removed, so prevention through careful marker selection is key.