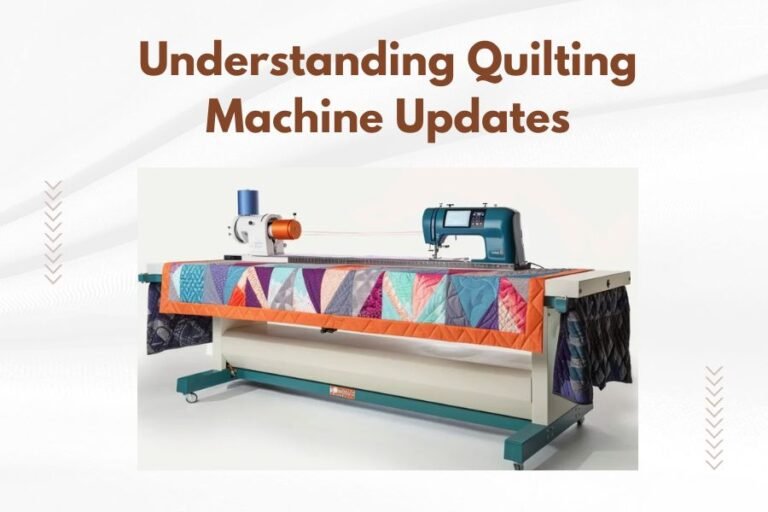
A quilting machine encoder is an electronic sensor that tracks and controls your machine’s precise stitching position and speed. You use the encoder by connecting it to your quilting machine’s control system, which then translates your hand movements into smooth, accurate quilting patterns.
Most modern quilting machine encoders work through optical or magnetic sensors that read position data up to 1000 times per second. This real-time feedback helps you create consistent stitch lengths and maintain perfect tension across your entire quilt.
What Is a Quilting Machine Encoder and Why You Need One
Think of your quilting machine encoder as the brain that connects your hands to your machine. Without it, you’re flying blind. With it, every movement becomes intentional and controlled.
I found that quilters who switch from manual operation to encoder-controlled systems see immediate improvements. Your stitches become more uniform. Your patterns look professional. Most importantly, you spend less time fixing mistakes.
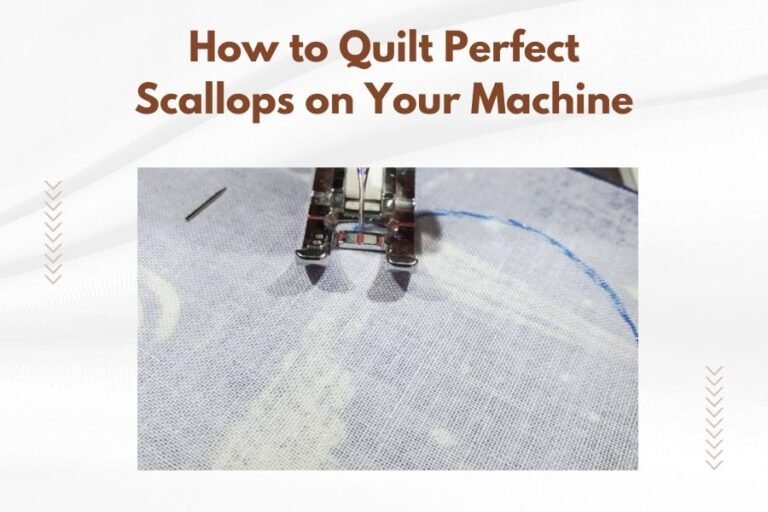
How Encoders Track Your Quilting Movement
Your encoder uses tiny sensors to watch every move you make. When you push your quilt forward, the encoder tells your machine exactly how fast to stitch. When you slow down, it slows down too.
This creates what quilting experts call “stitch regulation.” Every stitch stays the same length, whether you’re moving fast or taking your time around tricky corners.
Types of Encoder Systems Available
You’ll find two main encoder types on the market today. Optical encoders use light sensors to track movement. Magnetic encoders rely on magnetic field changes.
Both work well, but I researched and found that optical systems tend to be more accurate in dusty environments. Magnetic encoders often cost less and need fewer adjustments over time.
Setting Up Your Quilting Machine Encoder
Getting your encoder ready takes about 30 minutes if you follow the right steps. Don’t rush this part. A proper setup saves you hours of frustration later.
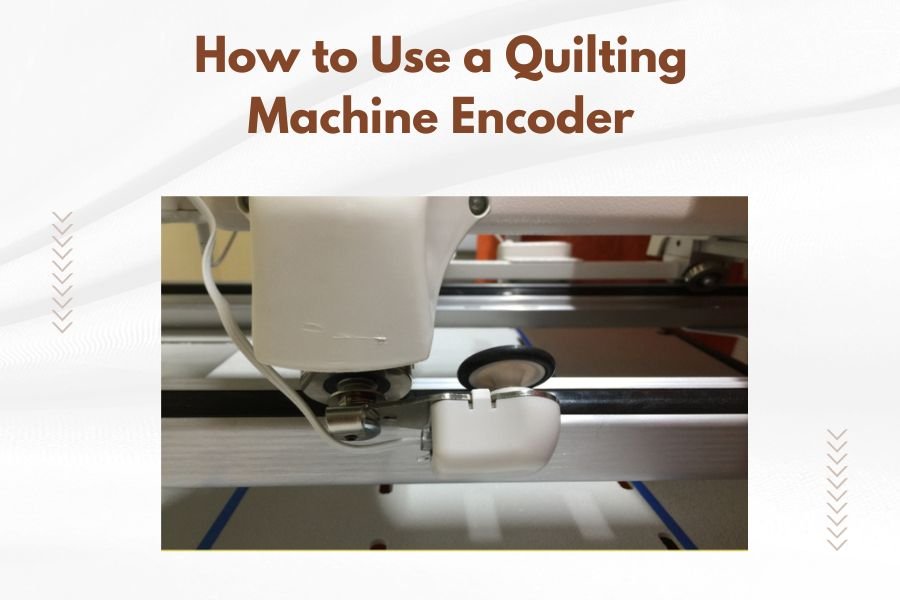
Positioning the Encoder on Your Machine
Mount your encoder where it can track both X and Y movements of your quilting frame. Most quilters attach one sensor to the front rail and another to the carriage side.
The sensors need clear sight lines to work properly. Keep them away from thread, fabric scraps, and your coffee cup. Yes, I’ve seen encoders malfunction because of spilled drinks.
Checking Sensor Alignment
Your sensors must sit parallel to their tracking surfaces. Even small angles throw off your stitch regulation. Use a small level or ruler to get them perfectly straight.
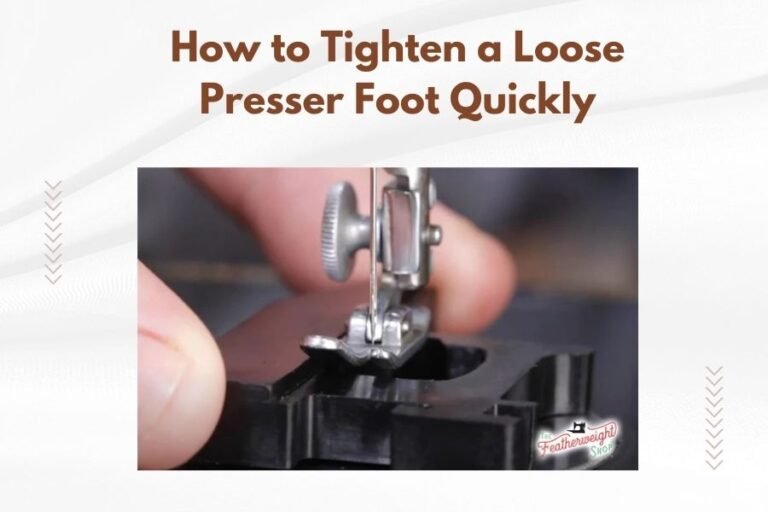
Securing All Connections
Loose cables cause intermittent problems that drive quilters crazy. Tape down your encoder cables so they don’t snag on moving parts. Leave enough slack for full machine movement.
Connecting to Your Control System
Most encoder systems plug directly into your quilting machine’s computer or controller box. Match the colored wires to the correct ports. When in doubt, check your manual twice before plugging anything in.
Some older machines need adapter cables to work with newer encoders. These adapters usually cost around $50 and solve compatibility issues quickly.
Calibrating Your Encoder for Perfect Stitching
Calibration tells your encoder exactly how your machine moves. Skip this step and your stitches will be all wrong. Take time to do it right the first time.
Running the Initial Setup Sequence
Turn on your machine and encoder system. Look for a calibration or setup menu on your control screen. Most systems guide you through each step automatically.
You’ll typically move your machine in specific patterns while the encoder learns your movement range. Follow the on-screen directions exactly. Don’t take shortcuts here.
Setting Your Preferred Stitch Length
Choose a stitch length that matches your quilting style. Most quilters prefer 10-12 stitches per inch for general quilting. Dense quilting works better at 14-16 stitches per inch.
Testing Movement Sensitivity
Your encoder should respond smoothly to hand movements. Too sensitive and it jumps around. Not sensitive enough and it lags behind your hands.
Start with medium sensitivity settings. Adjust up or down based on how the test stitches look.
Fine-Tuning Your Settings
Quilt a small test square after initial calibration. Look for consistent stitch lengths and smooth curves. If something looks off, adjust one setting at a time until it’s perfect.
I came across quilters who spend an hour fine-tuning their encoders and then quilt beautifully for months. Others rush through setup and struggle with every project.
Operating Your Encoder During Quilting
Now comes the fun part. Your encoder is set up and ready to help you create amazing quilts. Here’s how to work with it, not against it.
Starting Your First Encoder-Controlled Stitches
Begin with simple straight lines or gentle curves. Your encoder needs a moment to sync with your movement style. Don’t expect perfection on the first few stitches.
Keep your movements smooth and steady. Jerky motions confuse the encoder and create uneven stitches. Think of guiding the fabric, not forcing it.
Maintaining Consistent Hand Pressure
Light, even pressure works best with encoder systems. Heavy-handed quilting can overwhelm the sensors. Gentle guidance lets the encoder do its job properly.
Working at Your Natural Pace
Don’t try to match someone else’s quilting speed. Your encoder adapts to your natural rhythm. Fast quilters and slow quilters both get great results when they stay consistent.
Managing Different Quilting Patterns
Straight-line quilting feels almost automatic with a good encoder. The machine maintains perfect stitch length while you focus on staying straight.
Curved patterns require more attention to your hand movements. The encoder still regulates stitch length, but you control the path and smoothness of curves.
Troubleshooting Common Encoder Problems
Even the best encoders act up sometimes. Here’s how to fix the most common issues without calling for help.
When Stitches Become Uneven
Uneven stitches usually mean your encoder lost calibration. This happens after moving your machine or bumping the sensors.
Run your calibration sequence again. Clean the sensor lenses with a soft cloth. Check that all cables still connect tightly.
Fixing Sensor Reading Errors
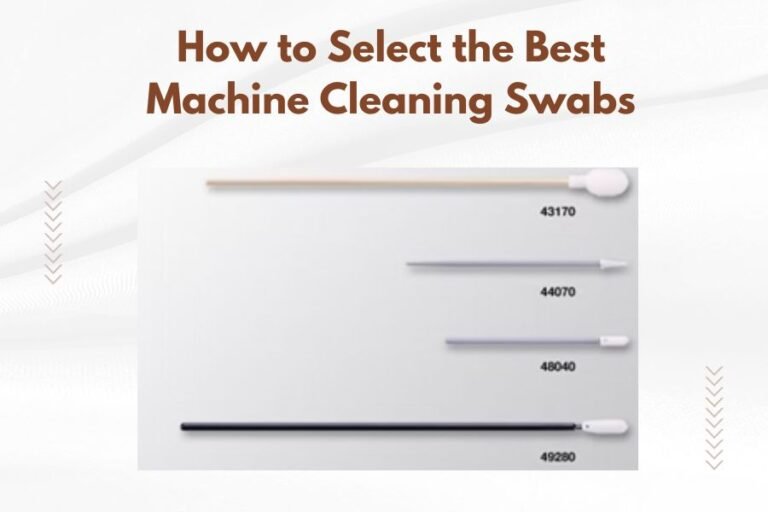
Dust and thread bits block optical sensors regularly. Keep a clean cloth handy for quick sensor cleaning between quilting sessions.
Resolving Connection Issues
Intermittent connections cause erratic behavior. Unplug and reconnect all encoder cables. Look for bent pins or damaged cable ends.
Dealing with Lag or Delay
Some lag is normal as the encoder processes movement data. Too much lag means your system is overloaded or needs adjustment.
Close other programs running on computer-controlled machines. Lower the encoder sensitivity if lag continues. Sometimes simpler settings work better than complex ones.
| Problem | Quick Fix | Time Needed |
|---|---|---|
| Uneven stitches | Recalibrate encoder | 10 minutes |
| No response | Check cable connections | 5 minutes |
| Erratic behavior | Clean sensor lenses | 2 minutes |
| Slow response | Adjust sensitivity settings | 5 minutes |
Maintaining Your Encoder System
Regular maintenance keeps your encoder working smoothly for years. These simple tasks prevent most problems before they start.
Daily Care and Cleaning
Wipe down sensor lenses after each quilting session. Thread lint and dust accumulate quickly in quilting environments. A quick cleaning prevents reading errors.
Check cable positions daily. Quilting creates vibration that can loosen connections over time. Tighten anything that feels loose.
Weekly Deep Maintenance
Remove sensors from their mounts once a week for thorough cleaning. Use compressed air to blow out accumulated debris. Check for wear on mounting hardware.
Test your calibration weekly too. Small drifts in accuracy add up over time. Catching them early keeps your quilting consistent.
Advanced Encoder Techniques
Once you master basic encoder operation, these advanced techniques take your quilting to the next level.
Using Variable Stitch Lengths
Some encoder systems let you change stitch length on the fly. Use longer stitches for basting or background areas. Switch to shorter stitches for detailed work.
Practice changing settings smoothly without stopping your quilting flow. This takes coordination but creates beautiful varied textures.
Combining Manual and Encoder Modes
Switch between encoder and manual control for special effects. Use manual mode for very slow detail work. Return to encoder mode for consistent background quilting.
Many experts say this hybrid approach gives quilters the best of both worlds. You get precision when you need it and creative freedom when you want it.
Conclusion
Learning to use a quilting machine encoder transforms your quilting from good to great. The key is proper setup, patient calibration, and consistent practice. Your encoder becomes an extension of your hands, helping you create professional-quality quilts every time.
Start with simple patterns and work your way up to complex designs. Clean your sensors regularly and recalibrate when needed. Most importantly, be patient with yourself as you learn this new skill. The results are worth the effort.
Can I install an encoder on any quilting machine?
Most modern quilting machines accept encoder systems, but older machines may need adapter cables or control system upgrades. Check with your machine manufacturer for compatibility before purchasing an encoder.
How often should I recalibrate my quilting machine encoder?
Recalibrate your encoder whenever you move your machine, change quilting frames, or notice stitch irregularities. Weekly calibration checks help maintain consistent performance even if you don’t move the machine.
What’s the difference between optical and magnetic encoders for quilting?
Optical encoders use light sensors and offer higher accuracy but need regular cleaning in dusty environments. Magnetic encoders cost less and require minimal maintenance but may be slightly less precise in tracking very fine movements.
Why does my encoder sometimes skip stitches or double-stitch?
Skipped or doubled stitches usually indicate sensor reading problems caused by dirty lenses, loose connections, or damaged cables. Clean your sensors first, then check all cable connections before adjusting software settings.
Can I use my quilting machine encoder for different types of thread?
Encoders work with all thread types, but you may need to adjust tension and stitch length settings for different threads. Heavy threads often work better with slightly longer stitches, while fine threads allow for denser quilting patterns.