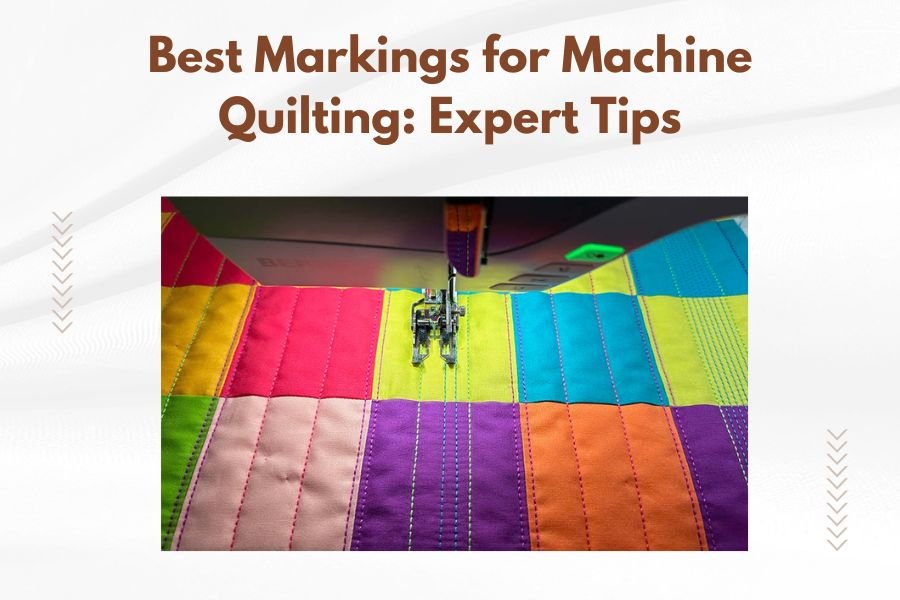
The best markings for machine quilting are water-soluble pens, heat-erasable pens, and chalk pencils that disappear cleanly without damaging your fabric.
Choose your marking tool based on your fabric color, quilting timeline, and whether you need temporary or semi-permanent guidelines for your project.
Why Your Marking Tool Choice Makes or Breaks Your Quilt
You spend hours planning your perfect quilt design. You pick beautiful fabrics and thread. But then you grab the wrong marking tool and watch your masterpiece get ruined by permanent lines that won’t come out.
I’ve researched quilting forums and found this happens more than you’d think. The good news? You can avoid this heartbreak completely.
Your marking tool needs to do three things well. First, it must show up clearly while you work. Second, it should disappear completely when you’re done. Third, it can’t damage your fabric in any way.
Water-Soluble Markers: Your Go-To for Most Projects
Water-soluble markers win the popularity contest among quilters for good reason. They wash out with plain water and work on most fabrics.
These markers come in blue or purple ink. The blue ones tend to be more visible on light fabrics. Purple works better on medium-toned materials.
When Water-Soluble Markers Work Best
Use these markers when you plan to finish your quilting within a few days. They can become permanent if left too long, especially in heat or sunlight.
They’re perfect for detailed designs where you need precise lines. The fine tip gives you control that chalk just can’t match.
What to Watch Out For
Never iron over water-soluble marks before washing them out. Heat sets the ink permanently. I found this warning repeated across multiple quilting guides, and it’s not reversible.
Test on a fabric scrap first. Some synthetic blends hold onto the ink longer than cotton.
Heat-Erasable Pens: Perfect for Long Projects
Heat-erasable pens use friction or heat to disappear. You can erase them with a special eraser or your iron’s heat.
These work great when your quilting project might sit unfinished for weeks or months. Unlike water-soluble markers, time won’t make them permanent.
How to Use Heat-Erasable Pens Safely
Mark your design, then quilt over it. Use your iron on medium heat to make the marks vanish. The lines disappear like magic.
Keep one important thing in mind. Cold temperatures can bring the marks back temporarily. If you store your finished quilt somewhere very cold, faint lines might reappear until it warms up again.
Best Fabrics for Heat-Erasable Options
These pens work well on cotton and cotton blends. Avoid them on delicate fabrics that can’t handle medium iron heat.
They show up clearly on both light and dark fabrics, making them versatile for mixed-color quilts.
Chalk Pencils and Powders: The Gentle Choice
Chalk gives you the safest option for your fabrics. It brushes away easily and won’t stain or damage anything.
You can find chalk in pencil form, powder form, or pre-loaded in rolling wheels. Each type has its place in your marking toolkit.
Traditional Chalk Pencils
Chalk pencils work like regular pencils but leave removable marks. Sharpen them to get fine lines for detailed work.
The marks can rub off while you’re quilting, so they work best for simple designs you can complete quickly.
Chalk Powder and Pounce Wheels
Pounce wheels let you transfer patterns using chalk powder. Roll the serrated wheel along your template, and it leaves a dotted line of chalk.
This method works well for large, flowing designs where you need gentle curves rather than sharp lines.
When Chalk Falls Short
Chalk doesn’t show up well on dark fabrics. It also tends to disappear as you handle the quilt, so it’s not great for projects that take several sessions to complete.
Silver and White Pencils for Dark Fabrics
Dark fabrics need special treatment. Regular markers and chalk just disappear against navy, black, or deep purple materials.
Silver quilting pencils show up beautifully on dark colors. They’re made specifically for fabric and wash out in regular laundry cycles.
White Fabric Pencils
White pencils work similarly to silver ones but give you a softer, more subtle line. They’re perfect when you want guidance without bold marks.
Both silver and white pencils need testing first. Some wash out completely, while others fade to very light lines that most people won’t notice.
Soap Slivers: The Old-School Secret
Many experienced quilters swear by thin slivers of white bar soap for marking. It’s cheap, safe, and washes out completely.
Cut a bar of soap into thin pieces and sharpen the edge with a knife. The soap glides smoothly across fabric and leaves clear marks.
Why Soap Works So Well
Soap never stains fabric. It actually helps clean your quilt when you wash the finished project. Plus, you probably already have it at home.
The marks stay visible while you work but aren’t permanent like some chemical markers can become.
Hera Tools: Invisible Marking
Hera tools create creased lines in fabric without any ink or chalk. You press the tool along your design line, and it leaves a gentle fold you can follow.
This Japanese technique works perfectly on cotton and linen. The creases stay visible long enough to complete your quilting, then relax out naturally.
Best Uses for Hera Marking
Use hera tools for straight lines and gentle curves. They work great for grid patterns and simple geometric designs.
You can’t create detailed or intricate patterns with creasing, so save this method for bold, simple quilting designs.
Choosing the Right Color for Visibility
Your marking tool needs to show up clearly against your fabric. This sounds obvious, but it’s where many quilters make mistakes.
Light Fabric Guidelines
On white, cream, and pale fabrics, use blue water-soluble markers or regular chalk. These show up clearly without overwhelming your design.
Avoid yellow or light-colored markers on light fabrics. You’ll strain your eyes trying to see the lines.
Medium Tone Strategies
Medium fabrics give you the most options. Purple markers, silver pencils, and white chalk all work well on prints and medium solids.
Test your chosen tool on the actual fabric before marking your whole quilt. Lighting conditions affect how well you can see different colors.
Dark Fabric Solutions
Dark fabrics limit your choices but don’t eliminate them. Silver pencils, white pencils, and soap slivers all show up well on navy, black, and deep colors.
Yellow chalk can work on very dark fabrics, but test it first to make sure it brushes away cleanly.
Temporary vs Semi-Permanent Options
Think about your quilting timeline before choosing your marking method. Some marks fade quickly, while others last for weeks.
Quick Project Markings
For quilts you’ll finish in one or two sessions, chalk and soap work perfectly. They’re gentle and disappear easily when you’re done.
Water-soluble markers also work well for quick projects, as long as you wash them out within a few days.
Long-Term Project Solutions
Projects that might sit for weeks need more permanent markings. Heat-erasable pens and fabric pencils won’t fade while your quilt waits for attention.
Avoid chalk for long projects. It rubs off as you handle the fabric, leaving you with partial guidelines that don’t help much.
Testing Your Tools: The Smart Approach
Smart quilters test every marking tool on fabric scraps before using them on their actual project. This simple step prevents disasters.
Cut small pieces from the same fabrics you’re using in your quilt. Make test marks, then try to remove them using your chosen method.
What to Test For
Check how well the marks show up while you work. Then verify they disappear completely when removed. Look for any residue, color changes, or fabric damage.
Test removal after different time periods too. Mark some samples and try washing them out after one day, one week, and one month.
Common Marking Mistakes to Avoid
Even experienced quilters sometimes grab the wrong tool for the job. Here are the mistakes I found mentioned most often in quilting communities.
Using Regular Pens or Pencils
Never use regular writing pens or graphite pencils on quilts. They’re not designed for fabric and often won’t wash out completely.
Ballpoint pens are especially bad. The ink can spread into your fabric fibers and become permanent.
Marking Too Far Ahead
Don’t mark your entire quilt at once unless you’re using long-lasting tools. Mark small sections as you go to prevent marks from fading or setting permanently.
This approach also lets you adjust your design as you work if something isn’t turning out as planned.
Ignoring Fabric Care Instructions
If your quilt fabric can’t be washed in water, don’t use water-soluble markers. Choose heat-erasable options or chalk that brushes away instead.
Some specialty fabrics need gentle treatment that rules out certain marking tools entirely.
Storage and Care of Marking Tools
Proper storage keeps your marking tools working well and extends their life. Most tools need protection from heat and direct sunlight.
Marker and Pen Storage
Store markers and pens horizontally in a cool, dry place. Heat can dry them out or change how the ink behaves on fabric.
Replace markers when they start skipping or leaving uneven lines. Old markers often don’t erase as completely as fresh ones.
Chalk and Powder Care
Keep chalk pencils and powders in sealed containers to prevent them from drying out or absorbing moisture from the air.
Replace chalk tools when they become too hard or crumbly to make smooth lines.
Conclusion
The right marking tool makes machine quilting easier, more accurate, and much more enjoyable. Water-soluble markers work great for quick projects on light fabrics. Heat-erasable pens handle long-term projects beautifully. Chalk and soap provide the gentlest options for delicate materials.
Remember to always test your chosen tool on fabric scraps first. This simple step prevents heartbreaking mistakes and gives you confidence in your choice. With the right markings, your machine quilting will be precise, professional-looking, and completely removable when finished.
What happens if I accidentally iron over water-soluble marker lines?
The heat sets the ink permanently into the fabric fibers, making it nearly impossible to remove. Always wash out water-soluble marks with cold water before applying any heat to your quilt.
Can I use regular school chalk for marking quilts?
Regular chalk works in emergencies but isn’t ideal. It’s often too hard and can leave permanent residue in fabric fibers. Quilting chalk is softer and designed specifically for easy removal from fabric.
How long do heat-erasable pen marks stay visible?
Heat-erasable marks can last for months without fading, making them perfect for long projects. They only disappear when exposed to heat from an iron or friction from the special erasers.
Why do my chalk lines disappear while I’m quilting?
Chalk rubs off easily as you handle the fabric and move it through your sewing machine. This is normal behavior for chalk. Consider using slightly more permanent options like fabric pencils for detailed work.
Is it safe to use soap for marking expensive fabrics?
Soap is one of the safest marking options for expensive fabrics because it actually helps clean the material when washed. However, always test on a hidden area first, especially with silk or wool fabrics that have special care requirements.