The right quilting machine ruler depends on your project type, machine size, and skill level – most beginners should start with straight-edge rulers and basic curves before moving to complex templates.
Quality quilting machine rulers feature clear measurement markings, non-slip grips, and appropriate thickness (usually 1/4 inch) to work smoothly with your machine’s hopping foot.
Understanding Quilting Machine Rulers
Quilting machine rulers guide your fabric through precise patterns. Think of them as stencils for your quilting machine. They help you create straight lines, perfect curves, and repeating designs without freehand guesswork.
I found that many quilters get confused about ruler types. The basic concept is simple: you move the ruler and fabric together under your machine’s foot. The ruler acts as a fence to keep your stitching on track.
How Rulers Work With Your Machine
Your quilting machine needs a special ruler foot (also called a hopping foot). This foot rides along the ruler edge while you guide both ruler and fabric. The foot height must match your ruler thickness perfectly.
Most quality rulers measure 1/4 inch thick. Some machines work better with 3/16 inch rulers. Check your manual before buying anything.
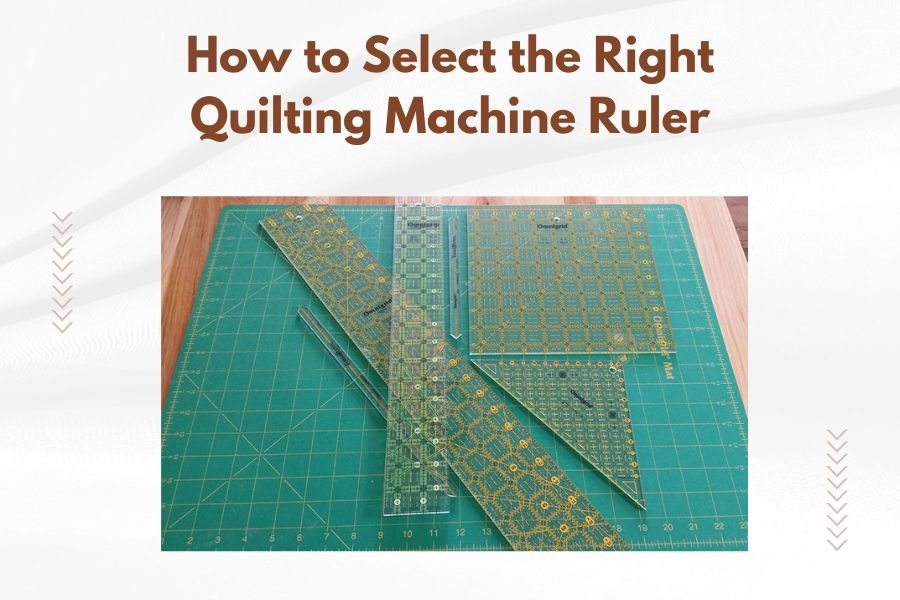
Types of Quilting Machine Rulers
Straight-Edge Rulers
These are your bread-and-butter tools. Straight rulers come in various lengths from 6 inches to 24 inches. Longer rulers help with large quilts but can feel awkward on smaller machines.
I researched what sizes work best for different projects. A 12-inch ruler handles most tasks well. You can always overlap passes for longer lines.
Best Uses for Straight Rulers
- Border quilting and sashing
- Grid patterns and crosshatch designs
- Echo quilting around applique
- Background fill patterns
Curved Rulers
Curved rulers create flowing, organic shapes. They range from gentle arcs to tight spirals. Some have multiple curve sizes on one ruler.
Start with basic arc rulers before trying complex curves. Your muscle memory needs time to develop smooth, consistent motion.
Popular Curved Ruler Styles
- Simple arcs and waves
- Nested circles for flower petals
- S-curves for ribbon effects
- Feather spine templates
Template Rulers
Template rulers have cutout shapes or specific design elements. They’re like cookie cutters for quilting patterns. You stitch around or through the template openings.
These rulers speed up repetitive motifs. Once you position the template, the design practically quilts itself.
Key Features to Look For
Material Quality
Good rulers use clear acrylic plastic. You need to see through them to position designs accurately. Cheap plastic gets cloudy or cracks over time.
I found online that 3/16 and 1/4 inch thickness work best. Thinner rulers flex too much. Thicker ones don’t fit standard ruler feet.
Edge Quality Matters
Smooth, polished edges prevent fabric snags. Rough or chipped edges will catch your fabric and ruin your project. Run your finger along edges before buying.
Measurement Markings
Clear, accurate markings help with spacing and alignment. Look for rulers with both inch and metric measurements. Contrasting colors (like black lines on clear plastic) are easiest to read.
Some rulers have measurement grids etched into the surface. These help position designs precisely without guessing.
Grip Features
Non-slip grips keep rulers from sliding during use. Look for small rubber dots or textured areas on the ruler bottom. Some have removable grip strips you can position where needed.
From what I read, good grip features reduce hand fatigue and improve stitch quality. Your hands don’t fight the ruler while you work.
Choosing Based on Your Machine
Machine Throat Size
Your machine’s throat space limits ruler size. Measure the distance from needle to machine arm. Subtract a few inches for comfortable maneuvering room.
Small domestic machines work best with 6-12 inch rulers. Mid-arm machines handle 12-18 inch rulers easily. Longarm machines can use rulers up to 24 inches.
Throat Size Guidelines
| Machine Type | Throat Space | Recommended Ruler Size |
|---|---|---|
| Domestic | 6-9 inches | 6-12 inches |
| Mid-arm | 15-17 inches | 12-18 inches |
| Longarm | 20+ inches | 18-24 inches |
Ruler Foot Compatibility
Different machines use different ruler foot styles. Some have open-toe feet. Others use closed or circular feet. Your ruler thickness must match your foot design.
Check with your machine dealer about compatible ruler sizes. Many experts say mismatched rulers and feet cause skipped stitches and uneven tension.
Skill Level Considerations
Beginner-Friendly Options
New quilters should start simple. A basic straight ruler and one gentle curve ruler cover most learning projects. Don’t buy a full set until you know what you like.
I came across advice from quilting instructors who recommend mastering two or three rulers completely before adding more. Quality beats quantity every time.
Recommended First Rulers
- 12-inch straight ruler
- 6-inch straight ruler for tight spaces
- Simple arc or wave ruler
- Basic circle template (6-8 inch diameter)
Advanced Ruler Techniques
Experienced quilters can handle complex templates and multiple ruler combinations. Advanced techniques include ruler work with variegated threads and combining rulers mid-design.
Some quilters create custom rulers by modifying existing ones. This requires experience with ruler behavior and design principles.
Budget and Quality Balance
Investment-Worthy Features
Spend more money on rulers you’ll use frequently. A high-quality straight ruler gets daily use and deserves the investment. Specialty templates might be fine in budget versions.
Research often shows that cheap rulers cost more long-term. They crack, chip, or become scratched and unusable. Good rulers last for years with proper care.
When to Save Money
Simple geometric shapes don’t require premium materials. Basic circle or square templates work fine in standard quality. Save your budget for complex curves and frequently-used rulers.
Care and Maintenance
Proper Storage
Store rulers flat or hanging vertically. Stacking them creates pressure points that can cause cracks. Many quilters use ruler storage racks or wall-mounted systems.
Keep rulers away from heat sources. Hot car interiors or sunny windows can warp acrylic material permanently.
Cleaning and Care
Clean rulers with mild soap and water. Avoid abrasive cleaners that scratch the surface. Dry completely before storage to prevent water spots.
Check edges regularly for nicks or rough spots. Light sanding with fine-grit paper can smooth minor damage.
Common Mistakes to Avoid
Buying Too Many Too Fast
New quilters often buy ruler sets before understanding their needs. Start with basics and add rulers as specific projects require them. This saves money and storage space.
Ignoring Machine Compatibility
The prettiest ruler won’t work if it doesn’t fit your machine setup. Always verify ruler thickness matches your ruler foot before purchasing.
Skipping Practice Time
Each ruler has a learning curve. Practice on scraps before using new rulers on actual projects. This prevents expensive mistakes on finished quilts.
Conclusion
Selecting the right quilting machine ruler starts with understanding your machine, skill level, and project goals. Begin with high-quality basic rulers – a good straight edge and simple curve will handle most beginner projects. Focus on rulers that match your machine’s throat space and ruler foot specifications.
Remember that ruler quilting is a skill that develops over time. Invest in a few quality rulers rather than many cheap ones. Practice regularly and add specialty rulers as your confidence and project complexity grow. The right ruler becomes an extension of your creativity, helping transform simple fabric into beautiful, precisely quilted masterpieces.
What’s the difference between 1/4 inch and 3/16 inch rulers?
The thickness affects how they work with your ruler foot. Most machines use 1/4 inch rulers, but some older or specialty machines require 3/16 inch thickness. Check your machine manual or test with your ruler foot before buying. Using the wrong thickness causes uneven stitching and skipped stitches.
Can I use quilting rulers on a regular sewing machine?
Regular sewing machines don’t have the throat space or proper feet for ruler quilting. You need a quilting machine with a ruler foot attachment. Some high-end sewing machines offer quilting extensions and ruler feet, but the workspace remains limited compared to dedicated quilting machines.
How do I know if my ruler foot height matches my ruler?
The ruler should slide smoothly under the foot with minimal gap. Too much space causes wobbly stitching. Too little space prevents smooth movement. Most ruler feet have adjustment screws to match ruler thickness. Test with scrap fabric before working on your actual project.
Why do some rulers have grip dots and others don’t?
Grip features prevent rulers from sliding during use but can slow down ruler movement. Beginners benefit from more grip for control. Advanced quilters often prefer smooth rulers that glide easily for faster stitching. Some rulers offer removable grip strips so you can customize based on your needs.
What’s the best way to learn ruler quilting techniques?
Start with simple straight-line patterns using a basic ruler. Practice consistent speed and pressure on fabric scraps. Take a class or watch video tutorials to learn proper hand positioning and movement techniques. Master one ruler completely before adding new shapes. Regular practice builds the muscle memory needed for smooth, professional results.