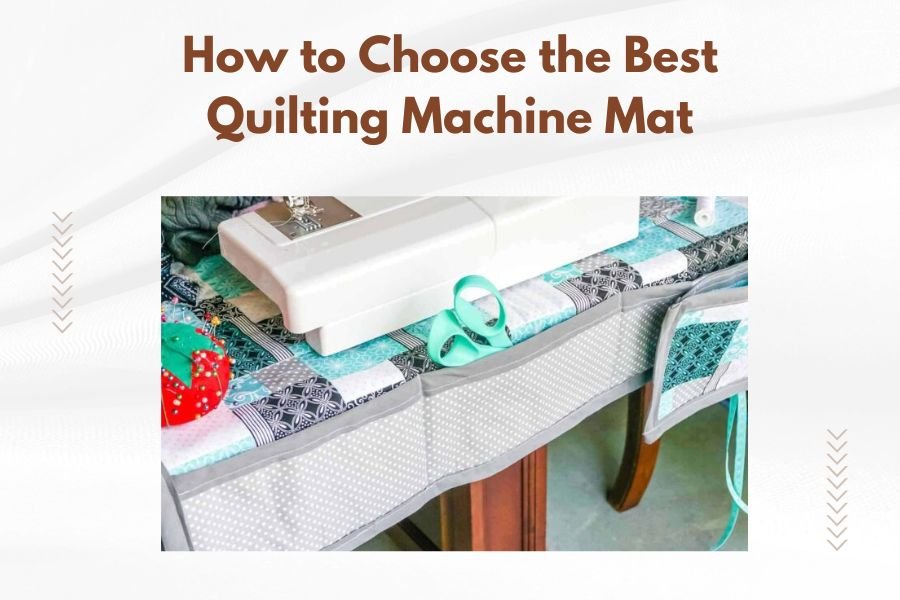
The best quilting machine mat should have a non-slip bottom, protect your table surface, and provide enough space for your specific quilting machine model.
Look for mats made from durable materials like PVC or rubber that resist cuts, absorb vibrations, and clean easily with soap and water.
Why Your Quilting Machine Needs a Good Mat
Your beautiful dining table wasn’t made to handle a 20-pound quilting machine running at full speed. Without proper protection, you’ll end up with scratches, dents, and maybe even structural damage.
A quality mat does more than protect surfaces. It keeps your machine stable, reduces noise, and gives you a dedicated workspace. Think of it as the foundation of your quilting setup.
Surface Protection That Actually Works
I found that many quilters learn this lesson the hard way. One small slip or vibration can leave permanent marks on wood furniture. A good mat creates a barrier between your machine and precious surfaces.
The right mat also catches oil drips, thread scraps, and small pins that would otherwise damage your table. It’s like having insurance for your furniture.
Key Features to Look For
Non-Slip Bottom Technology
Your machine shouldn’t dance around while you’re trying to create straight seams. Look for mats with textured rubber bottoms or suction-cup designs.
From what I read, the best non-slip surfaces use micro-suction technology. This grips smooth surfaces without leaving residue when you move the mat.
Testing Grip Strength
A simple test helps you judge grip quality. Place the mat on your table and try to slide it with gentle pressure. Good mats won’t budge until you lift an edge.
Material Durability
Cheap mats crack, tear, and lose their grip after a few months. You want materials that handle daily use without falling apart.
Research shows that high-quality PVC and natural rubber last longest. These materials resist cuts from rotary cutters and don’t break down from machine oil.
Thickness Considerations
Thin mats offer minimal protection. Thick mats can make your machine sit too high. The sweet spot is usually between 2-4mm thick.
This thickness absorbs vibrations without creating awkward working angles. Your arms and back will thank you during long quilting sessions.
Size and Workspace Planning
Measuring Your Machine Footprint
Don’t guess at sizing. Measure your machine’s base, then add 6-8 inches on each side. This extra space prevents your machine from hanging over edges.
Consider your machine’s arm extension too. Some quilting machines have wide throat spaces that need extra room on the right side.
Standard Size Guidelines
Most home quilting machines work well with 24″ x 36″ mats. Larger machines might need 36″ x 48″ or custom sizes.
Long-arm quilting machines require much bigger mats. Measure carefully and consider getting multiple mats that connect together.
Table Compatibility
Your mat should fit your table with room to spare. A mat that hangs over table edges won’t provide stable support.
Round tables present special challenges. You might need a custom-cut mat or a smaller rectangular option centered on the surface.
Special Features Worth Considering
Self-Healing Properties
Some mats can close up small cuts from rotary cutters or pins. This feature extends mat life and keeps the surface smooth.
I found that self-healing mats cost more upfront but save money long-term. They’re especially useful if you do cutting work on the same surface.
How Self-Healing Works
The material has memory properties that pull cut fibers back together. It won’t fix large gashes, but handles normal wear beautifully.
Easy Cleaning Systems
Quilting creates lots of lint, thread bits, and occasional spills. Your mat should clean up quickly with basic supplies.
Look for smooth surfaces that wipe clean with damp cloths. Textured tops might look fancy but trap debris in grooves.
Stain Resistance
Oil stains from machines and fabric markers can ruin cheap mats. Quality materials resist staining and release marks with gentle cleaning.
Common Mistakes to Avoid
Buying Too Small
Many quilters underestimate the space they need. A cramped setup leads to poor posture and limited fabric movement.
When in doubt, go bigger. You can always use extra space for supplies, but you can’t make a small mat larger.
Ignoring Weight Capacity
Not all mats handle heavy machines well. Check weight ratings before buying, especially for industrial or vintage machines.
A mat that compresses too much under weight won’t provide stable support. Your machine might wobble or sit unevenly.
Testing Load Distribution
Good mats distribute weight evenly across their surface. Poor mats create pressure points that can damage tables underneath.
Budget Considerations
Price Ranges Explained
Basic mats start around $20-30 but might need replacement yearly. Mid-range options ($50-80) offer better durability and features.
Premium mats ($100+) include advanced materials and longer warranties. They’re investments that pay off for serious quilters.
| Price Range | Features | Best For |
|---|---|---|
| $20-30 | Basic protection, simple grip | Occasional quilters |
| $50-80 | Better materials, non-slip bottom | Regular quilters |
| $100+ | Self-healing, premium grip, warranty | Daily users, professionals |
Long-Term Value
Calculate cost per year rather than upfront price. A $100 mat that lasts five years costs less annually than a $30 mat you replace every year.
Factor in potential table damage too. Repairing or replacing furniture costs way more than buying a quality mat upfront.
Maintenance and Care
Daily Cleaning Routine
Wipe your mat clean after each quilting session. This prevents buildup that can affect the non-slip surface.
Use a lint roller to remove thread bits and fabric fibers. This quick step keeps your workspace tidy and professional-looking.
Deep Cleaning Methods
Monthly deep cleaning extends mat life. Use mild soap and warm water, then dry completely before storing.
Avoid harsh chemicals that can break down rubber or PVC materials. When in doubt, test cleaning products on a small corner first.
Storage Best Practices
Store mats flat when possible. Rolling or folding can create permanent creases that affect performance.
If you must roll your mat, do it loosely and store it standing up. This reduces stress on the material.
Conclusion
Choosing the right quilting machine mat protects your furniture, improves your quilting experience, and saves money long-term. Focus on non-slip bottoms, durable materials, and proper sizing for your specific setup. A quality mat is a small investment that pays dividends in every project you create. Take time to measure your space, consider your quilting frequency, and buy the best mat your budget allows. Your future self will appreciate the stable, protected workspace you’ve created.
What thickness should I choose for my quilting machine mat?
Most quilters find 2-4mm thickness works best. This provides vibration absorption and surface protection without raising your machine too high and creating awkward working angles.
Can I use a cutting mat under my quilting machine?
Regular cutting mats aren’t designed for machine weight and vibration. They may crack or lose their grid lines. Use a mat specifically made for quilting machines instead.
How do I clean oil stains from my quilting machine mat?
Mix warm water with mild dish soap and scrub gently with a soft brush. For stubborn stains, let the soapy water sit for 10 minutes before scrubbing. Rinse thoroughly and air dry completely.
Will a quilting machine mat work on a glass table?
Yes, quality mats with micro-suction or textured rubber bottoms grip glass surfaces well. Just make sure the glass can support your machine’s weight safely.
How often should I replace my quilting machine mat?
Replace your mat when it loses its grip, develops cracks, or no longer lies flat. Quality mats typically last 3-5 years with regular use, while budget options may need yearly replacement.