Quilting vine designs on your machine requires setting up a continuous curved pattern using either free-motion quilting or following marked templates with coordinated thread colors.
You can create beautiful vine quilts by mastering basic curved stitching techniques, choosing the right presser foot, and maintaining consistent stitch length throughout your design.
Getting Started with Machine-Quilted Vines
Machine quilting vines feels intimidating at first. But once you break it down into simple steps, you’ll wonder why you waited so long to try it.
The key is thinking of vines as connected curves rather than one complex design. Each vine segment builds on the last one. You’re not drawing the Mona Lisa here – just making gentle S-curves that flow together.
Essential Equipment You’ll Need
Your regular sewing machine can handle vine quilting just fine. You don’t need anything fancy or expensive.
- Quilting foot or free-motion foot
- Sharp quilting needles (size 90/14 works well)
- Quality quilting thread in vine colors
- Quilting gloves for better grip
- Water-soluble marking pen
- Quilting hoop (for smaller projects)
Thread Selection for Realistic Vines
Thread choice makes or breaks your vine design. I found that many quilters stick to just green, but real vines have more variety.
Consider using multiple shades of green, plus brown for woody stems. Variegated threads can add natural color changes without switching spools constantly.
Planning Your Vine Design
Good vine quilting starts with smart planning. Random curves rarely look natural. Real vines have patterns you can copy.
Understanding Natural Vine Growth
Take a walk outside and really look at how vines grow. They don’t make perfect spirals or identical curves.
Vines reach toward light sources. They wrap around supports. They branch at nodes. They get thicker near the base and thinner at the tips.
Common Vine Patterns to Copy
- Spiral climbing patterns
- Branching Y-shapes
- Gentle S-curves
- Random directional changes
- Varying thickness along the stem
Sketching Your Design First
Don’t wing it on your actual quilt. Practice on paper first. This saves thread, time, and frustration later.
Draw your vine paths with a pencil. Mark where branches split off. Note which areas need thicker or thinner lines. This becomes your roadmap when you’re at the machine.
Template Options for Beginners
If drawing freehand seems scary, templates can help. You can buy commercial vine stencils or make your own.
I found online that many quilters trace real vine photos onto clear plastic. This creates custom templates that look more natural than store-bought ones.
Setting Up Your Machine
Proper machine setup prevents most vine quilting problems before they start. Take time to get this right.
Choosing the Right Presser Foot
Your presser foot choice depends on your quilting style. Free-motion quilting gives more creative control but requires practice.
For beginners, a walking foot with curved templates works better. You can always upgrade to free-motion later as your skills improve.
Free-Motion Foot Setup
Lower your feed dogs completely. Attach the free-motion foot. Set stitch length to zero since you’ll control the speed manually.
Test on scrap fabric first. Your hands control the design movement while your foot controls the stitching speed.
Walking Foot Alternative
Keep feed dogs up with a walking foot. This method requires marked guidelines but produces more consistent results for new quilters.
Tension and Speed Settings
Slightly loose top tension often works better for quilting than piecing settings. Test on scraps using your actual quilt sandwich layers.
Start with medium machine speed. Rushing leads to wobbly lines and broken threads. Smooth and steady wins this race.
Marking Your Vine Paths
Even experienced quilters mark basic guidelines. You’re not cheating – you’re being smart.
Water-Soluble Marking Methods
Water-soluble pens disappear completely when you wash the finished quilt. Test on fabric scraps first to make sure the marks actually wash out.
Mark lightly. Heavy marks might show through light-colored threads or be harder to remove later.
Alternative Marking Tools
| Marking Tool | Best For | Removal Method |
|---|---|---|
| Water-soluble pen | Light fabrics | Cold water rinse |
| Air-erasable pen | Quick projects | Disappears in 24-48 hours |
| Quilter’s pencil | Dark fabrics | Gentle washing |
| Masking tape | Straight vine segments | Peel off when done |
Creating Flowing Vine Lines
Real vines don’t have sharp corners or sudden direction changes. Your marked lines shouldn’t either.
Use gentle curves that connect smoothly. Think of how a river flows around obstacles rather than making abrupt turns.
Quilting Techniques for Vines
Now for the fun part – actually stitching your vines. Start with simple techniques and build complexity as you gain confidence.
Basic Straight-Line Vines
Single-line vines work great for delicate designs or background elements. Follow your marked path with consistent stitching speed.
Keep your hands relaxed but steady. Tense hands create jerky, uneven lines. Breathe normally and let the machine do the work.
Building Vine Thickness
Real vines aren’t uniform thickness. Make yours more realistic by varying the line weight.
Stitch your main vine path first. Then add parallel lines for thicker sections. Space the lines closer together for the thickest parts, farther apart for thinner areas.
Free-Motion Vine Quilting
Free-motion quilting gives you complete creative control. But it takes practice to get smooth, even results.
Move the fabric smoothly and consistently. Fast fabric movement with slow stitching creates long stitches. Slow movement with fast stitching makes tiny stitches.
Hand Movement Coordination
Think of your hands as a steering wheel. Both hands should move together in the same direction. Don’t let one hand get ahead of the other.
Practice on scraps until this feels natural. Muscle memory takes time to develop, but it’s worth the effort.
Adding Branches and Leaves
Branches make vines look realistic instead of like random squiggles. Add them after completing your main vine structure.
Branch off at slight angles, not perpendicular joints. Real branches emerge gradually from the main stem.
Simple Leaf Shapes
You don’t need perfect botanical accuracy. Simple oval or teardrop shapes read as leaves from a distance.
Stitch each leaf as a separate element, or create continuous leaf chains along smaller branches.
Troubleshooting Common Problems
Every quilter faces challenges when learning vine techniques. Here’s how to fix the most common issues.
Wobbly or Uneven Lines
Shaky lines usually come from moving too fast or gripping too tightly. Slow down and relax your hands.
Some quilters find that practicing the motion without thread helps build smooth movement patterns.
Thread Tension Issues
Loops on top mean your top tension is too loose. Loops on bottom mean it’s too tight. Adjust gradually until you get even stitches on both sides.
Thread Breaks and Skipped Stitches
Use a fresh, sharp needle for each project. Dull needles cause more problems than most quilters realize.
Check that your thread path is correct and nothing is catching or creating extra friction.
Advanced Vine Techniques
Once you master basic vines, these advanced techniques add professional-looking details.
Dimensional Vine Effects
Create depth by varying your thread colors throughout the design. Use darker threads for shadows and lighter threads for highlights.
This simple change makes flat vines appear three-dimensional without any extra complexity in your stitching.
Layered Vine Designs
Stitch background vines in lighter or matching thread colors. Then add foreground vines in contrasting colors that pop off the surface.
Echo Quilting Around Vines
Echo quilting creates beautiful backgrounds that make your vines the star of the show. Stitch parallel lines around your vine shapes at regular intervals.
Start close to the vine and work outward. Each line should be about 1/4 inch from the previous one.
Finishing and Care
Your vine quilting deserves proper finishing to look its best and last for years.
Removing Marking Lines
Follow the manufacturer’s instructions for your marking tool. Cold water usually works better than hot for removing quilting marks.
Test removal methods on scraps first. Some marking tools can become permanent if heat-set accidentally.
Pressing Quilted Vines
Press lightly from the back side to avoid flattening your quilting texture. Use a pressing cloth to protect delicate threads.
Heavy pressing can make your beautiful dimensional quilting look flat and lifeless.
Conclusion
Machine quilting vine designs transforms ordinary quilts into stunning works of art. Start with simple single-line vines and gradually add complexity as your skills develop. Remember that practice makes progress – your first vines might not be perfect, but each one teaches you something new. Focus on smooth, flowing lines that mimic natural vine growth patterns. With patience and practice, you’ll create vine quilts that look like they took years to complete, when they actually took just hours of focused work.
Can I quilt vines on a regular home sewing machine?
Yes, any sewing machine that can do a straight stitch can quilt vine designs. You don’t need special quilting machines or expensive equipment. A free-motion foot or walking foot will make the process easier, but even a regular presser foot can work for simple vine patterns.
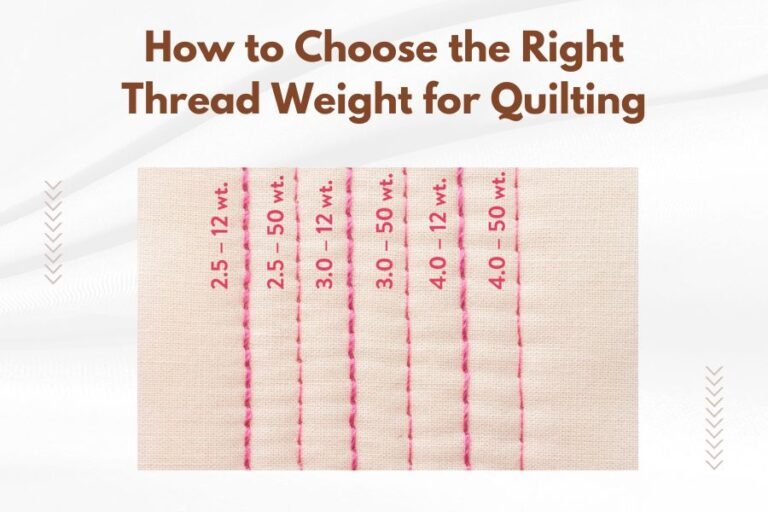
What’s the best thread weight for machine-quilted vines?
40-weight thread works well for most vine quilting projects. It’s thick enough to show up clearly but not so heavy that it creates bulk or tension problems. For delicate background vines, try 50-weight thread. For bold, prominent vines, 30-weight thread creates more visual impact.
How do I prevent my vine quilting from puckering the fabric?
Use proper quilting hoops or frames to maintain even fabric tension. Avoid pulling or stretching the fabric while stitching. Check that your thread tension settings are correct for quilting rather than piecing. Take breaks to reposition the fabric and prevent one area from becoming over-worked.
Should I quilt vines before or after other quilting patterns?
Quilt your main vine designs first, then add background quilting around them. This prevents the background quilting from distorting your vine shapes. Save small detail work like individual leaves for last, after all the major quilting is complete.
How do I make my machine-quilted vines look more realistic?
Vary the thickness along each vine stem, making it thicker near the base and thinner at the tips. Add random curves and direction changes rather than perfect spirals. Use multiple thread colors within each vine, and include imperfections like slight wobbles that real vines naturally have.