
Calibrating your stitch regulator is essential for consistent sewing results. You can do this by making small adjustments to the tension screws while testing on scrap fabric. This ensures your stitches are neither too loose nor too tight, leading to a professional finish every time.
A properly calibrated stitch regulator means fewer skipped stitches and puckering. It’s a key step many home sewers overlook, leading to frustration. Getting this right will make your sewing projects look much better and save you time wrestling with your machine. It’s about achieving that perfect stitch tension.
- Check your machine’s manual first.
- Use scrap fabric for testing.
- Make small, gradual tension adjustments.
- Test the stitch quality after each change.
Let’s walk through exactly how to get your stitch regulator perfectly tuned, step by step.
Tuning Your Sewing Machine for Perfect Stitches
Getting your stitch regulator just right can make a world of difference. Think of it like tuning a musical instrument. When it’s in tune, everything sounds beautiful and harmonious. Your sewing machine is similar!
A well-calibrated stitch regulator ensures every stitch is evenly formed. This means no more frustrating puckering or skipped stitches. You’ll achieve a smooth, professional look on all your projects. Let’s make sure your machine is singing the right tune.
Understanding Your Stitch Regulator
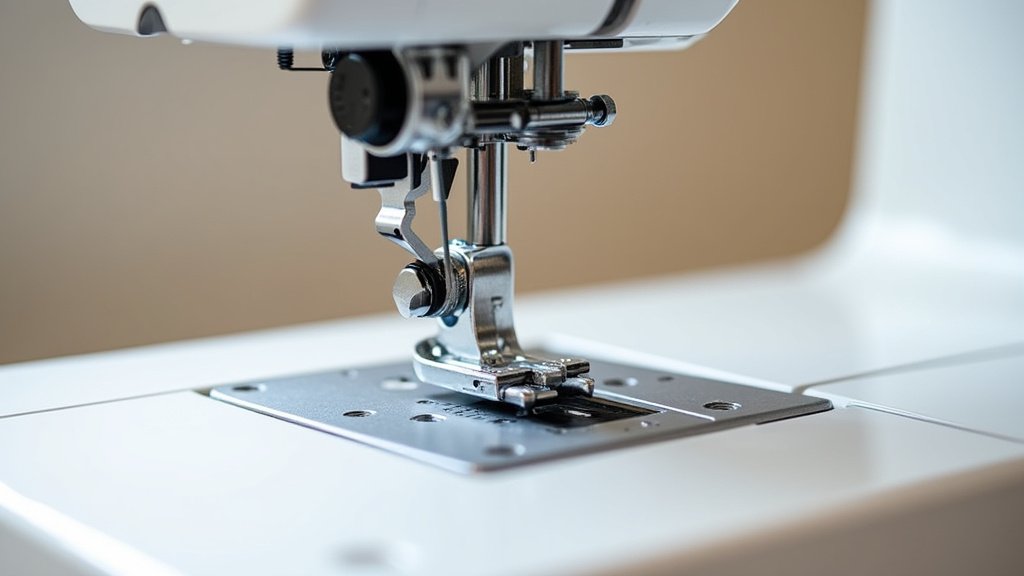
Your stitch regulator, often called the stitch length regulator or stitch dial, controls how far the fabric moves under the needle with each stitch. It’s not a mysterious black box; it’s a simple mechanism designed for your convenience.
When you change the stitch length setting, you’re telling the feed dogs how much to advance the fabric. This directly impacts the density and appearance of your stitches. A consistent feed is key to beautiful sewing.
What Does a Stitch Regulator Actually Do?
Essentially, this part of your machine dictates the stitch length. Imagine the feed dogs are like tiny conveyor belts for your fabric. The stitch regulator tells those belts how far to move each time the needle goes up and down.
A longer setting means the feed dogs move the fabric farther, creating longer stitches. A shorter setting means less movement, resulting in shorter, denser stitches. It’s all about the rhythm of your sewing.
Why Calibration Matters So Much
Over time, parts can wear down or get out of alignment. This can affect how accurately your stitch regulator functions. When it’s not calibrated, you might notice inconsistencies in your stitch length.
One moment your stitches are long, and the next they’re short, even if you haven’t touched the dial. This lack of uniformity is frustrating. Proper calibration ensures the dial setting you choose is the stitch length you actually get. It’s the foundation of good sewing.
Preparing for Calibration
Before you start twisting any knobs, a little preparation goes a long way. You want to set yourself up for success. Gather your supplies and create a good workspace.
Gathering Your Sewing Supplies
You’ll need a few essential items. First, make sure you have your sewing machine’s manual handy. Every machine is a little different, and your manual is the ultimate guide.
- Sewing machine manual
- Scrap fabric (cotton is usually best for testing)
- Thread (matching your project or a contrasting color)
- Scissors
- Screwdriver (if needed for tension adjustments, check your manual)
Choosing the Right Test Fabric
The type of fabric you use for testing is important. You want something that represents the fabrics you’ll be sewing most often. Cotton woven fabrics are a great starting point.
They are stable and easy to work with. Avoid stretchy knits or slippery silks for initial calibration. These fabrics can behave differently and mask underlying tension issues. We’re aiming for a baseline of perfection first.
Setting Up Your Workspace
Find a quiet spot where you can focus without distractions. Good lighting is also a must. You need to be able to see your stitches clearly to assess them.
Make sure your sewing machine is on a stable surface. Ensure you have enough room to maneuver your fabric. This isn’t a race, so give yourself the space to do it right.
The Calibration Process: Step-by-Step
Now, let’s get down to business! This is where you’ll be making the adjustments. Remember, small changes are key. Think of it as a delicate dance, not a rough overhaul.
Step 1: Understanding Thread Tension
Stitch regulators work hand-in-hand with your thread tension. You have upper tension and lower (bobbin) tension. Both need to be balanced for perfect stitches.
Generally, your stitch regulator setting determines the stitch length, while your tension settings determine how the threads interlock. If your tension is off, even a perfectly calibrated regulator won’t save your stitches. We’ll focus on ensuring the If your tension is off, even a perfectly calibrated regulator won’t save your stitches, so ensure your “bobbin tension” is also correct.regulator is accurate first.
Step 2: Initial Stitching and Observation
Thread your machine with your chosen thread. Set your stitch regulator to a medium setting, perhaps around 2.0 to 2.5 mm. This is a common, versatile stitch length.
Take a piece of your scrap fabric. Sew a straight line without any backstitching. Just sew a few inches. Don’t worry about perfection yet. You’re just getting a baseline reading.
Now, examine the stitches. Look at them on both the top and the underside of the fabric. Are they consistent? Do they look balanced? Are there any skipped stitches? Are the edges of the stitches crisp?
Step 3: Making Small Adjustments
If your stitches look too loose on top, you might need to increase the upper thread tension slightly. If they look too loose on the bottom (bobbin side), you may need to decrease upper tension or check your bobbin tension.
If your stitches look too tight on top, try decreasing the upper tension. If they look too tight on the bottom, you might need to increase upper tension. Many manuals have troubleshooting charts for tension issues (National Network for Manufacturing Information).
This is where the stitch regulator comes in. If you’ve set your dial to 2.0 mm, you expect about 2.0 mm of stitch length. If your actual stitches are consistently longer or shorter, the regulator might need attention.
Step 4: Testing and Re-testing
After any adjustment, no matter how small, sew another sample on your scrap fabric. Observe the stitches again. Compare them to your previous sample.
Continue making tiny adjustments to the tension dial or bobbin if needed. Then, sew another sample. Repeat this process until your stitches look evenly formed on both sides. You want the thread to interlock precisely between the two layers of fabric.
Common Stitch Problems and What They Mean
Let’s look at some typical issues you might encounter:
- Skipped Stitches: Often caused by a bent needle, incorrect needle type for the fabric, or improper thread tension. Ensure your needle is inserted correctly and is sharp.
- Puckering: This usually means your tension is too tight. The fabric is being pulled down by the thread. Loosen your upper tension slightly.
- Loose, Loopy Stitches: This indicates tension is too loose. The thread isn’t being pulled taut enough. You might need to increase upper tension or check your bobbin.
- Uneven Stitch Length: This is where the stitch regulator calibration is key. If your stitches vary in length even when the dial is set to a specific number, the regulator itself might be the issue.
Step 5: Testing the Regulator Itself
Once your thread tension feels good and consistent, you can focus on the stitch regulator. Most stitch regulators have numerical markings. These are usually approximate.
You’ll want to test each setting. Set the dial to a specific number, say 1.0 mm. Sew a sample. Measure the actual stitch length with a ruler. Does it match the setting? Probably not exactly, but it should be close.
Now, move the dial to 3.0 mm. Sew another sample. Measure again. Is the stitch length noticeably longer than the 1.0 mm setting? It should be.
If you move the dial from 1.0 to 2.0, then to 3.0, and the stitch length doesn’t change consistently, you may have a problem with the regulator mechanism. This is less common than tension issues.
When to Suspect a Regulator Issue
If you’ve perfected your thread tension, and your stitches are still inconsistent in length when you change the dial setting, then the regulator mechanism might be the culprit. This could involve:
- The dial not moving smoothly.
- The markings on the dial not corresponding to actual stitch length changes.
- The feed dogs not adjusting their movement correctly.
In these cases, a visit to a sewing machine repair professional might be necessary. They have specialized tools to diagnose and fix these mechanical issues. Most home sewers will find that tension adjustments are sufficient.
Troubleshooting Common Calibration Hiccups
Even with the best intentions, you might run into a few snags. Don’t get discouraged! Most problems are fixable with a little patience.
We found that the most common issue is actually a misdiagnosis of the problem. People think it’s the stitch regulator when it’s really the thread tension. It’s like blaming the drummer when the guitarist is out of tune!
The Great Tension Tightrope Walk
Balancing upper and lower tension can feel like walking a tightrope. A change to one can affect the other. Some experts suggest adjusting the bobbin tension first, then the upper tension.
Others prefer the opposite. The key is consistency. Make one small adjustment at a time. Sew a test sample. Evaluate. Repeat. This methodical approach helps you pinpoint the exact cause of the stitch problem.
Remember that different thread types and fabric weights will require slightly different tension settings. So, what works perfectly for a cotton broadcloth might need a tweak for a denim or a silk.
When to Seek Professional Help
If you’ve spent hours adjusting tension, tested different needles and threads, and you’re still getting inconsistent stitches, it might be time to call in the pros. Sewing machine repair technicians have the expertise to identify mechanical issues.
They can clean, oil, and adjust parts that you might not even know exist. They can also tell you if a part is worn out and needs replacing. Think of it as an annual check-up for your machine.
A professional cleaning and tune-up can often resolve calibration issues. It’s an investment in the longevity and performance of your sewing machine. Many recommend a professional service every few years (Good Housekeeping).
Quick Checklist for Perfect Stitches
Here’s a quick rundown to keep you on track:
- Read Your Manual: Always the first step.
- Use the Right Fabric: Test on stable cotton.
- Thread Correctly: Ensure machine and bobbin are threaded properly.
- Start with Tension: Fix tension issues before suspecting the regulator.
- Adjust Gradually: Make tiny changes and re-test.
- Test All Settings: Verify stitch length changes with the regulator dial.
Conclusion
You’ve now learned how crucial calibration is for achieving perfect stitches. We’ve walked through understanding your stitch regulator and preparing your workspace. Remember, small, consistent adjustments to tension are key. If tension is balanced and stitches are still uneven, the regulator itself might need attention, though this is less common. Don’t be afraid to test and re-test until you’re happy with the results. Your next step is to grab some scrap fabric and put these steps into practice. You’ve got this!
Frequently Asked Questions
How often should I calibrate my stitch regulator?
You don’t need to calibrate your stitch regulator every time you sew. Many find that calibrating once or twice a year, or whenever you notice stitch inconsistencies, is sufficient. Major repairs or cleaning might also necessitate a re-calibration.
Can I adjust the stitch regulator dial directly?
Generally, you’ll adjust thread tension first. If your thread tension is perfectly balanced and stitches are still uneven in length when you change the dial, then the regulator mechanism itself might need adjustment. Check your manual for specific instructions on your model.
My stitches look good on top but messy underneath. What’s wrong?
This often indicates a bobbin tension issue or that your upper tension is too tight. Try reducing your upper tension slightly, or check to ensure your bobbin is wound correctly and the bobbin case tension is properly set. Consistent testing will help you pinpoint the cause.
What’s the difference between stitch length and stitch regulator?
The stitch regulator is the mechanism that controls stitch length. The stitch length is the actual measurement of how far the fabric moves for each stitch. Calibrating the regulator ensures the dial setting accurately reflects the desired stitch length.
Is it normal for the stitch length numbers on the dial to be approximate?
Yes, it is common for the numbers on your stitch regulator dial to be approximate. They serve as a guide. The key is consistency: moving the dial should result in a noticeable and predictable change in stitch length. Your testing and fine-tuning ensure you achieve the precise length you want.
