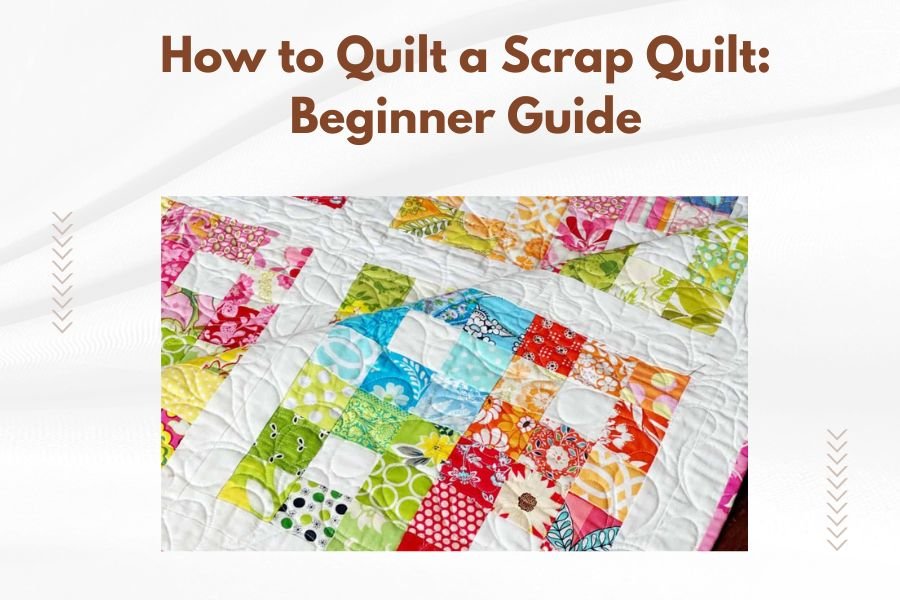
Scrap quilting transforms fabric remnants into beautiful quilts by sewing pieces together in patterns or random arrangements, then layering with batting and backing before quilting through all layers.
You’ll need fabric scraps, batting, backing fabric, rotary cutter, cutting mat, ruler, sewing machine, and quilting thread to create your first scrap quilt successfully.
What Makes Scrap Quilts Special
Scrap quilts tell stories. Every piece of fabric carries memories from other sewing projects. You might spot fabric from your daughter’s first dress or leftover material from kitchen curtains.
These quilts also save money. Instead of buying new fabric for every project, you use what’s already in your stash. It’s like cooking with leftovers – creative and budget-friendly.
Essential Supplies for Your First Scrap Quilt
Fabric Requirements
Gather cotton fabric scraps in various sizes. Cotton works best because it’s easy to handle and holds its shape well.
You’ll also need backing fabric. This large piece of fabric goes on the quilt’s back. Choose something simple that won’t compete with your scrap design.
How Much Fabric Do You Need
For a lap quilt (50×60 inches), collect about 2-3 yards worth of scraps. Your backing fabric should measure 54×64 inches – slightly larger than your quilt top.
Tools and Notions
A rotary cutter makes cutting fabric scraps much faster than scissors. Pair it with a self-healing cutting mat and clear acrylic ruler.
Your sewing machine doesn’t need to be fancy. Any machine that sews a straight stitch will work perfectly for scrap quilting.
Thread Selection
Cotton thread works well for piecing scraps together. Choose neutral colors like cream, gray, or tan that blend with most fabrics.
Planning Your Scrap Quilt Design
Simple Designs for Beginners
Start with basic blocks like squares or rectangles. These shapes are forgiving and easy to piece together.
A patchwork design works well too. You simply sew random scraps together without following a specific pattern. Think of it as creating a fabric puzzle.
Color Coordination Tips
Group your scraps by color families. Keep warm colors (reds, oranges, yellows) separate from cool colors (blues, greens, purples).
Mix light and dark fabrics throughout your design. This creates visual interest and prevents your quilt from looking flat.
Block Size Considerations
Choose one finished block size for consistency. Popular beginner sizes include 6-inch, 8-inch, or 10-inch squares.
Remember to add seam allowances. A 6-inch finished block needs to be cut at 6.5 inches to account for quarter-inch seams.
Preparing Your Fabric Scraps
Sorting and Organizing
Sort scraps by size first, then by color. This helps you see what you’re working with and plan your design better.
Remove any pieces with stains or holes. Your quilt will last longer when made from quality fabric pieces.
Washing and Pressing
Wash fabric scraps if they haven’t been washed before. This prevents shrinking and color bleeding later.
Press all pieces flat with an iron. Wrinkled fabric is harder to cut accurately and sew properly.
Cutting Your Pieces
Cut scraps into uniform shapes using your rotary cutter and ruler. Consistent cutting makes piecing much easier.
Stack similar fabrics and cut multiple pieces at once. This saves time and ensures pieces are the same size.
Step-by-Step Assembly Process
Creating Your Blocks
Start by making individual blocks. If you’re making 6-inch square blocks, simply cut your scraps to 6.5 inches.
For patchwork blocks, sew smaller scraps together to create 6.5-inch squares. This is where creativity really shines.
Sewing Techniques
Use a quarter-inch seam allowance throughout your project. Most quilting rulers have markings to help you cut accurate seam allowances.
Sew scraps right sides together. This hides raw edges and creates clean seams on the quilt’s front.
Joining Blocks Together
Arrange your completed blocks on a large flat surface. Take a photo before sewing – you might want to reference your layout later.
Sew blocks together in rows first. Then join the rows to complete your quilt top.
Pressing Seams
Press seams to one side rather than open. This creates stronger seams that last longer.
Alternate seam directions between rows. This helps seams nest together and lie flat.
Making Your Quilt Sandwich
Layering Components
Your quilt sandwich has three layers: backing (bottom), batting (middle), and quilt top (surface).
Lay the backing face-down on a large flat surface. Smooth out any wrinkles.
Adding Batting
Place batting on top of the backing. Cotton batting is beginner-friendly because it’s stable and easy to quilt.
Trim batting to match your backing size. Both should be slightly larger than your quilt top.
Basting the Layers
Basting holds your three layers together during quilting. You can use safety pins, spray basting, or large hand stitches.
Place basting pins every 4-6 inches across the quilt. Avoid putting pins where you plan to quilt lines.
Quilting Your Scrap Creation
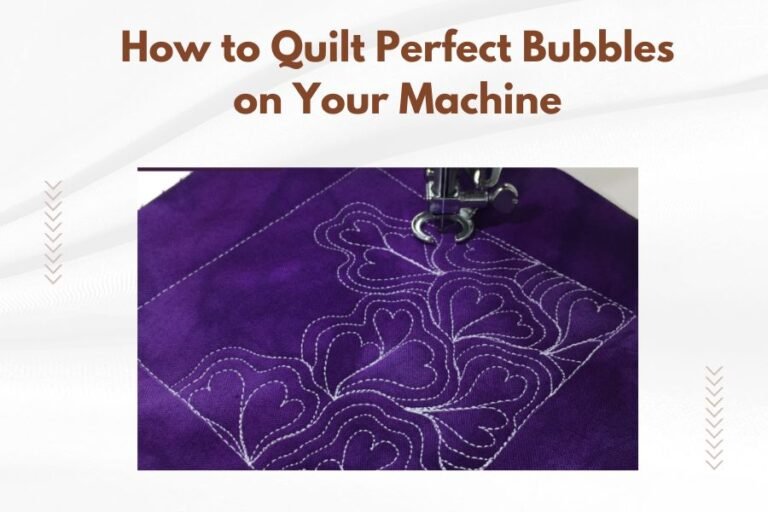
Simple Quilting Patterns
Straight-line quilting is perfect for beginners. Quilt in the ditch (along seam lines) or create parallel lines across the quilt.
Try quilting diagonal lines from corner to corner. This creates a diamond pattern that looks more complex than it is.
Machine Quilting Tips
Start quilting from the center and work outward. This prevents puckering and keeps layers smooth.
Use a walking foot if your machine has one. This foot helps feed all three layers evenly through the machine.
Hand Quilting Option
Hand quilting takes longer but gives you complete control. Use a quilting hoop to keep small sections taut while stitching.
Make small, even stitches through all three layers. Don’t worry about perfection – slight variations add handmade charm.
| Quilting Method | Time Required | Skill Level | Best For |
|---|---|---|---|
| Machine Quilting | 2-4 hours | Beginner | Quick results |
| Hand Quilting | 10-20 hours | Patient beginners | Relaxing process |
| Long-arm Service | 1 week turnaround | Any level | Professional finish |
Finishing Your Quilt
Trimming and Squaring
Trim excess batting and backing to match your quilt top. Use a large ruler to ensure straight edges.
Square up your corners using a large square ruler. Perfect corners make binding application much easier.
Binding Preparation
Cut binding strips 2.5 inches wide. You’ll need enough strips to go around your quilt’s perimeter plus 8 extra inches.
Join binding strips at 45-degree angles. This creates smooth corners and reduces bulk.
Attaching the Binding
Start sewing binding on one side, not at a corner. Leave a 6-inch tail and begin sewing with a quarter-inch seam.
Stop sewing a quarter-inch before each corner. Create mitered corners by folding the binding at 45-degree angles.
Hand-Stitching the Back
Fold binding over to the quilt back and hand-stitch in place. Your stitches should catch the machine stitching line.
Take small, even stitches. This final step takes patience but creates a beautiful, professional-looking finish.
Common Beginner Mistakes to Avoid
Cutting Inaccuracies
Measure twice, cut once. Inaccurate cutting leads to blocks that don’t fit together properly.
Keep your rotary blade sharp. Dull blades create ragged cuts and can slip during cutting.
Seam Allowance Problems
Consistent quarter-inch seams are key to successful quilting. Use your machine’s quarter-inch foot if available.
Test your seam allowance before starting. Sew two scraps together, press, and measure the finished piece.
Caring for Your Finished Scrap Quilt
Washing Instructions
Wash your finished quilt in cold water on a gentle cycle. Hot water can cause colors to bleed or fabric to shrink.
Air dry your quilt when possible. Heat from dryers can damage batting and cause fabrics to fade.
Storage Tips
Store quilts flat if you have space. If you must fold, refold along different lines occasionally to prevent permanent creases.
Keep quilts away from direct sunlight, which can fade colors over time.
Conclusion
Creating your first scrap quilt combines creativity with practicality. You transform leftover fabrics into something beautiful and useful while learning fundamental quilting skills. Start with simple designs and basic techniques – you can always try more complex patterns as your confidence grows. Each scrap quilt you make will be unique, reflecting your fabric choices and personal style. The process might seem overwhelming at first, but breaking it into small steps makes it manageable. Your finished quilt will provide warmth and comfort while showcasing your growing quilting abilities.
How long does it take to make a scrap quilt?
A simple scrap quilt typically takes 15-25 hours to complete, spread over several weeks. This includes cutting, piecing, quilting, and binding. Machine quilting reduces the time compared to hand quilting.
Can I mix different fabric weights in a scrap quilt?
Stick to similar fabric weights for best results. Mixing heavy and lightweight fabrics can cause puckering and uneven wear. Cotton quilting fabrics work well together since they’re typically the same weight.
What’s the smallest scrap size I can use effectively?
Scraps as small as 2×2 inches can work in quilts, but pieces smaller than 1.5 inches become difficult to handle and sew accurately. Combine tiny scraps with larger pieces for easier construction.
Do I need to prewash all my fabric scraps?
Prewashing prevents shrinking and color bleeding, but it’s not always necessary if your scraps came from prewashed projects. Test a small piece first if you’re unsure about colorfastness.
What should I do if my quilt top turns out slightly crooked?
Minor irregularities can often be corrected during the quilting process by gently easing fullness. For major issues, you might need to take apart some seams and repiece sections for better alignment.