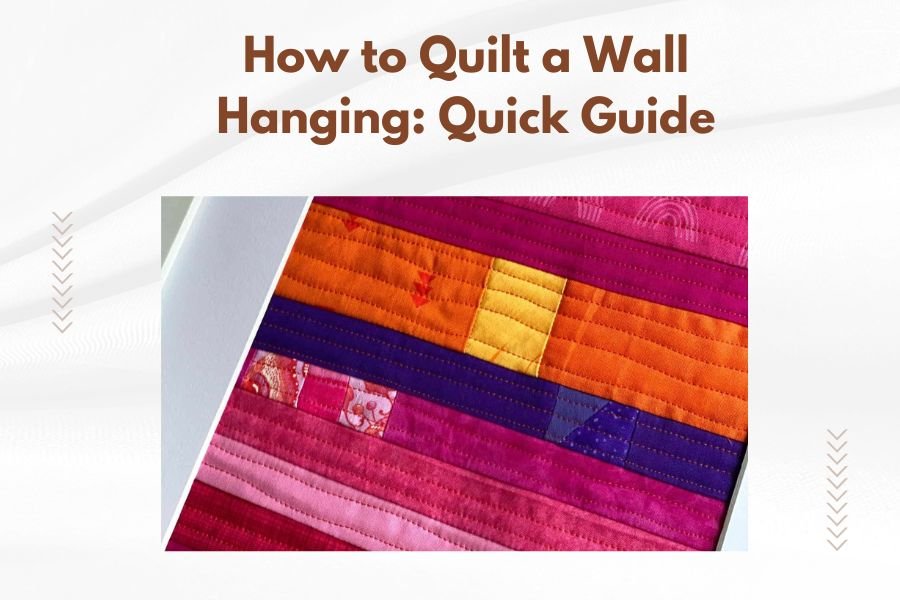
Quilting a wall hanging involves layering batting between a decorative top and backing fabric, then stitching through all layers to secure them together.
You’ll need basic quilting supplies including fabric, batting, thread, and either a sewing machine or hand-quilting tools to create your wall hanging.
What You Need to Start Your Wall Hanging Project
Let’s get your supplies ready first. You don’t need fancy equipment to make beautiful quilted wall hangings.
Fabric Requirements
Pick cotton fabric for best results. You’ll need fabric for the top design, backing, and binding. Cotton holds its shape well and works great for beginners.
Calculate your fabric needs based on your finished size. Add 4 inches to each dimension for the backing fabric. This gives you room to work without running short.
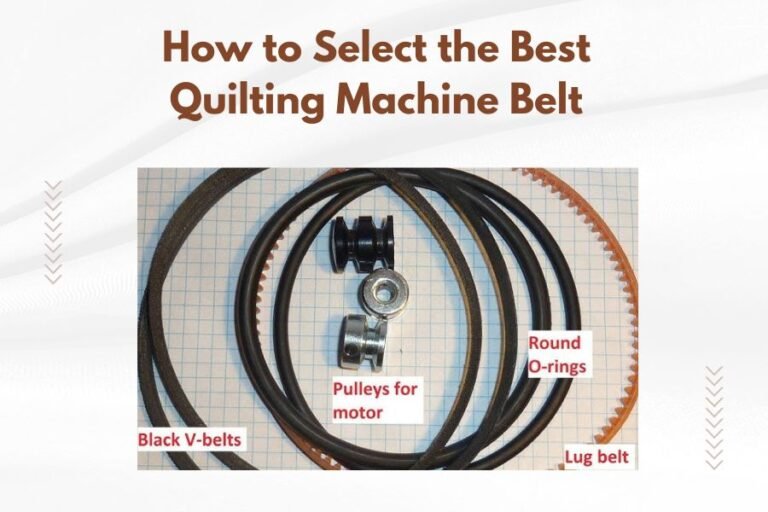
Essential Tools and Materials
- Cotton batting sized 2 inches larger than your quilt top
- Rotary cutter and cutting mat
- Quilting ruler
- Safety pins or basting spray
- Quilting thread
- Sewing machine or hand-quilting needles
- Fabric scissors
Batting Options That Work Best
Cotton batting gives a flat, traditional look. Polyester batting adds more loft and warmth. Wool batting drapes beautifully but costs more.
For wall hangings, I found that low-loft batting works better than thick batting. It hangs flatter against the wall.
Planning Your Design
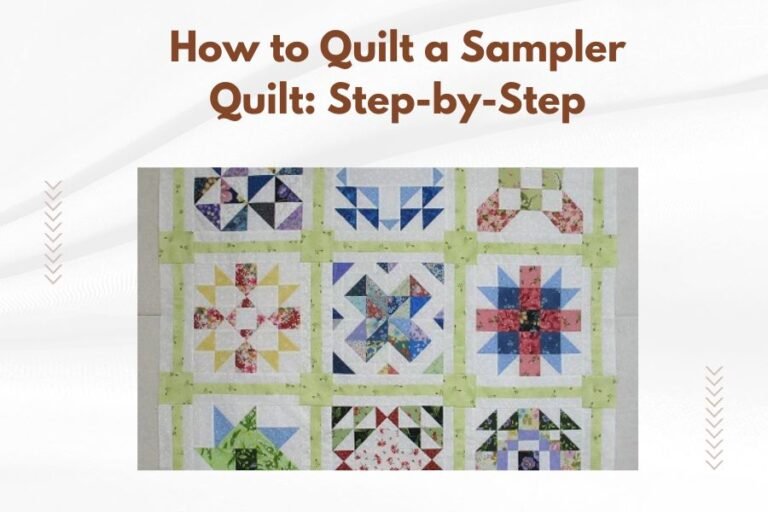
Start simple if you’re new to quilting. A basic patchwork design or single large image works great for your first wall hanging.
Choosing the Right Size
Think about where you’ll hang your finished piece. Measure the wall space first. Common wall hanging sizes range from 24×36 inches to 40×60 inches.
Smaller pieces finish faster and cost less. They’re perfect for testing new techniques before making larger projects.
Design Layout Tips
Keep your focal point slightly above center. This creates better visual balance when hung on the wall.
Use odd numbers of elements when possible. Three flowers look better than two. Five blocks work better than four.
Color Selection Strategy
Pick a main color plus two supporting colors. This keeps your design from looking too busy. Test your color combination with small fabric swatches first.
Creating Your Quilt Top
Your quilt top is the decorative front layer. Take time here because this determines how your finished piece looks.
Cutting Your Pieces
Measure twice, cut once. Use a rotary cutter for straight, clean edges. Sharp blades make cleaner cuts than dull ones.
Cut all pieces before you start sewing. This prevents mistakes and keeps your work flowing smoothly.
Piecing Techniques
Use a quarter-inch seam allowance for most quilting projects. This standard measurement ensures pieces fit together properly.
Press seams as you go. Iron seams toward the darker fabric to prevent show-through.
Assembly Order
Sew smaller pieces into blocks first. Then join blocks into rows. Finally, sew rows together to complete your top.
This method prevents handling large, awkward pieces while sewing small seams.
Preparing Your Quilt Sandwich
The quilt sandwich has three layers: top, batting, and backing. Getting this step right prevents puckering and bunching during quilting.
Laying Out the Layers
Start with backing fabric face-down on a flat surface. Smooth out all wrinkles. Tape corners down if needed.
Add batting next, centering it on the backing. Finally, place your quilt top face-up on the batting.
Basting Methods
Safety pin basting works well for machine quilting. Place pins every 4-6 inches across the entire surface.
Spray basting saves time but costs more. It creates a temporary bond between layers without pins.
Avoiding Common Basting Problems
Don’t skip the edges when basting. Loose edges shift during quilting and cause problems later.
Remove any folds or bubbles before you start quilting. These won’t disappear during the quilting process.
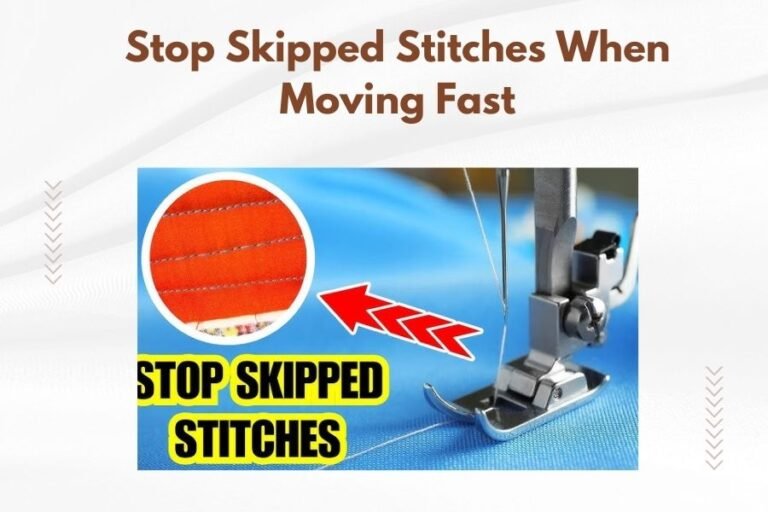
Machine Quilting Your Wall Hanging
Machine quilting goes faster than hand quilting. It also creates strong, durable stitching for wall hangings.
Straight-Line Quilting
Start with straight lines for your first project. Quilt lines 2-4 inches apart across the entire surface.
Use a walking foot if your machine has one. This foot feeds all layers evenly and prevents puckering.
Free-Motion Quilting Basics
Drop your machine’s feed dogs for free-motion quilting. Move the fabric with your hands to create curved designs.
Practice on scraps first. Free-motion quilting takes coordination between your hands and machine speed.
Simple Pattern Ideas
Try these beginner-friendly patterns: meandering loops, echo quilting, or simple geometric shapes.
Avoid stopping and starting often. Continuous patterns look smoother and stronger than broken lines.
Hand Quilting Options
Hand quilting takes longer but gives you complete control over every stitch. Many quilters find it relaxing.
Basic Hand Quilting Technique
Use quilting thread and a short needle called a “between.” Make small, even running stitches through all three layers.
Aim for 10-12 stitches per inch. Consistent stitch size matters more than tiny stitches.
Quilting Hoop vs Frame
Hoops work well for small wall hangings. They’re portable and inexpensive. Frames hold larger pieces better but take up more space.
| Method | Best For | Time Needed | Skill Level |
|---|---|---|---|
| Machine Quilting | Fast results | 2-4 hours | Beginner |
| Hand Quilting | Traditional look | 15-25 hours | Intermediate |
Binding Your Wall Hanging
Binding finishes the raw edges and gives your wall hanging a professional look. It’s the final step before hanging.
Cutting Binding Strips
Cut binding strips 2.5 inches wide. Cut them on the bias for curved edges or straight grain for straight edges.
You’ll need enough binding to go around your entire perimeter plus 10 inches for joining and corners.
Attaching the Binding
Sew binding to the front of your quilt first. Use a quarter-inch seam allowance. Miter the corners for a neat finish.
Fold binding to the back and hand-stitch it down. This creates a clean, finished edge that won’t fray.
Adding Hanging Hardware
Your beautiful wall hanging needs proper hanging hardware to display safely and attractively.
Sleeve Method
Sew a fabric sleeve to the back of your quilt. This hidden pocket holds a wooden dowel or curtain rod.
Make the sleeve 4 inches wide for quilts under 40 inches. Wider quilts need 6-inch sleeves for better support.
Alternative Hanging Options
Small wall hangings can use quilt clips or decorative rods. These show hardware as part of the design.
Velcro strips work for temporary displays or rental properties where nails aren’t allowed.
Finishing Touches and Care
Add a label to document your work. Include your name, date, and any special meaning behind the piece.
Press your finished wall hanging gently if needed. Use low heat and press from the back to protect decorative elements.
Long-Term Care Tips
Rotate wall hangings yearly to prevent uneven fading. Vacuum gently with a screen attachment to remove dust.
Keep quilted wall hangings away from direct sunlight and heat sources. These cause fabric to fade and weaken over time.
Conclusion
Quilting a wall hanging combines creativity with practical sewing skills. You now have the complete process from planning through hanging your finished piece. Start with simple designs and basic techniques, then build your skills with each new project. The key is taking your time with each step and enjoying the process. Your first quilted wall hanging might not be perfect, but it will be uniquely yours and made with care.
What size batting should I buy for my wall hanging?
Buy batting that’s 2 inches larger than your quilt top on all sides. If your finished wall hanging measures 30×40 inches, get batting that’s at least 34×44 inches. This extra batting makes the quilting process easier and gets trimmed off later.
Can I use a regular sewing machine for quilting?
Yes, any sewing machine can quilt wall hangings. You don’t need a special quilting machine. A walking foot attachment helps feed layers evenly, but it’s not required. Start with straight-line quilting if you’re using a basic machine.
How do I prevent my wall hanging from puckering while quilting?
Proper basting prevents most puckering problems. Pin or spray-baste every 4-6 inches across the entire surface. Also, don’t pull or stretch the fabric while quilting. Let the machine do the work and guide the fabric gently.
What’s the difference between quilting thread and regular thread?
Quilting thread is stronger and designed to withstand the stress of going through multiple fabric layers. Cotton quilting thread works best for most projects. Regular thread can break more easily and may not give you the coverage you want for decorative quilting.
How long does it take to complete a wall hanging?
Machine-quilted wall hangings typically take 8-15 hours spread over several days. Hand-quilted pieces take 20-40 hours depending on size and detail. Your first project will take longer as you learn techniques. Planning and cutting fabric usually takes 2-3 hours alone.