Zig-zag quilting creates beautiful wavy patterns by moving your fabric side to side while your machine stitches forward. Your quilting machine’s tension, speed, and presser foot settings determine how smooth and even your zig-zag quilting lines will look.
Most quilting machines can handle zig-zag quilting with the right setup, but you’ll need to adjust your stitch length, lower your feed dogs, and practice steady hand movements.
What Is Zig-Zag Quilting?
Zig-zag quilting is a free-motion technique where you create wavy, lightning-bolt patterns across your quilt top. Unlike straight-line quilting, you move the fabric in gentle S-curves while the machine stitches.
Think of it like drawing waves on paper, but with thread. Your hands guide the fabric while the needle does the work. The result? Dynamic lines that add movement and texture to any quilt.
Setting Up Your Machine for Success
Your machine setup makes or breaks your zig-zag quilting experience. Get these basics right first, then worry about technique.
Essential Machine Adjustments
Drop or cover your feed dogs completely. They’ll fight your hand movements if you leave them up. Your hands become the feed dogs now.
Install a darning foot or quilting foot. These feet hover slightly above the fabric, giving you room to move freely while maintaining some control.
Set your stitch length to zero. You control the stitch length by how fast you move the fabric, not the machine setting.
Thread Tension Settings
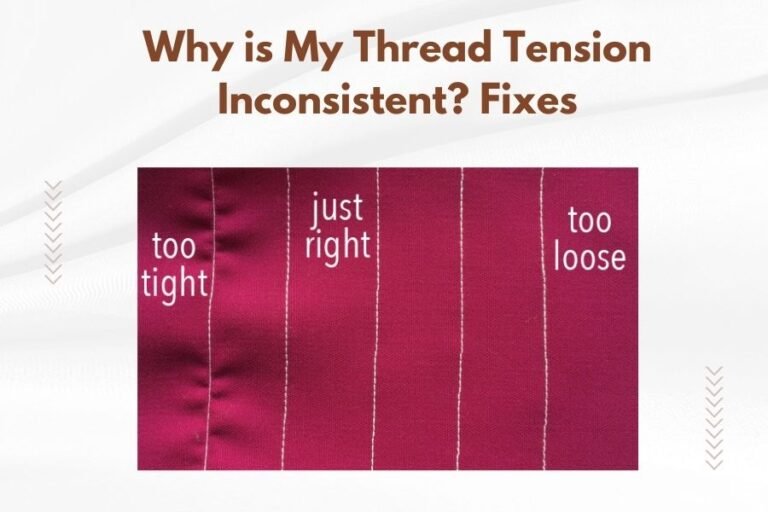
Start with normal tension settings, around 3-4 on most machines. If your bobbin thread shows on top, lower the top tension slightly. If your top thread shows on the back, raise it a bit.
I found that many quilters overthink tension. Small adjustments work better than dramatic changes.
Speed Control Tips
Run your machine at medium speed, about 60-70% of maximum. Too slow creates uneven stitches. Too fast makes control impossible.
Your fabric movement speed should match your machine speed. Fast stitching plus slow fabric movement creates tiny stitches that bunch up.
Choosing the Right Thread and Needle
Thread weight affects how your zig-zag lines look. Heavier threads create bold, visible lines. Lighter threads blend more subtly.
Best Thread Options
- 40-weight cotton for balanced visibility
- 50-weight cotton for subtle texture
- 30-weight cotton for bold statement lines
- Polyester for strength on heavily used quilts
Needle Selection Guide
Match your needle to your thread weight and fabric layers. Size 90/14 universal needles work for most cotton quilts with cotton thread.
Quilting needles have slightly rounded points that slip between fibers instead of piercing them. This prevents pulled threads and puckering.
Mastering the Zig-Zag Motion
Your hand position and movement pattern determine how your zig-zag quilting looks. Practice these techniques on scraps first.
Hand Position and Grip
Place your hands flat on either side of the needle, about 4-6 inches apart. Don’t grip the fabric – let it rest in your palms.
Keep your shoulders relaxed. Tense shoulders lead to jerky movements that show up in your stitching lines.
Creating Smooth Curves
Move the fabric in gentle S-curves, like drawing waves. The key is consistency – try to make each wave roughly the same size and shape.
Start your curves shallow and wide. You can always make them sharper as you get comfortable. Sharp zigzags are harder to control.
Maintaining Even Spacing
Keep your quilting lines about 1-2 inches apart for balanced coverage. Closer lines create denser texture. Wider spacing lets the fabric drape more softly.
Use painter’s tape or quilting templates as spacing guides while you learn. Remove them as your eye develops.
Common Beginner Mistakes
Every quilter makes these mistakes when learning zig-zag quilting. Recognizing them helps you improve faster.
Moving Too Fast or Too Slow
Fast fabric movement with slow stitching creates long, loose stitches that can break. Slow movement with fast stitching bunches up thread and can break needles.
Practice coordinating your hand speed with your foot pedal pressure. They should feel like a dance, not a fight.
Inconsistent Wave Patterns
Random wave sizes look chaotic, not artistic. Plan your pattern before you start stitching each line.
Count your waves as you go. “Big curve, small curve, big curve” gives you a rhythm to follow.
Stopping Mid-Line
Stopping in the middle of a quilting line often creates visible dots or thread buildup. Plan your start and stop points before you begin each line.
If you must stop mid-line, do it at the peak or valley of a wave where the direction change hides the pause.
Troubleshooting Problems
When things go wrong, stop and identify the problem. Most zig-zag quilting issues come from setup, not technique.
Thread Breaks and Skipped Stitches
Thread breaks usually mean your needle is dull, your tension is too tight, or you’re moving the fabric too fast. Change the needle first – it’s the cheapest fix.
Skipped stitches often happen when your needle isn’t fully penetrating all layers. Check that your needle is appropriate for your fabric weight.
Puckering and Gathering
Puckered fabric means your layers aren’t basted well, or you’re pulling the fabric instead of guiding it. Let the machine do the work.
Proper basting keeps all three quilt layers smooth and aligned. Spray basting works well for smaller projects. Safety pin basting suits larger quilts.
Uneven Line Tension
Some parts of your lines look loose while others look tight? Your fabric movement speed isn’t consistent. Practice steady, rhythmic movements.
Mark practice squares on scrap fabric and fill them with zig-zag lines. Focus on keeping the same rhythm throughout each square.
Advanced Zig-Zag Techniques
Once you master basic zig-zag quilting, these variations add interest and sophistication to your quilts.
Varying Wave Amplitudes
Mix wide, dramatic curves with smaller, tighter waves in the same quilting line. This creates visual rhythm and prevents monotony.
Plan your variations before you start. “Two big waves, three small waves, one big wave” gives you a pattern to repeat.
Echo Quilting with Zig-Zags
Echo your zig-zag lines by stitching parallel wavy lines that follow the same general shape. This fills space beautifully while maintaining design coherence.
Keep your echo lines about 1/2 inch apart. Closer echoes create dense texture. Farther apart echoes let each line stand alone.
Combining with Other Patterns
Zig-zag quilting pairs beautifully with straight lines, spirals, and geometric shapes. Use it as background texture or as a main design element.
Try alternating zig-zag rows with straight-line rows. The contrast makes both patterns more interesting.
Practice Exercises for Improvement
Deliberate practice beats random experimentation. These exercises build specific skills you need for great zig-zag quilting.
Wave Consistency Drills
Draw wavy lines on paper first. This trains your brain for the movement patterns before you add machine control to the challenge.
Practice stitching along your drawn lines on fabric scraps. Your goal is matching the drawn pattern, not creating perfect waves.
Speed Coordination Practice
Stitch straight lines while varying your fabric movement speed. Fast movement creates longer stitches. Slow movement creates shorter stitches.
Once straight lines feel natural, add gentle curves. Then progress to full zig-zag patterns. Build complexity gradually.
Tools That Make Zig-Zag Quilting Easier
You don’t need expensive tools, but these items can improve your results and comfort while quilting.
| Tool | Purpose | Cost Range |
|---|---|---|
| Quilting gloves | Better fabric grip | $10-25 |
| Supreme slider | Smoother fabric movement | $15-30 |
| Extension table | More workspace | $50-200 |
| LED lighting | Better visibility | $20-100 |
Workspace Setup Tips
Your quilting surface should be level with your machine bed. Height differences create drag that affects your control.
Good lighting prevents eye strain and helps you see your quilting lines clearly. Position lights to avoid shadows cast by your hands.
Design Ideas and Inspiration
Zig-zag quilting works in many design contexts. Here are some ideas to spark your creativity.
Background Texture Applications
Use subtle zig-zag quilting as background texture behind appliqué or pieced blocks. Light-colored thread that matches your fabric creates texture without competing for attention.
Vary your wave sizes across different background areas. Smaller waves behind detailed piecing, larger waves in open spaces.
Border Treatment Options
Zig-zag quilting adds movement to plain borders without overwhelming pieced centers. Try waves that get progressively larger toward the outer edge.
Corner treatments can be tricky. Plan how your waves will turn the corners before you start quilting the borders.
Maintenance and Care
Free-motion quilting puts extra stress on your machine. Regular maintenance keeps everything running smoothly.
Cleaning and Oiling Schedule
Clean lint from your bobbin area after every project. Free-motion quilting creates more lint than regular sewing.
Oil your machine according to manufacturer recommendations. High-speed free-motion work can dry out moving parts faster than normal sewing.
Conclusion
Zig-zag quilting transforms ordinary quilts into dynamic works of art. Your success depends more on proper setup and consistent practice than expensive equipment or natural talent.
Start with simple, shallow waves and focus on smooth, steady movements. Build complexity gradually as your confidence grows. Remember that every expert quilter started exactly where you are now – with enthusiasm and a willingness to learn.
Most importantly, enjoy the process. The meditative rhythm of free-motion quilting brings as much satisfaction as the beautiful results. Your quilts will improve with every project, and soon you’ll be creating stunning zig-zag patterns that friends and family will admire for years to come.
How do I prevent my zig-zag quilting lines from looking wobbly?
Practice consistent hand movements at a steady rhythm, keep your shoulders relaxed, and maintain the same speed ratio between your machine and fabric movement throughout each line. Using quilting gloves can also improve your grip and control.
Can I do zig-zag quilting on a regular sewing machine?
Yes, any sewing machine with a free-motion capability can handle zig-zag quilting. You’ll need to drop the feed dogs, use a darning foot, and have enough throat space to maneuver your quilt comfortably.
What’s the best stitch length setting for zig-zag quilting?
Set your stitch length to zero or the shortest setting available. In free-motion quilting, you control the actual stitch length by how fast you move the fabric, not the machine’s stitch length dial.
Should I use the same thread in the top and bobbin for zig-zag quilting?
Using matching thread in both top and bobbin gives the most consistent appearance, but you can use a lighter weight thread in the bobbin to reduce bulk. Many quilters use white or cream bobbin thread regardless of the top thread color.
How far apart should I space my zig-zag quilting lines?
Space lines 1-2 inches apart for balanced coverage and good quilt stability. Closer spacing creates denser texture and more quilting security, while wider spacing allows for softer drape and emphasizes each individual line.