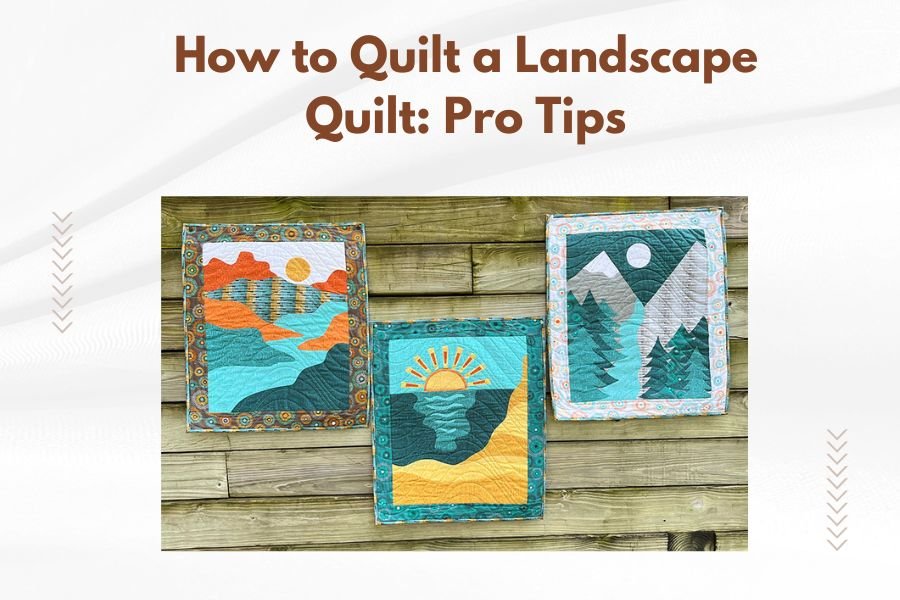
To quilt a landscape quilt successfully, start by choosing fabrics in color gradients that represent natural elements like sky, mountains, and water. Layer your quilt sandwich with batting and backing, then use free-motion quilting to add texture that mimics nature.
The key to professional-looking landscape quilts lies in fabric placement, proper layering techniques, and strategic quilting patterns that enhance your scenic design.
Planning Your Landscape Design
Before you touch any fabric, sketch your design on paper. Think about what scene you want to create. A sunset over mountains? A peaceful lake surrounded by trees? Your sketch doesn’t need to be perfect.
I found that many quilters rush this step and regret it later. Take time to plan your color flow and main focal points.
Choosing Your Color Palette
Pick 3-5 main colors that work well together. For a mountain scene, you might choose blues for sky, greens for trees, and browns for earth tones.
Collect fabric swatches and lay them out together. Do they feel harmonious? Trust your eye here.
Sketching Your Layout
Draw your quilt to scale on graph paper. Mark where different elements will go. This becomes your roadmap when cutting fabric.
Number each section so you remember the order. You’ll thank yourself later when you’re knee-deep in fabric pieces.
Selecting the Right Fabrics
Fabric choice makes or breaks a landscape quilt. You need different textures and prints to create visual interest.
Sky Fabrics
Look for gradual color changes in your sky fabrics. Hand-dyed fabrics work beautifully here. They give you natural color variations that printed fabrics can’t match.
Avoid busy prints for sky areas. You want smooth color transitions, not distracting patterns.
Ground and Mountain Fabrics
For mountains and hills, choose fabrics with subtle textures. Small prints that look like rock or earth work well.
Pick fabrics in different values of the same color. Light, medium, and dark versions create depth.
Water Elements
Shimmery or metallic fabrics can represent water beautifully. Don’t go overboard though. A little sparkle goes a long way.
Blue batiks often have the flowing, organic look that works perfectly for rivers and lakes.
Cutting and Piecing Techniques
Now comes the fun part. You get to bring your sketch to life with fabric.
Creating Smooth Color Transitions
Cut your fabrics in strips rather than blocks when possible. This helps create flowing lines instead of choppy sections.
Overlap your color zones slightly. This blends them together more naturally.
Working with Curves
Don’t fear curved seams. They’re what make landscape quilts look realistic instead of blocky.
Cut curves gently and sew slowly. Press seams carefully so they lay flat.
Template-Free Curve Cutting
You can cut gentle curves freehand with sharp scissors. Mark your cutting line with chalk first if you’re nervous.
Remember, nature isn’t perfectly straight anyway. Small imperfections add character.
Assembling Your Quilt Top
Work from background to foreground. This is how artists paint, and it works for quilting too.
Building Your Sky
Start with your sky section. This usually covers the top third of your quilt.
Piece horizontal strips for a sunset effect, or use one large piece for a clear sky day.
Adding Middle Ground Elements
Your mountains, hills, or distant trees come next. These elements should be in medium tones.
Appliqué works well for adding tree lines or mountain silhouettes.
Foreground Details
Add your closest elements last. These might be flowers, rocks, or nearby trees.
Use your darkest and brightest fabrics here. They’ll pop against the softer background.
Preparing for Quilting
Once your top is complete, you need to create your quilt sandwich.
Choosing Your Backing
Pick a backing fabric that won’t compete with your front design. Solid colors or subtle prints work best.
Make sure your backing is 2-3 inches larger than your quilt top on all sides.
Selecting Batting
Low-loft batting works well for landscape quilts. You want your quilting stitches to show without too much puff.
Cotton batting gives you the most control for detailed quilting work.
Layering Your Sandwich
Lay your backing face down, add batting, then place your quilt top face up.
Smooth out wrinkles as you go. Wrinkles quilted in are there forever.
Quilting Strategies for Natural Textures
Your quilting lines should add to the natural feeling of your scene.
Sky Quilting Patterns
For sky areas, use gentle curved lines that suggest clouds or wind patterns.
Avoid straight lines in sky sections. They look too mechanical for a natural scene.
Mountain and Hill Quilting
Quilt lines that follow the shape of your mountains. This adds dimension and makes them look more solid.
Echo quilting around mountain edges creates nice shadowing effects.
Water Quilting Techniques
For water, use flowing horizontal lines with gentle waves. Think about how water actually moves.
Vary your quilting density. Darker water areas can have closer quilting lines.
Tree and Vegetation Quilting
For trees, quilt lines that suggest bark texture or leaf patterns.
Small stippling works well for bushes and dense vegetation areas.
Free-Motion Quilting Tips
Free-motion quilting gives you the most control for adding realistic textures.
Setting Up Your Machine
Drop your feed dogs and use a darning foot. This lets you move the fabric freely in any direction.
Practice on scraps first. Free-motion quilting takes some getting used to.
Speed and Rhythm
Keep your machine speed moderate and move the fabric smoothly. Think of drawing with thread.
Consistent rhythm gives you even stitches. Don’t rush this part.
Adding Special Effects
Small details can make your landscape quilt really shine.
Thread Color Choices
Use thread colors that blend with your fabrics for subtle texturing.
Contrasting threads can highlight special features like tree branches or rock formations.
Metallic Thread for Water
Metallic thread in water areas catches light like real water does.
Use it sparingly. Too much metallic thread can look gaudy instead of natural.
Troubleshooting Common Problems
Every quilter runs into challenges. Here’s how to handle the most common ones.
Puckering Issues
If your quilt top is puckering, your backing might be too tight. Loosen it slightly.
Sometimes the batting shifts during quilting. Stop and smooth it out before continuing.
Thread Breaking
Check your needle. Dull needles cause thread breaks and can damage your fabric.
Make sure your thread path is smooth. Sometimes lint buildup causes problems.
Uneven Stitches
This usually happens when you move the fabric too fast or too slow for your machine speed.
Practice maintaining steady fabric movement. It gets easier with time.
Finishing Your Landscape Quilt
You’re almost done! The finishing touches make all the difference.
Trimming and Squaring
Trim your quilt edges evenly. Use a large square ruler to make sure corners are true.
Leave about 1/4 inch of batting and backing beyond your quilt top edge for binding.
Binding Selection
Choose a binding color that frames your design well. It doesn’t have to match exactly.
Sometimes a neutral binding lets your landscape colors shine without distraction.
Care and Display Tips
Your finished landscape quilt deserves proper care to last for years.
Hanging Your Quilt
Add a sleeve to the back if you plan to hang your quilt. This distributes weight evenly.
Keep quilts away from direct sunlight to prevent fading.
Conclusion
Creating a landscape quilt takes patience and planning, but the results are worth every stitch. Start with good fabric choices and a clear design plan. Take your time with the quilting process, letting each section tell part of your nature story. Remember that small imperfections add character to your work, just like they do in real landscapes. With practice, you’ll develop your own style and techniques that make your landscape quilts uniquely yours.
What’s the best batting thickness for landscape quilts?
Low-loft cotton batting works best for landscape quilts because it allows your detailed quilting stitches to show clearly without creating too much puffiness that might distract from your design.
How do I prevent fabric colors from bleeding in landscape quilts?
Pre-wash all fabrics in cool water before cutting, especially dark blues and reds commonly used in landscapes. Use color-catching sheets during washing if you’re concerned about any remaining dye.
Can I use regular cotton thread for the entire landscape quilt?
Yes, high-quality cotton thread works well for most landscape quilting. Save specialty threads like metallics or silk for accent areas where you want special effects like shimmering water or highlighted details.
What’s the easiest landscape scene for a beginner to attempt?
Start with a simple sunset or sunrise scene with gentle horizontal layers of color. This design uses mostly straight seams and gradual color changes without requiring complex curved piecing or detailed appliqué work.
How do I fix quilting mistakes without starting over?
For small areas, carefully remove the problem stitches with a seam ripper and re-quilt that section. For larger mistakes, you can sometimes incorporate them into your design by adding decorative stitching or small appliqué elements to camouflage the area.