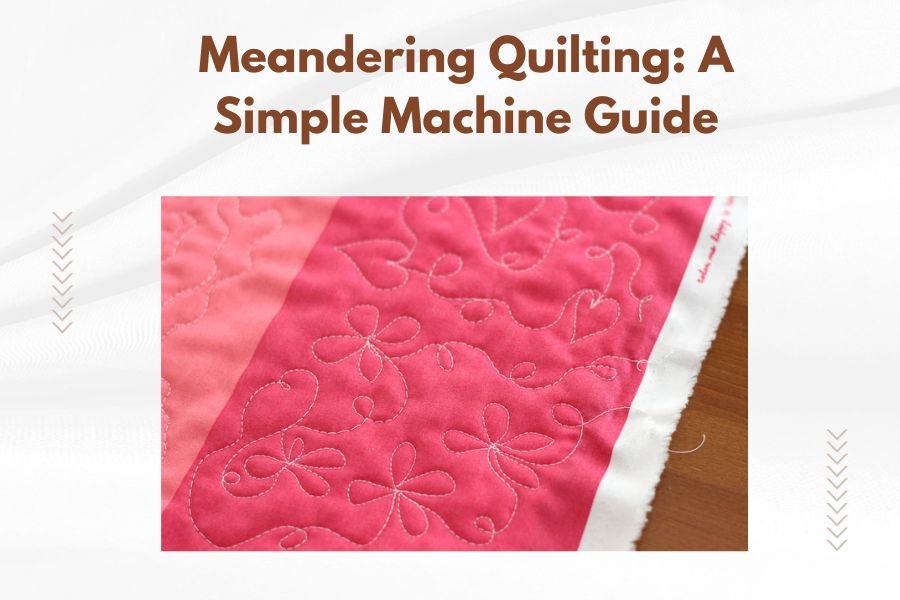
Meandering quilting is a free-motion machine technique where you stitch random, curved lines across your quilt without following any pattern. Think of it as doodling with thread – you move the fabric freely under the needle, creating flowing, organic designs that look like winding rivers or tangled vines.
This simple quilting method works perfectly for beginners because there are no rules to follow and mistakes blend right into the design. You just need to drop your feed dogs, attach a darning foot, and start moving your quilt in smooth, continuous motions.
What Makes Meandering Quilting So Popular
You’ve probably seen meandering quilting without knowing it had a name. It’s that squiggly, all-over stitching that fills quilt backgrounds beautifully.
The best part? You can’t mess it up. Every curve and loop adds character to your quilt. If you accidentally create a tight spot or awkward turn, it just becomes part of the overall texture.
Research shows that free-motion quilting techniques like meandering help quilters develop better machine control and confidence with their equipment. Many quilting instructors recommend starting with meandering before moving to more complex designs.
Setting Up Your Machine for Success
Essential Machine Adjustments
Before you start, your sewing machine needs three key changes. First, drop or cover your feed dogs – those metal teeth that usually move fabric forward. Second, switch to a darning or free-motion quilting foot. Third, reduce your thread tension slightly.
I found through research that most quilting problems come from skipping these setup steps. Your machine won’t cooperate if it’s still trying to control fabric movement.
Choosing the Right Needle and Thread
A size 90/14 quilting needle works for most projects. It’s strong enough to pierce three layers but won’t create huge holes in delicate fabrics.
For thread, cotton or polyester both work well. Cotton gives a softer, more traditional look. Polyester adds slight stretch and comes in more colors. Pick something that contrasts enough to show your work but doesn’t fight with your fabric.
The Basic Meandering Motion
Understanding the Movement Pattern
Imagine drawing lazy figure-eights that never quite close. That’s the heart of meandering. You want flowing curves that change direction smoothly, never crossing over previous stitching lines.
Your hands control the fabric movement while your foot controls the stitching speed. Think of steering a car – gentle, consistent movements work better than jerky corrections.
Hand Position and Grip
Place your hands flat on either side of the needle, about six inches apart. Don’t grip the fabric tightly. Your palms should rest lightly on the quilt surface, fingers relaxed.
Keep your elbows slightly bent and shoulders relaxed. Tension in your arms will transfer to uneven stitching. Many quilters find that taking deep breaths helps maintain smooth movements.
Common Hand Position Mistakes
Avoid pinching the fabric between your fingers. This creates drag and makes smooth curves impossible. Also, don’t place your hands too close to the needle – you need room for natural arm movement.
Step-by-Step Meandering Process
Starting Your First Line
Begin about two inches from any edge. Lower your needle into the fabric, then lower your presser foot. Take one stitch by hand to bring the bobbin thread up, then hold both thread tails while you start stitching.
Move the fabric slowly at first. Your needle speed and hand speed need to match for even stitches. Too fast with your hands creates long stitches. Too slow creates tiny, dense stitches that can pucker the fabric.
Creating Smooth Curves
Think about drawing with your whole arm, not just your wrists. Wide, gentle curves look more natural than tight spirals. Vary your curve sizes – some wide sweeps, some smaller loops.
When you need to change direction, do it gradually. Sharp turns create weak points where thread might break later. Flow from one curve into the next like you’re following a lazy river.
Maintaining Consistent Spacing
Try to keep your lines roughly one to two inches apart. Closer spacing creates a dense, heavily quilted look. Wider spacing gives a lighter feel but might not hold your quilt layers securely.
Don’t stress about perfect spacing. Part of meandering’s charm is its organic, handmade appearance. Natural variation looks better than mechanical precision.
Troubleshooting Common Problems
Uneven Stitch Length
This happens when your hand speed and needle speed don’t match. Practice moving your hands at a steady pace while maintaining consistent foot pressure on the pedal.
Many quilting experts suggest starting very slowly. Speed comes with practice, but smooth, even stitches matter more than finishing quickly.
Thread Breaking
Usually caused by tension that’s too tight or moving the fabric too quickly. Check your upper tension setting and slow down your movements. Sharp directional changes can also snap thread.
Bobbin Thread Issues
If your bobbin thread keeps pulling up to the top, your upper tension might be too loose. Small tension adjustments make big differences in free-motion quilting.
Fabric Bunching
This often means your presser foot isn’t down or your feed dogs are still up. Double-check your machine settings. Also, make sure you’re not pushing or pulling the fabric – just guide it gently.
Building Your Skills
Practice Exercises
Start with paper and pencil before touching your sewing machine. Draw meandering patterns to train your brain and hand coordination. Notice how professional quilters vary their curves and spacing.
When you’re ready for fabric, use practice sandwiches – two pieces of cotton with thin batting between them. Pin or spray-baste these together for realistic quilting practice.
Developing Muscle Memory
Plan for about 10-15 hours of practice before meandering feels natural. Your first attempts might look wobbly or uneven. That’s completely normal and expected.
I came across advice from quilting instructors who recommend short practice sessions over long ones. Twenty minutes of focused practice beats two hours of frustrated struggling.
Adding Variations
Once basic meandering feels comfortable, try variations. Make some areas denser for texture contrast. Add occasional larger loops or tighter curves for visual interest.
You can also combine meandering with simple geometric shapes. Quilt around printed motifs in your fabric, then fill empty spaces with meandering.
Practical Tips for Real Projects
Planning Your Quilting Path
Start in the center of your quilt and work outward. This prevents fabric from bunching up as you quilt. Roll or fold the sides of larger quilts to fit through your machine’s throat space.
Think about where you’ll start and stop. Plan to end near an edge where you can easily trim thread tails and secure them.
Managing Large Quilts
Support the weight of your quilt so it doesn’t drag and create tension. Use a table extension or set up an ironing board next to your machine to hold the bulk.
Time and Energy Management
Meandering is meditative but physically demanding. Your shoulders, neck, and back will feel the work. Take breaks every 30-45 minutes to stretch and rest your eyes.
Most quilters find they can effectively meander for 2-3 hours before fatigue affects their stitch quality. Listen to your body and stop when you start feeling tense.
When Meandering Works Best
| Quilt Style | Meandering Effect | Best Use |
|---|---|---|
| Traditional pieced quilts | Softens geometric lines | Background areas |
| Modern quilts | Adds organic texture | Negative space |
| Applique quilts | Doesn’t compete with design | Around motifs |
| Baby quilts | Soft, cuddly texture | All-over quilting |
Fabric Considerations
Meandering works on most fabrics but shines on solids and small prints. Busy prints can hide your beautiful quilting work. Light to medium-weight cottons are easiest for beginners.
Avoid very stretchy or slippery fabrics until you’re comfortable with the technique. They’re harder to control and can distort under the presser foot.
Conclusion
Meandering quilting gives you creative freedom while building essential free-motion skills. Start with simple practice pieces and don’t worry about perfection. Each quilt you meander will look better than the last as your confidence grows.
Remember that this technique should feel relaxing and enjoyable. If you’re getting frustrated, take a break and come back with fresh energy. Your quilts will thank you for the patient practice, and you’ll love the unique, handmade texture that only meandering can create.
What’s the difference between meandering and stippling?
Stippling uses much tighter, smaller curves with closer spacing than meandering. Stippling creates a more textured, dense appearance while meandering has flowing, larger curves with more open spacing. Both use the same free-motion technique but create different visual effects.
Can I meander quilt without a special foot?
You really need a darning foot or free-motion quilting foot for best results. A regular presser foot will drag on the fabric and make smooth curves nearly impossible. Darning feet are inexpensive and make a huge difference in your quilting quality.
How do I know if my meandering spacing is right?
Good spacing allows the quilt to drape naturally without stiffness or puckering. Lines about 1-2 inches apart work for most projects. Closer spacing creates more structure, wider spacing stays softer but might not secure your batting adequately in high-use quilts.
Why does my thread keep breaking during meandering?
Thread breaks usually happen from tension that’s too tight, moving the fabric too quickly, or making sharp directional changes. Try loosening your upper tension slightly, slowing down your hand movements, and making gentler curves. Also check that your needle isn’t dull or bent.
Should I mark meandering patterns on my quilt first?
No, marking defeats the purpose of meandering’s organic, flowing appearance. The beauty lies in its spontaneous, natural curves. Trust your instincts and let the pattern develop as you stitch. Marked lines would make it stippling or echo quilting instead of true meandering.