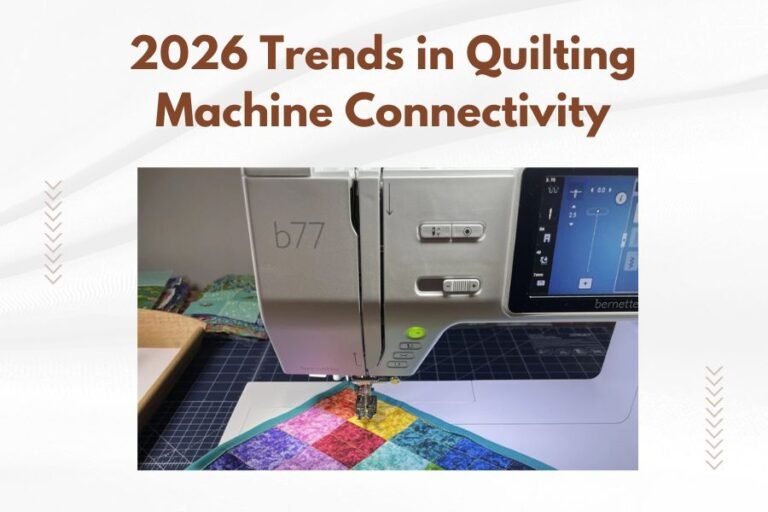
To quilt a fabric panel, first secure the panel between batting and backing fabric using basting or spray adhesive, then stitch along the design lines using a walking foot on your sewing machine.
The key to success with quilting fabric panels is choosing the right batting thickness and using consistent stitch tension throughout the quilting process.
What is a Fabric Panel and Why Quilt It?
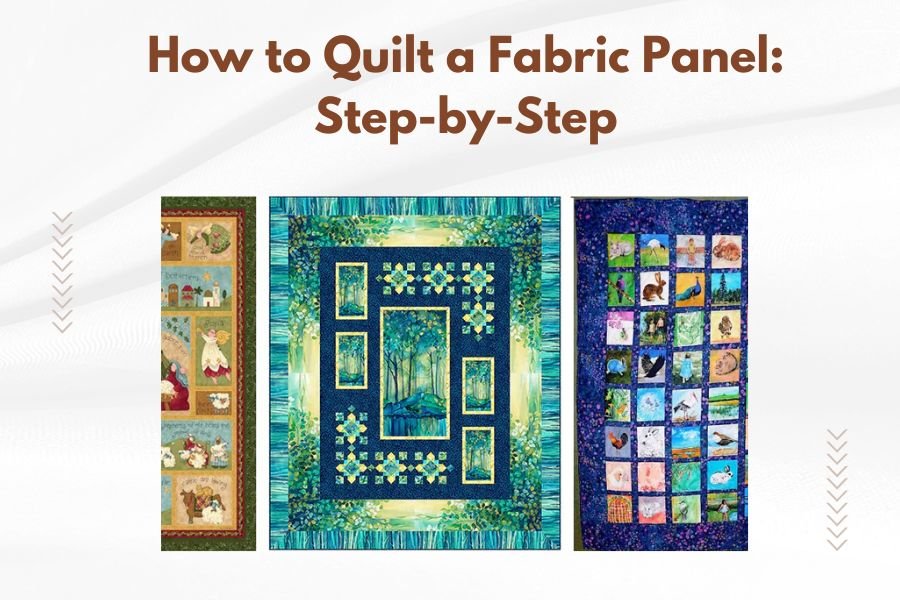
A fabric panel is a large piece of printed fabric with a complete design already on it. Think of it as artwork printed on fabric that you can turn into a quilt.
These panels usually measure 24 inches by 44 inches or larger. They feature everything from holiday scenes to nature landscapes to children’s characters.
Quilting a fabric panel adds texture and dimension. It also makes the finished piece more durable and gives it that classic quilted look.
Benefits of Using Fabric Panels
Fabric panels save you time since the main design work is already done. You don’t need to piece together dozens of small fabric squares.
They’re perfect for beginners who want to practice quilting techniques without the complexity of traditional piecing.
Materials You’ll Need
Gathering the right supplies makes your quilting project much smoother. Here’s what you’ll need:
- Your chosen fabric panel
- Batting (cotton, polyester, or wool)
- Backing fabric (slightly larger than your panel)
- Thread for quilting
- Fabric scissors or rotary cutter
- Safety pins or basting spray
- Walking foot for your sewing machine
- Quilting ruler
- Fabric marking tools
Choosing the Right Batting
Batting thickness affects how your finished quilt looks and feels. Thin batting (1/8 inch) works well for wall hangings. Medium batting (1/4 inch) is good for lap quilts.
Cotton batting gives a flat, traditional look. Polyester batting adds more loft and warmth.
Thread Selection Tips
Cotton thread works great for most quilting projects. It’s strong and easy to work with.
Choose thread colors that blend with your panel design. You can match the main colors or use a neutral like cream or gray.
Preparing Your Fabric Panel
Start by washing and pressing your fabric panel if the manufacturer recommends it. Some panels are pre-treated and don’t need washing.
Square up the edges using a rotary cutter and quilting ruler. This ensures clean, straight edges for your finished quilt.
Measuring and Cutting
Measure your panel carefully. Cut your batting and backing fabric 2-3 inches larger than the panel on all sides.
This extra fabric gives you room to work and accounts for any shifting during quilting.
Pressing Techniques
Press the panel with a warm iron to remove any wrinkles. Use a pressing cloth if your panel has metallic or delicate elements.
Press the backing fabric too. Wrinkles in the backing will show through your finished quilt.
Creating Your Quilt Sandwich
The quilt sandwich is what quilters call the three layers: backing, batting, and top fabric panel.
Lay the backing fabric face-down on a flat surface. Smooth out any wrinkles with your hands.
Layering Process
Place the batting on top of the backing fabric. Center it carefully so you have equal borders on all sides.
Add your fabric panel face-up on top of the batting. Make sure it’s centered and smooth.
Basting Methods
You can baste using safety pins or spray adhesive. Safety pins are traditional and reliable.
Place pins every 4-6 inches across the entire quilt. Start from the center and work outward.
Using Spray Basting
Spray basting is faster but requires good ventilation. Spray the batting lightly, then smooth the backing fabric on top.
Flip the sandwich over, spray again, and add your fabric panel. Work quickly since the adhesive sets fast.
Quilting Techniques for Panels
You have several options for quilting your fabric panel. The technique you choose affects both the look and the time investment.
Straight Line Quilting
Straight line quilting is perfect for beginners. You quilt in straight lines across the entire panel.
Use your walking foot and sew lines 1-3 inches apart. You can quilt vertically, horizontally, or diagonally.
Grid Quilting Pattern
Create a grid by quilting both horizontal and vertical lines. This creates a classic quilted look that works with any panel design.
Mark your lines with a quilting ruler and fabric-safe marker before you start sewing.
Echo Quilting
Echo quilting follows the shapes in your panel design. You stitch around design elements, creating “echoes” of the shapes.
This technique highlights the panel’s artwork while adding beautiful texture.
Following Design Elements
Look for natural quilting lines in your panel design. Flower stems, building outlines, or cloud shapes make great quilting paths.
Stitch 1/4 to 1/2 inch away from these design lines to create the echo effect.
Free Motion Quilting
Free motion quilting gives you complete creative control. You move the fabric under the needle to create any design you want.
This technique requires practice but creates stunning results. Start with simple swirls or loops.
| Quilting Method | Skill Level | Time Required | Best For |
|---|---|---|---|
| Straight Line | Beginner | 2-4 hours | First quilts |
| Echo Quilting | Intermediate | 4-6 hours | Highlighting designs |
| Free Motion | Advanced | 6-10 hours | Custom artwork |
Step-by-Step Quilting Process
Now let’s walk through the actual quilting process step by step.
Setting Up Your Machine
Install your walking foot and select a slightly longer stitch length than normal sewing. A 2.5 to 3.0 stitch length works well.
Reduce your machine’s presser foot pressure if possible. This helps the layers feed through evenly.
Thread Tension Adjustments
Test your thread tension on a small sample sandwich first. The stitches should look balanced on both sides.
If the bobbin thread shows on top, loosen the top tension slightly. If the top thread shows on the back, tighten the top tension.
Starting to Quilt
Begin quilting from the center of your panel and work outward. This prevents puckering and distortion.
Roll up the sides of your quilt to make it easier to maneuver under your machine.
Managing Bulk
Large quilts can be heavy and awkward. Use a table next to your sewing machine to support the weight.
Take breaks to prevent fatigue. Tired hands make uneven stitches.
Finishing Your Quilting Lines
When you reach the end of a quilting line, backstitch a few stitches or reduce your stitch length to lock the threads.
Pull threads to the back and tie them off by hand for the cleanest finish.
Troubleshooting Common Issues
Even experienced quilters run into problems. Here’s how to fix the most common issues:
Puckering Problems
Puckering happens when the layers shift during quilting. Make sure your basting is secure before you start.
Check that you’re not stretching the fabric as you sew. Let the walking foot do the work.
Tension Issues
Uneven stitches usually mean tension problems. Research shows that most tension issues come from incorrect threading (Sewing Machine Manufacturers Association).
Re-thread your machine completely, making sure the thread follows every guide correctly.
Skipped Stitches
Skipped stitches often happen with dull or wrong needles. Use a quilting needle size 90/14 for most projects.
Change your needle after every 6-8 hours of sewing time.
Binding Your Finished Panel
After quilting, you need to finish the edges with binding. This gives your quilt a professional look.
Trimming Excess Fabric
Trim the batting and backing even with your panel edges. Use a rotary cutter for clean, straight cuts.
Leave about 1/4 inch of batting and backing beyond the panel for the binding seam allowance.
Preparing Binding Strips
Cut binding strips 2.5 inches wide from coordinating fabric. You’ll need enough strips to go around your entire quilt plus 10 inches.
Join strips with diagonal seams to reduce bulk.
Attaching the Binding
Sew the binding to the front of your quilt with a 1/4 inch seam. Miter the corners for a professional finish.
Fold the binding to the back and hand-stitch it down with invisible stitches.
Care and Maintenance
Your finished quilted panel will last longer with proper care.
Washing Instructions
Most quilted panels can be machine washed on gentle cycle with cold water. Use mild detergent without bleach.
Air dry when possible to prevent shrinkage and maintain the quilt’s shape.
Storage Tips
Store quilts flat if possible. If you must fold them, refold along different lines periodically.
Keep quilts away from direct sunlight to prevent fading.
Conclusion
Quilting a fabric panel is a rewarding project that combines the beauty of printed designs with traditional quilting techniques. You’ve learned how to prepare your materials, create a quilt sandwich, and choose quilting patterns that enhance your panel’s design. Remember to start with simple straight-line quilting if you’re new to the craft, and gradually work up to more complex techniques like free motion quilting. The key to success is taking your time, using the right tools, and practicing good technique. With these skills, you can transform any fabric panel into a beautiful, lasting quilt that showcases both the original artwork and your quilting craftsmanship.
What size needle should I use for quilting a fabric panel?
Use a 90/14 quilting needle for most fabric panels. This size handles multiple layers well without creating large holes in your fabric. Switch to a heavier 100/16 needle if you’re using thick batting or dense fabrics.
Can I quilt a fabric panel without a walking foot?
While possible, quilting without a walking foot makes it much harder to keep your layers even. The walking foot feeds all layers through at the same rate, preventing puckering and shifting. It’s worth investing in this attachment for better results.
How do I prevent my fabric panel from stretching while quilting?
Avoid pulling or pushing the fabric through your machine. Let the feed dogs and walking foot do the work. Keep your hands relaxed and simply guide the quilt gently. Proper basting also prevents stretching by keeping layers secure.
What’s the best batting thickness for a wall hanging panel?
Use thin batting (1/8 inch or less) for wall hangings. Thick batting adds too much bulk and weight for pieces that will hang vertically. Thin batting still provides texture while keeping your wall hanging flat and lightweight.
Should I pre-wash my fabric panel before quilting?
Check the manufacturer’s instructions on the fabric bolt end. Some panels are pre-treated and shouldn’t be washed. If washing is recommended, use cool water and gentle cycle to prevent colors from running or fabric from shrinking.