Perfect machine-quilted spirals require consistent tension, steady speed, and a walking foot or darning foot depending on your chosen technique.
The key to quilting flawless spirals is starting from the center and working outward with even spacing while maintaining smooth, continuous curves.
You know that feeling when you see a beautifully quilted spiral pattern? It looks so smooth and professional. But when you try it yourself, things get wobbly fast.
I’ve researched the best techniques from quilting experts and found some game-changing tips that make spiral quilting much easier than you might think.
Essential Equipment for Spiral Quilting
Before you start quilting spirals, you need the right tools. Your machine setup makes the biggest difference between success and frustration.
Choosing the Right Foot
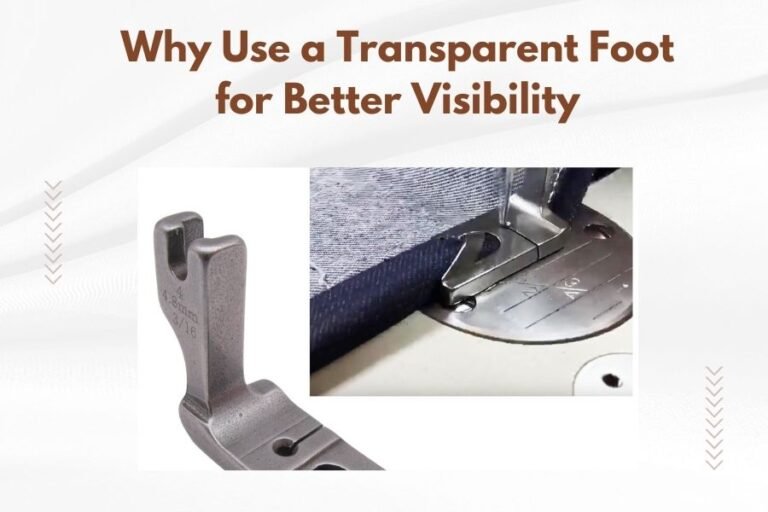
You have two main options for spiral quilting. A walking foot works great for guided spirals with templates. It feeds all fabric layers evenly and prevents puckering.
For free-motion spirals, use a darning foot or free-motion quilting foot. This lets you move the fabric freely in any direction. Many quilters find free-motion gives them better control over spiral curves.
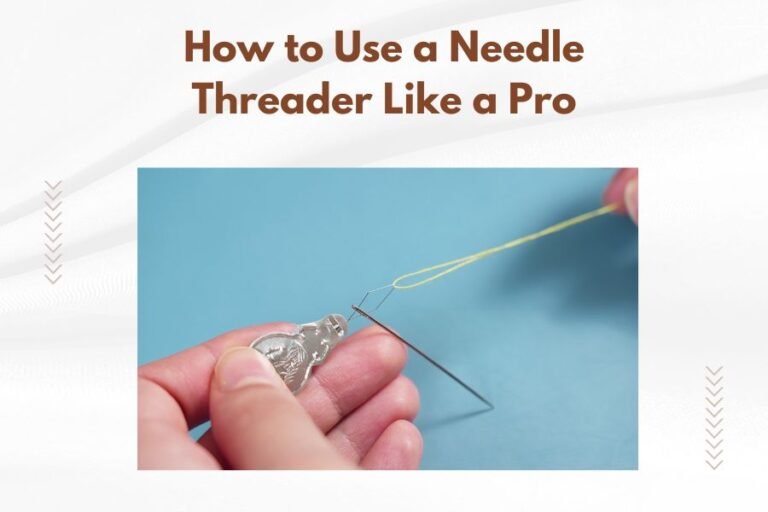
Thread and Needle Selection
Cotton thread works best for most spiral projects. It has less stretch than polyester and creates cleaner lines. Use a universal needle size 80/12 for cotton fabrics.
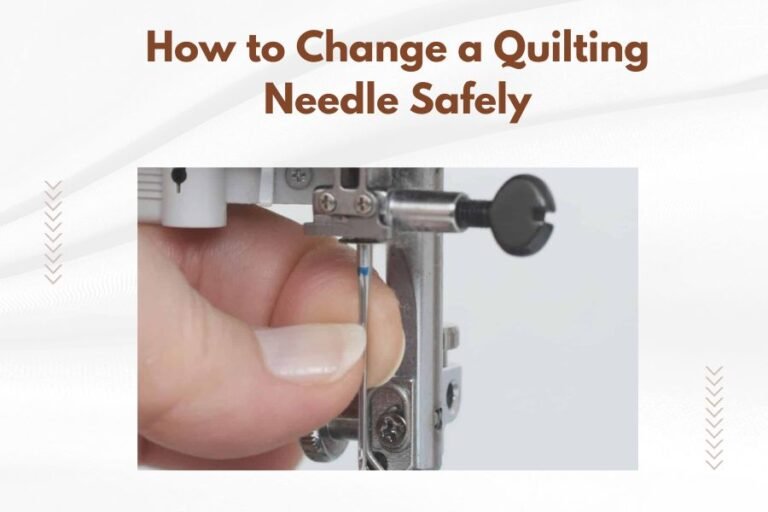
For denser fabrics or multiple layers, try a size 90/14 needle. Sharp needles pierce fabric cleanly without creating large holes.
Machine Settings That Matter
Set your stitch length to 2.5-3.0mm for walking foot spirals. This creates even stitches that follow curves smoothly.
For free-motion quilting, you control stitch length by how fast you move the fabric. Keep your machine speed consistent and move fabric at a steady pace.
Preparing Your Quilt Sandwich
Good preparation prevents problems later. Your quilt sandwich needs proper layering and basting to stay smooth during spiral quilting.
Layering Tips
Start with your backing fabric face-down on a flat surface. Smooth out all wrinkles. Add batting next, making sure it lies flat without stretching.
Place your quilt top face-up as the final layer. All three layers should extend about 2 inches beyond your planned quilting area.
Basting Methods
Safety pin basting works well for spiral patterns. Place pins every 4-6 inches across the quilt surface. Avoid putting pins directly in your planned spiral path.
Spray basting creates a smoother surface but costs more. It works especially well for large spirals where pins might get in the way.
Planning Your Spiral Design
Smart planning saves time and prevents mistakes. You need to think about spiral placement, size, and spacing before you start sewing.
Finding Your Starting Point
Most spirals look best when centered on quilt blocks or in specific design areas. Mark your center point with a removable fabric marker.
Some quilters prefer off-center spirals for a more organic look. Trust your eye and choose what looks balanced for your specific quilt.
Determining Spiral Size
Small spirals (2-4 inches across) work well in block corners or as fill patterns. Large spirals (6+ inches) make great focal points but need more space.
Consider your quilt’s overall design. Busy prints hide spiral details, so you might want larger, more dramatic spirals. Simple fabrics show off intricate spiral work better.
Free-Motion Spiral Technique
Free-motion quilting gives you the most control over spiral shapes. It takes practice, but the results look completely custom.
Getting Started
Drop your feed dogs and attach your darning foot. Set stitch length to 0 since you’ll control it manually.
Start at your marked center point. Take a few stitches in place to lock the thread. Then begin moving in a tiny circle.
Creating Smooth Curves
Think of drawing with your sewing machine. Move the fabric smoothly while keeping consistent machine speed. Fast, jerky movements create uneven stitches.
Keep your circles growing gradually outward. Try to maintain even spacing between each spiral ring. This spacing creates the visual rhythm that makes spirals look professional.
Maintaining Consistent Speed
Your machine speed and fabric movement need to work together. Fast machine speed with slow fabric movement creates tiny stitches. Slow machine speed with fast fabric movement makes long, loose stitches.
Practice on scraps until you find your comfortable rhythm. Most quilters work best at medium machine speed with steady fabric movement.
Using Templates and Guides
Templates help create perfectly shaped spirals, especially when you’re learning. You can buy commercial templates or make your own.
Commercial Template Options
Acrylic spiral templates come in various sizes. They work well with walking feet and provide consistent shapes every time.
Some templates have channels that guide your machine foot. Others have raised edges you follow while free-motion quilting.
DIY Template Ideas
You can make templates from cardboard or plastic. Draw spirals using a compass or trace around circular objects of increasing sizes.
Paper templates work for simple projects. Draw your spiral on paper, then pin it to your quilt and stitch through both layers. Tear away the paper afterward.
Troubleshooting Common Problems
Even experienced quilters run into spiral quilting challenges. Here’s how to fix the most common issues.
Uneven Stitches
Uneven stitches usually come from inconsistent speed. Practice moving fabric at the same pace while keeping steady machine speed.
Check your thread tension too. Loose tension creates loops on the quilt back. Tight tension puckers the fabric or breaks thread.
Puckered Fabric
Puckering happens when fabric layers don’t feed evenly. Make sure your quilt sandwich is well-basted and not stretched during quilting.
A walking foot helps prevent puckering by feeding all layers at the same rate. Reduce pressure on your presser foot if your machine allows it.
Wobbly Spiral Lines
Shaky lines come from trying to go too fast or gripping the fabric too tightly. Relax your hands and let the fabric glide smoothly.
Support your quilt weight with a table extension or quilting frame. Heavy quilts pull on your work area and make smooth curves harder.
Advanced Spiral Variations
Once you master basic spirals, try these variations to add interest to your quilting.
Double Spirals
Quilt one spiral, then add a second spiral starting from the same center point but going in the opposite direction. This creates a beautiful overlapping effect.
Square Spirals
Instead of curves, create spirals with straight lines and right angles. These work especially well in modern quilt designs.
Feathered Spirals
Add small feather designs along your spiral lines. This combines two classic quilting motifs for extra elegance.
Practice Exercises
Smart practice builds your skills without wasting good fabric. Try these exercises to improve your spiral technique.
Paper Practice
Remove the thread from your machine and practice on paper first. This helps you get the motion down without worrying about thread tension or stitch quality.
Muslin Sandwiches
Make practice sandwiches with muslin and thin batting. These cost less than good fabric but give you realistic quilting practice.
Size Progression
Start with small 3-inch spirals and gradually work up to larger ones. Small spirals are more forgiving for beginners.
| Spiral Size | Best Use | Difficulty Level |
|---|---|---|
| 2-3 inches | Block corners, small fills | Beginner |
| 4-6 inches | Block centers, medium designs | Intermediate |
| 7+ inches | Large focal points, borders | Advanced |
Finishing Your Spiral Quilting
Good finishing techniques make your spiral work look polished and professional.
Securing Thread Ends
Always lock your stitching at the beginning and end of each spiral. Take several tiny stitches in place, then trim threads close to the fabric surface.
Some quilters prefer to pull thread tails to the back and tie them off. This creates the most secure finish but takes more time.
Pressing Considerations
Press lightly from the quilt top side using a pressing cloth. Heavy pressing can flatten your quilting texture.
Steam helps relax any minor puckering, but don’t oversaturate the fabric. Let everything dry completely before handling.
Conclusion
Quilting perfect spirals takes practice, but the techniques are straightforward once you understand them. Start with proper equipment setup, plan your design carefully, and practice on scraps before working on your good quilts.
Remember that even wobbly spirals have character. Your handmade quilting doesn’t need to look machine-perfect. The slight variations in hand-guided work add charm and personality to your quilts.
Focus on consistent spacing and smooth curves rather than absolute precision. With time and practice, your spiral quilting will develop its own beautiful style that makes your quilts uniquely yours.
Can I quilt spirals without a walking foot or darning foot?
You can try using a regular presser foot, but results won’t be as good. Walking feet prevent fabric shifting, while darning feet allow free movement needed for smooth curves. Regular feet can cause puckering and uneven feeding of quilt layers.
How do I fix a spiral that went off-track halfway through?
Stop quilting and assess the problem area. You can often disguise small mistakes by adding decorative stitching or converting the spiral into a different design element. For major problems, carefully remove stitches with a seam ripper and start over from the problem point.
What’s the best way to mark spiral guidelines on dark fabrics?
Use white or silver water-soluble markers for dark fabrics. Chalk pencils also show up well and brush away easily. Test any marking tool on fabric scraps first to ensure it removes completely without leaving residue.
Should I quilt spirals before or after other quilting designs?
Quilt spirals after straight-line quilting but before dense fill patterns. This sequence prevents fabric distortion. If spirals are your main design element, quilt them first and add supporting elements around them.
How tight should my thread tension be for spiral quilting?
Use slightly looser tension than normal piecing – usually one number lower on your tension dial. This prevents thread breakage during curves and reduces fabric puckering. Test on scraps with your actual quilt sandwich to find the right setting for your specific project.