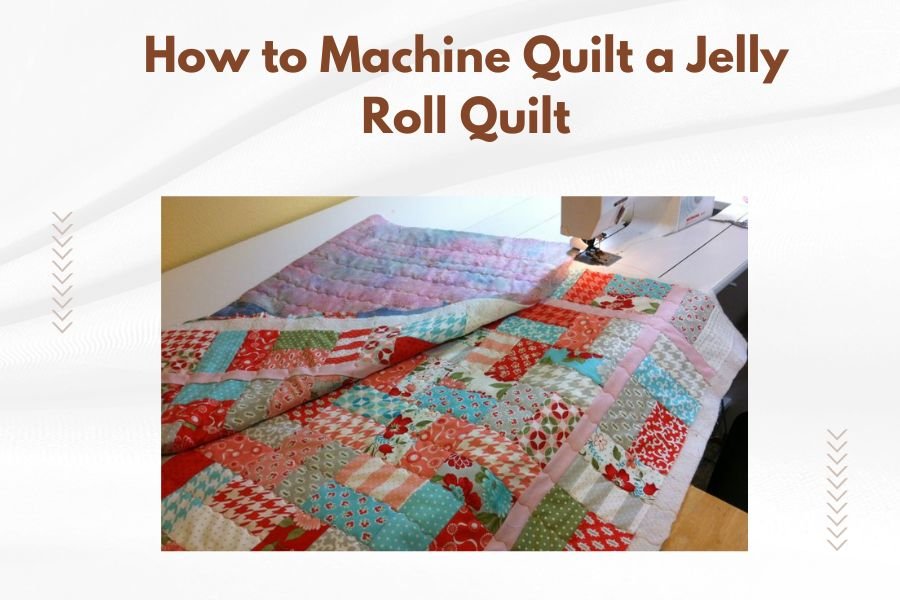
To machine quilt a jelly roll quilt, first layer your quilt top with batting and backing, then secure with safety pins or spray basting before quilting with straight lines or simple patterns.
Jelly roll quilts work best with walking foot quilting or free-motion quilting using gentle curves that follow the fabric strips’ natural flow.
What Makes Jelly Roll Quilts Perfect for Machine Quilting
Jelly roll quilts are fantastic for beginners who want to try machine quilting. The long fabric strips create natural quilting lines. You don’t need to guess where to quilt.
These pre-cut strips measure 2.5 inches wide and come in coordinated fabric collections. When you sew them together, they form beautiful patterns that practically beg for simple quilting designs.
Why Your Sewing Machine Loves Jelly Rolls
Your regular sewing machine can handle jelly roll quilts without stress. The seams between strips are evenly spaced. This gives you consistent thickness across the quilt top.
I found that most quilting experts recommend jelly roll quilts for first-time machine quilters. The strips guide your stitching naturally.
Essential Supplies for Machine Quilting Your Jelly Roll Creation
You need specific tools to make machine quilting smooth and enjoyable. Don’t skip these basics or you’ll fight your machine the whole time.
Machine Feet That Make the Difference
- Walking foot for straight-line quilting
- Free-motion quilting foot for curved designs
- Edge-joining foot for binding attachment
Thread and Needle Essentials
Use cotton quilting thread in neutral colors like cream or light gray. These blend with most jelly roll fabrics. Machine quilting needles size 90/14 work best for cotton batting.
Batting Choices That Work
Cotton batting gives you the easiest quilting experience. It grabs the fabric slightly, which prevents shifting. Polyester batting slides more but creates extra loft.
Preparing Your Jelly Roll Quilt for Machine Quilting
Preparation saves you hours of frustration later. Take time to do this right, and your quilting will be smooth sailing.
Pressing Your Quilt Top
Press all seams in one direction within each row. Alternate the direction between rows. This reduces bulk where seams meet.
Check for any loose threads or uneven seams. Fix them now before you add batting and backing.
Creating Your Quilt Sandwich
Lay your backing fabric face-down on a flat surface. Smooth out all wrinkles. The backing should be 4 inches larger than your quilt top on all sides.
Place batting on top of the backing. Center it carefully. Add your pressed quilt top face-up on the batting.
Basting Methods That Actually Work
Safety pin basting works great for machine quilting. Place pins every 6 inches across the quilt. Avoid putting pins where you plan to quilt.
Spray basting creates a smoother surface but costs more. Use it in a well-ventilated area and let it dry completely.
Machine Quilting Patterns Perfect for Jelly Roll Quilts
Simple patterns look stunning on jelly roll quilts. You don’t need complex designs when the fabric strips create their own visual interest.
Straight-Line Quilting Techniques
Quilting parallel to the jelly roll strips creates clean, modern lines. Use your walking foot and quilt every 2-3 strips.
Echo quilting works beautifully too. Quilt along one seam, then add parallel lines 1/2 inch apart on both sides.
Diagonal Line Magic
Diagonal lines across jelly roll strips create stunning diamond patterns. Start at one corner and work your way across. Keep lines evenly spaced at 2-3 inch intervals.
Free-Motion Quilting Ideas
Gentle serpentine curves follow the natural flow of jelly roll strips. Drop your feed dogs and use a free-motion foot.
Loop-de-loops add whimsy without overwhelming the fabric patterns. Keep loops consistent in size for the best look.
Step-by-Step Machine Quilting Process
Follow these steps exactly and you’ll avoid the common mistakes that make quilters want to quit halfway through.
Setting Up Your Machine
Install your walking foot and insert a fresh quilting needle. Set your stitch length to 10-12 stitches per inch. Test on a practice sandwich first.
Tension Adjustments
Perfect tension shows tiny dots of bobbin thread on the quilt top. If you see loops on top, decrease upper tension. Tight bobbin threads mean you need to increase upper tension.
Starting Your First Line
Roll up the right side of your quilt and secure with clips. This makes it easier to fit through your machine’s throat space.
Start quilting from the center and work outward. This prevents fabric shifting and puckering.
Handling Bulk
Support the weight of your quilt with a table or ironing board beside your machine. Don’t let the quilt hang and pull on your stitching.
| Quilting Method | Best For | Difficulty Level |
|---|---|---|
| Straight lines with walking foot | Beginners | Easy |
| Echo quilting | Modern look | Easy |
| Free-motion curves | Organic feel | Medium |
| Diagonal crosshatch | Traditional style | Medium |
Troubleshooting Common Machine Quilting Problems
Every quilter faces these issues. The key is knowing how to fix them quickly so you can keep going.
Puckering and Tucks
Puckering happens when fabric layers shift during quilting. Stop immediately and re-baste the problem area.
Slow down your stitching speed. Fast sewing often causes the top layer to push ahead of the bottom layers.
Thread Breaking Solutions
Old thread breaks more often than fresh thread. Replace thread that’s been sitting in your stash for years.
Check your needle for burrs or damage. A damaged needle shreds thread as it moves through the fabric.
Uneven Stitches
Jerky hand movements create uneven free-motion stitches. Move the quilt smoothly at a consistent speed.
Practice makes perfect with free-motion quilting. Don’t expect magazine-perfect stitches on your first try.
Finishing Touches for Your Machine Quilted Masterpiece
The final steps transform your quilted sandwich into a finished quilt you’ll be proud to display or give as a gift.
Trimming and Squaring
Trim excess batting and backing to match your quilt top edges. Use a rotary cutter and ruler for straight, clean cuts.
Square up your corners with a large quilting square. This ensures your binding will lie flat and look professional.
Binding Your Quilted Treasure
Cut binding strips 2.5 inches wide from coordinating jelly roll fabrics. Join strips with diagonal seams to reduce bulk.
Machine stitch binding to the front of your quilt, then hand stitch it to the back for a beautiful finish.
Conclusion
Machine quilting your jelly roll quilt doesn’t have to be scary or overwhelming. With the right preparation, simple patterns, and patience with yourself, you can create a beautiful finished quilt. Remember that every expert quilter started exactly where you are now. Your first machine quilted project might not be perfect, but it will be uniquely yours and full of the love you stitched into every line. Take your time, enjoy the process, and celebrate each completed section. Before you know it, you’ll have a gorgeous quilt and the confidence to tackle your next machine quilting adventure.
How long does it take to machine quilt a jelly roll quilt?
A typical jelly roll quilt takes 8-15 hours to machine quilt, depending on your chosen quilting pattern and experience level. Simple straight-line quilting goes fastest, while intricate free-motion designs take longer.
Can I machine quilt without a walking foot?
You can quilt without a walking foot, but it’s much harder to get even stitches and avoid puckering. A walking foot feeds all quilt layers evenly and costs around $30-50, making it worth the investment.
What’s the best batting thickness for machine quilting jelly roll quilts?
Low-loft batting works best for machine quilting because it’s easier to maneuver through your machine. Cotton batting around 1/8 inch thick gives great results without adding bulk that fights your machine.
Should I quilt in the ditch or avoid the seam lines?
Both approaches work well for jelly roll quilts. Quilting in the ditch hides imperfect stitches but requires precision. Quilting 1/4 inch from seams is more forgiving and creates lovely shadow lines.
How do I prevent my quilt from shifting while machine quilting?
Proper basting prevents most shifting problems. Use safety pins every 6 inches or spray basting for best results. Also, support your quilt’s weight with tables on both sides of your machine so it doesn’t pull while you stitch.