Yes, you can absolutely use your quilting machine for sashiko stitching by adjusting tension settings and using appropriate threads and needles.
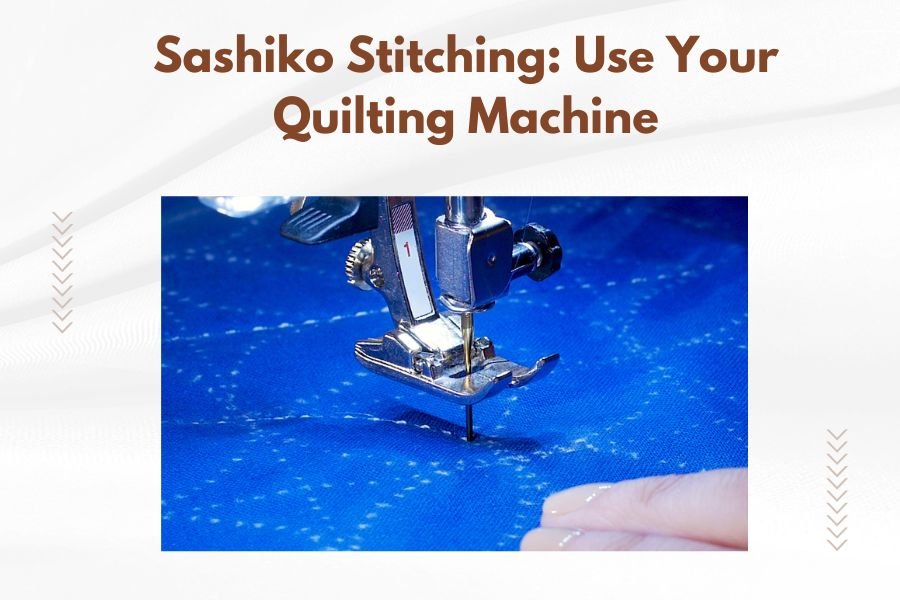
Sashiko stitching creates beautiful geometric patterns on fabric through simple running stitches, and modern quilting machines make this traditional Japanese technique faster and more accessible.
What Is Sashiko Stitching
Sashiko is a traditional Japanese stitching method that started as a way to repair and strengthen worn fabric. The word “sashiko” means “little stabs” in Japanese, which perfectly describes the simple running stitch technique.
This centuries-old craft transforms plain fabric into stunning textured art. You create geometric patterns using white or contrasting thread on darker fabric. The stitches are longer on the front and shorter on the back, giving sashiko its signature look.
Traditional vs Modern Sashiko
Traditional sashiko was always done by hand using thick cotton thread. Craftspeople would sit for hours creating intricate patterns to mend clothing and household items.
Today’s quilters have adapted this technique for quilting machines. You keep the same aesthetic and stitch style, but speed up the process dramatically. Many quilting experts I found online now prefer machine sashiko for large projects.
Why Use Your Quilting Machine for Sashiko
Your quilting machine opens up new possibilities for sashiko stitching. You can cover large areas quickly while maintaining consistent stitch length and tension.
Speed and Efficiency Benefits
Machine sashiko cuts your stitching time by 70-80% compared to hand stitching. What takes days by hand becomes hours on your machine. You can complete whole quilt tops in a weekend instead of months.
The consistent machine speed also prevents hand fatigue. No more sore fingers or cramped hands from hours of repetitive stitching.
Precision and Consistency
Quilting machines deliver perfectly even stitches every time. Your stitch length stays consistent across the entire project. This uniformity is hard to achieve by hand, especially on large pieces.
You also get better thread tension control. Most modern machines let you adjust upper and bobbin tension separately for optimal results.
Essential Machine Settings for Sashiko
Getting your machine settings right makes the difference between beautiful sashiko and frustrating tangles. I researched the most recommended settings from quilting experts.
Stitch Length Adjustments
Set your straight stitch length to 4.0-6.0mm for authentic sashiko appearance. Traditional sashiko stitches are longer than regular quilting stitches.
Start with 4.5mm and test on scrap fabric. Adjust up or down based on your thread weight and fabric thickness. Heavier threads need longer stitches to lay properly.
Tension Settings
Reduce your upper tension slightly from normal quilting settings. Heavy sashiko threads need looser tension to prevent puckering and thread breaks.
Try these starting points:
- Upper tension: 3.5-4.0 (instead of normal 4.5-5.0)
- Bobbin tension: Keep at normal setting initially
- Adjust gradually while testing on scraps
Speed Control
Slow down your machine speed for better control. Sashiko looks best with deliberate, even stitching. Most quilters I found online recommend 50-70% of normal quilting speed.
Use your machine’s speed limiter if available. This prevents accidentally speeding up during long runs.
Thread Selection for Machine Sashiko
Thread choice dramatically affects your sashiko results. The wrong thread creates tension problems and poor stitch quality.
Best Thread Types
Heavy cotton threads work best for authentic sashiko appearance. Look for 12-weight or 16-weight cotton threads. These create the thick, visible lines that define sashiko style.
Avoid thin polyester threads. They don’t give the bold visual impact sashiko needs. Your stitching will look more like regular quilting than traditional sashiko.
Color Combinations
Traditional sashiko uses white thread on indigo fabric. This high contrast makes the geometric patterns pop dramatically.
Modern variations include:
- Cream thread on navy fabric
- Natural thread on charcoal fabric
- Light blue thread on darker blue fabric
- Any light thread on much darker fabric
Thread Weight Guidelines
Match your thread weight to your project size. Larger quilts can handle heavier 12-weight threads. Smaller projects look better with 16-weight or 20-weight threads.
Test thread weights on sample blocks first. What looks good in the store might overwhelm your actual fabric choices.
Needle Selection and Preparation
The right needle prevents thread shredding and skipped stitches. Heavy sashiko threads need larger needles than regular quilting.
Needle Size Recommendations
Use size 90/14 or 100/16 needles for most sashiko projects. The larger eye accommodates thick threads without causing friction damage.
Match needle size to thread weight:
| Thread Weight | Needle Size | Best For |
|---|---|---|
| 12-weight | 100/16 | Large quilts, bold patterns |
| 16-weight | 90/14 | Medium projects, detailed work |
| 20-weight | 80/12 | Small items, delicate fabrics |
Needle Type Selection
Topstitch needles work best for sashiko. They have larger eyes and deeper grooves that protect heavy threads from breaking.
Universal needles can work with lighter sashiko threads. Avoid ballpoint needles – they’re designed for knits and can cause problems with cotton fabrics.
Fabric Preparation
Proper fabric prep prevents puckering and distortion during machine sashiko. These steps take extra time but save frustration later.
Choosing the Right Fabric
Medium-weight cotton fabrics work best for machine sashiko. They’re stable enough to support heavy threads without stretching or distorting.
Avoid lightweight or stretchy fabrics for beginners. They require more advanced techniques to prevent puckering and gathering.
Stabilizing Your Fabric
Use tear-away stabilizer under your fabric for best results. This prevents the fabric from pulling into the machine throat and creating uneven stitches.
Pin or spray-baste the stabilizer to your fabric. Remove it carefully after stitching to avoid disturbing your sashiko lines.
Basic Sashiko Patterns for Beginners
Start with simple patterns to master machine sashiko basics. These traditional designs teach essential techniques without overwhelming complexity.
Running Lines Pattern
Parallel straight lines are perfect for your first machine sashiko project. Mark lines 1-2 inches apart across your fabric using a washable marker.
Stitch each line from the same direction to prevent fabric distortion. This simple pattern creates stunning visual impact with minimal complexity.
Grid Patterns
Cross perpendicular lines to create basic grid patterns. Stitch all horizontal lines first, then add vertical lines on top.
Keep intersections loose to prevent excessive thread buildup. Let the top thread cross over naturally without forcing it down.
Wave Patterns
Gentle curved lines add organic movement to sashiko designs. Use your machine’s curved stitching capabilities or follow marked guidelines.
Practice on scraps first. Smooth curves require steady hand coordination with machine speed control.
Advanced Machine Techniques
Once you master basic patterns, these advanced techniques expand your creative possibilities.
Layered Pattern Construction
Build complex designs by layering simple patterns on top of each other. Start with your background pattern, then add accent lines in different directions.
Use different thread weights for each layer. Heavy threads for main patterns, lighter threads for accent details.
Free-Motion Sashiko
Drop your feed dogs and use free-motion quilting techniques for organic sashiko patterns. This advanced method requires practice but creates unique results.
Maintain consistent stitch length manually. Move the fabric at steady speeds to keep your sashiko stitches even.
Troubleshooting Common Problems
Machine sashiko presents unique challenges different from regular quilting. Here’s how to solve the most common issues.
Thread Tension Issues
Loops on top mean your upper tension is too loose. Loops underneath mean it’s too tight. Adjust in small increments and test frequently.
Heavy sashiko threads behave differently than regular quilting threads. What works for piecing might not work for sashiko.
Skipped Stitches
Skipped stitches usually mean your needle is too small for your thread. Switch to a larger needle size and rethread your machine completely.
Check your needle condition too. Dull or damaged needles cause more problems with heavy threads.
Fabric Puckering
Puckering happens when tension is unbalanced or you’re pulling the fabric. Let your machine feed the fabric naturally.
Add stabilizer if puckering continues. Some fabrics need extra support during heavy thread stitching.
Finishing Your Sashiko Projects
Proper finishing techniques preserve your beautiful sashiko work and prepare it for use or display.
Pressing and Blocking
Press lightly from the wrong side to avoid flattening your sashiko texture. Use a pressing cloth to protect the threads from direct heat.
Block larger pieces if they’ve distorted during stitching. Pin to measurements and steam gently to restore proper shape.
Trimming Thread Ends
Leave slightly longer thread tails than normal quilting. Heavy sashiko threads need extra length to stay secure.
Bury thread ends by hand for the most secure finish. Machine backstitching can create bulk that shows through the fabric.
Conclusion
Your quilting machine opens up exciting possibilities for sashiko stitching. With the right settings, threads, and needles, you can create stunning traditional patterns much faster than hand stitching allows. Start with simple straight-line patterns to master the basics, then experiment with more complex designs as your confidence grows. The key is proper preparation and patience while you learn how your specific machine handles heavy sashiko threads. Soon you’ll be creating beautiful textured quilts that honor this ancient Japanese technique while embracing modern efficiency.
Can I use regular quilting thread for machine sashiko?
Regular quilting thread is too thin for authentic sashiko appearance. You need 12-weight to 20-weight cotton threads to achieve the bold, visible lines that define traditional sashiko style.
What’s the biggest difference between hand and machine sashiko?
Machine sashiko stitches through all layers at once, while hand sashiko traditionally goes through one layer at a time. Machine work is much faster but requires different tension and stabilization techniques.
How do I prevent my fabric from gathering during machine sashiko?
Use tear-away stabilizer under your fabric and reduce your upper thread tension slightly. Also, let the machine feed the fabric naturally without pulling or pushing it through.
Can I do sashiko on quilts that are already sandwiched?
Yes, but use a walking foot or even-feed foot to handle the multiple layers smoothly. You may need to adjust your tension settings for the thicker sandwich.
What’s the minimum seam allowance needed around sashiko patterns?
Leave at least 1 inch of plain fabric around your sashiko patterns before seaming. This prevents the heavy stitching from interfering with construction seams and reduces bulk at intersections.