Thread painting is a machine embroidery technique that creates artwork using thread instead of paint or ink. You build up layers of thread stitches to form detailed images, landscapes, and artistic designs directly on fabric.
Your sewing machine becomes an artist’s brush when you master thread painting, letting you create stunning textile art with precise control over color, texture, and detail.
What Makes Thread Painting Special
Thread painting transforms your regular sewing machine into an art studio. You’re not following preset patterns or templates. Instead, you’re creating original artwork stitch by stitch.
Think of it like coloring with thread. You layer different colors and textures to build depth and dimension. The needle moves freely across fabric, letting you draw flowing lines or fill solid areas.
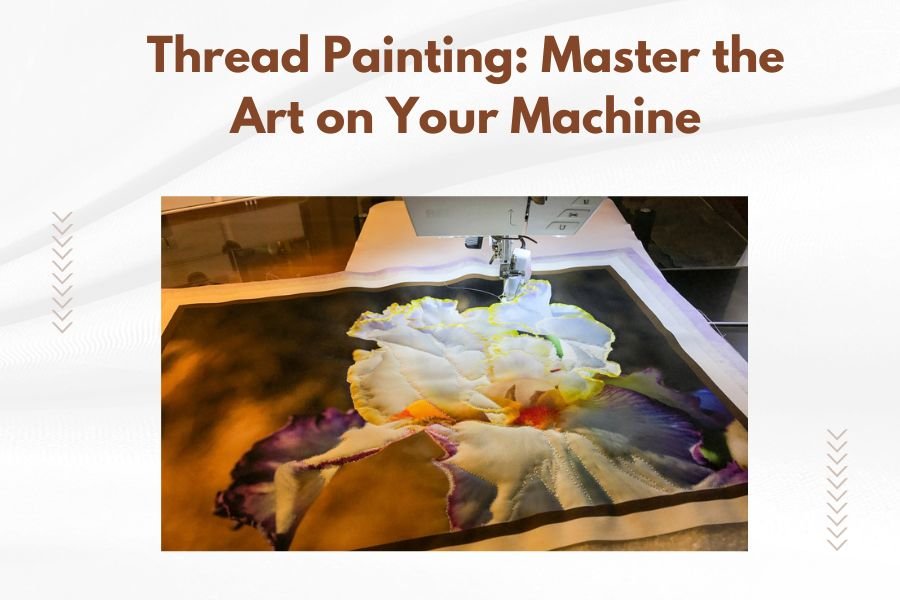
Free Motion vs Regular Embroidery
Regular machine embroidery follows programmed patterns. Your machine controls the design completely. Thread painting gives you full creative control.
You drop the feed dogs and use a darning foot. This lets you move fabric in any direction while the needle stitches. It’s like holding a pencil that never runs out of ink.
Essential Equipment for Thread Painting
You don’t need fancy equipment to start. Most home sewing machines can handle basic thread painting with the right setup.
Machine Requirements
Your machine needs these basic features:
- Ability to drop feed dogs
- Straight stitch capability
- Variable speed control
- Darning or free motion foot
I found that machines with knee lifters make the process much smoother. You can lift the presser foot without stopping to use your hands.
Thread Selection Guide
Thread choice makes or breaks your artwork. Different threads create different effects and textures.
Rayon Thread
Rayon gives you brilliant colors and high sheen. It’s perfect for flowers, water, and anything that should look vibrant. The downside? It breaks more easily than other threads.
Cotton Thread
Cotton creates matte finishes with natural texture. Use it for landscapes, skin tones, and realistic subjects. It’s stronger than rayon and easier to work with.
Polyester Thread
Polyester offers the best of both worlds. It’s strong like cotton but has more shine than cotton. Great for beginners who want durability.
Fabric Foundation Choices
Your fabric choice affects how easy the project becomes. Cotton and linen work best for beginners.
Avoid stretchy fabrics until you gain experience. They distort under the constant needle movement and make smooth stitching difficult.
Setting Up Your Machine
Proper setup prevents frustration and thread breaks. Take time to adjust everything correctly before starting.
Feed Dog and Presser Foot Setup
Drop your feed dogs completely. They should sit below the throat plate surface. If they stick up even slightly, they’ll catch your fabric.
Install your darning foot or free motion foot. This foot barely touches the fabric, giving you freedom to move in any direction.
Tension Adjustments
Start with normal tension settings. You might need to loosen the top tension slightly if you see bobbin thread pulling to the surface.
Test on scraps first. Perfect tension shows only your top thread color on the fabric surface.
Speed Control Settings
Set your machine to medium speed. Going too fast creates uneven stitches and increases thread breaks. Going too slow makes smooth curves difficult.
Many experts recommend finding a comfortable rhythm and sticking with it throughout your project.
Basic Thread Painting Techniques
Master these fundamental techniques before attempting complex artwork. Each one builds skills you’ll use in every project.
Creating Smooth Lines
Move your fabric steadily while maintaining consistent speed. Jerky movements create uneven stitch lengths and wavy lines.
Practice drawing circles, spirals, and flowing curves. Your hands should feel relaxed, not tense or gripping the fabric tightly.
Building Color Layers
Thread painting relies on layering colors to create depth. Start with your lightest color as the base layer.
Add darker colors gradually, building shadows and definition. You can always add more thread, but removing it means starting over.
Blending Techniques
Blend colors by overlapping stitching areas. The threads mix visually, creating new color combinations naturally.
Use short, random stitches in transition areas. Long straight lines create harsh color boundaries that look unnatural.
Planning Your First Project
Start simple. Your first thread painting should focus on technique, not complex subjects.
Subject Selection Tips
Choose subjects with clear color areas and simple shapes. Flowers, leaves, and basic landscapes work well for beginners.
Avoid subjects with lots of fine detail or complex color gradations. You’ll tackle those after mastering the basics.
Sketching and Transfer Methods
Draw your design lightly on fabric with water-soluble markers. Keep lines simple and avoid too much detail.
Remember that your sketch is just a guide. Thread painting often takes on a life of its own as you work.
Advanced Thread Painting Methods
Once you master basics, these advanced techniques add professional polish to your work.
Texture Creation Techniques
Different stitch patterns create various textures. Dense, overlapping stitches look smooth and solid. Sparse, scattered stitches appear rough and organic.
Vary your stitch direction to mimic natural textures. Tree bark uses vertical lines, while water uses horizontal flowing movements.
Dimensional Effects
Build up thick areas with multiple thread layers. This creates actual dimension, not just the illusion of depth.
Use this technique sparingly. Too much buildup makes fabric stiff and difficult to handle.
Color Theory in Thread Art
Understanding color relationships improves your artwork dramatically. Warm colors advance while cool colors recede.
Use complementary colors for vibrant contrasts. Use analogous colors for harmonious, peaceful effects.
| Color Effect | Thread Combinations | Best Use |
|---|---|---|
| High Contrast | Red and Green | Focal points |
| Soft Harmony | Blue and Purple | Backgrounds |
| Natural Blend | Yellow and Orange | Sunsets, flowers |
Common Problems and Solutions
Every thread painter faces these challenges. Knowing solutions beforehand saves time and frustration.
Thread Breaking Issues
Thread breaks happen for several reasons. Poor quality thread, incorrect tension, or dull needles cause most breaks.
Change your needle after every major project. Dull needles stress thread and create irregular holes in fabric.
Tension Problems
If bobbin thread shows on top, loosen your upper tension. If top thread pools underneath, tighten upper tension slightly.
Make small adjustments and test on scraps. Large tension changes usually make problems worse.
Fabric Puckering
Puckering occurs when you stitch too densely in one area. Spread your stitches more evenly across the design.
Using a stabilizer helps prevent puckering on lightweight fabrics. Tear-away stabilizer works well for most projects.
Finishing Your Thread Painting
Proper finishing protects your artwork and gives it professional appearance.
Securing Loose Threads
Tie off all thread ends securely. Pull them to the back of your work and knot them close to the fabric surface.
Trim excess thread close to the knots. Long tails can work loose over time and spoil your artwork’s appearance.
Pressing and Display Options
Press gently from the back using low heat. Place a pressing cloth over dimensional areas to avoid flattening the texture.
Frame your finished pieces behind glass to protect them from dust and handling. Mat them like traditional artwork for professional presentation.
Building Your Skills Progressive
Thread painting mastery comes through regular practice and gradual skill building.
Practice Project Ideas
Start with single flowers or leaves. Move on to simple landscapes with sky, ground, and basic shapes.
Try abstract designs next. They let you focus on color and texture without worrying about realistic proportions.
Skill Development Timeline
Expect to spend several months mastering basic techniques. Don’t rush to complex projects before your fundamentals are solid.
I found online communities where thread painters share techniques and encourage beginners. Learning from others accelerates your progress significantly.
Conclusion
Thread painting opens up endless creative possibilities on your sewing machine. Start with simple projects and basic techniques, then build complexity as your skills develop. Remember that every expert started as a beginner, so be patient with yourself as you learn.
The key to success lies in consistent practice and willingness to experiment. Your unique artistic voice will emerge as you gain confidence with the medium. Soon you’ll be creating stunning textile art that rivals traditional paintings.
Can I do thread painting on any sewing machine?
Most home sewing machines can handle thread painting if they have a straight stitch and the ability to drop feed dogs. You’ll also need a darning foot, which is available for nearly all machine brands.
How long does it take to complete a thread painting project?
Simple designs take 2-4 hours, while complex pieces can require 20+ hours. Your skill level and design complexity determine the time investment more than project size.
What’s the best thread weight for beginners?
40-weight thread works best for beginners. It’s strong enough to prevent frequent breaks but fine enough to create smooth color blending and detail work.
Do I need special fabric for thread painting?
Regular cotton quilting fabric works perfectly for beginners. Avoid stretchy fabrics, loosely woven materials, or anything that shifts easily under the needle.
Can thread paintings be washed after completion?
Thread paintings can be gently hand washed in cool water if you used quality threads and proper finishing techniques. Always test colorfastness on scraps first, and air dry to prevent heat damage.