Perfect crosshatching on a quilt requires even line spacing, consistent thread tension, and steady machine speed. You’ll need a walking foot or quilting extension table for best results.
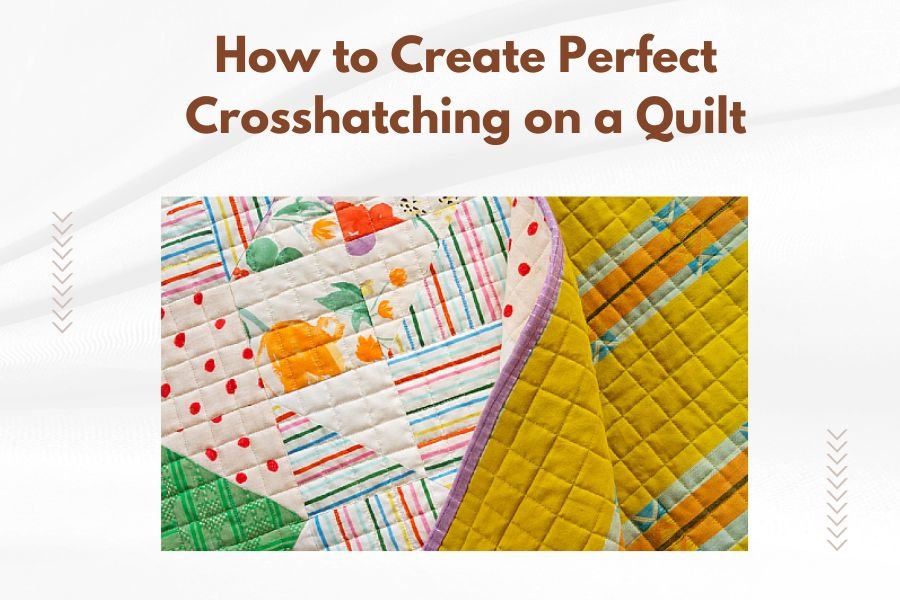
Start with diagonal lines spaced 1-2 inches apart in one direction, then cross them at 90-degree angles to create the classic diamond pattern that makes crosshatching so beautiful.
What Is Crosshatching and Why Use It
Crosshatching creates a grid of intersecting diagonal lines across your quilt surface. Think of it like drawing a tic-tac-toe board, but much larger and prettier.
This quilting pattern works well on almost any quilt design. It adds texture without competing with your fabric patterns. Plus, it’s forgiving for beginners since small mistakes blend into the overall design.
Benefits of Crosshatch Quilting
You get even quilt stability across the entire surface. The intersecting lines distribute tension equally, preventing puckering or bunching.
Crosshatching also quilts large areas quickly. Once you find your rhythm, you can cover space faster than with complex motifs.
Essential Tools for Perfect Crosshatching
Your sewing machine needs a few key accessories to make crosshatching work smoothly.
Walking Foot vs Regular Presser Foot
A walking foot feeds all quilt layers evenly. This prevents the top fabric from shifting while you sew long straight lines.
Can you use a regular foot? Yes, but you’ll fight fabric shifting constantly. Save yourself the headache and use a walking foot.
Quilting Extension Table
Large quilts need support. An extension table keeps your quilt level with the machine bed. Without it, the quilt’s weight pulls down and creates uneven stitches.
DIY Extension Table Options
No extension table? Set up a card table next to your machine at the same height. Cover it with a smooth tablecloth so the quilt glides easily.
Marking Tools You’ll Actually Use
Quilting rulers help you mark straight lines. Choose washable fabric markers or quilting tape that removes cleanly.
Some quilters skip marking entirely. They use the edge of their walking foot as a spacing guide. This works once you’re comfortable with the technique.
Planning Your Crosshatch Design
Measure your quilt top before you start. This helps you plan line spacing and avoid awkward partial diamonds at the edges.
Choosing Line Spacing
Start with 1.5 to 2-inch spacing between lines. Closer spacing creates more texture but takes longer. Wider spacing quilts faster but may not hold layers securely enough.
I found that 2-inch spacing works well for bed quilts. Wall hangings can handle closer spacing since they don’t need as much structural support.
| Quilt Size | Recommended Spacing | Quilting Time |
|---|---|---|
| Lap Quilt | 1.5-2 inches | 3-4 hours |
| Twin Bed | 2-2.5 inches | 5-6 hours |
| Queen Bed | 2.5-3 inches | 7-8 hours |
Marking Your First Line
Start with one diagonal line from corner to corner. This becomes your reference for all other lines.
Use a long quilting ruler to mark this line lightly. Don’t press hard – you just need a faint guide.
Setting Up Your Sewing Machine
Thread tension makes or breaks your crosshatching. Too tight and your quilt puckers. Too loose and stitches look messy.
Thread Selection Tips
Cotton thread works best for most quilts. Choose a color that blends with your overall design or creates subtle contrast.
Avoid heavy threads for crosshatching. They create thick line buildup where lines intersect. Stick with 40 or 50 weight cotton thread.
Bobbin Thread Considerations
Match your bobbin thread to the top thread or use white/cream for light quilts and gray/black for dark quilts. This prevents show-through on either side.
Stitch Length Settings
Set your machine for 10-12 stitches per inch. This creates strong seams without making the quilt stiff.
Test your settings on a practice sandwich first. Adjust until you’re happy with how it looks and feels.
Creating Your Quilt Sandwich
Layer your quilt backing, batting, and top carefully. Wrinkles or bubbles will show in your finished crosshatching.
Basting for Crosshatch Success
Spray basting works well for crosshatching since you’re not doing dense quilting that might gum up your needle.
Safety pin basting also works. Place pins every 4-6 inches, avoiding your planned quilting lines.
Temporary Basting Spray Tips
Work in a well-ventilated area. Spray the batting, not the fabric, to avoid residue on your quilt top.
Step-by-Step Crosshatching Process
Now comes the fun part. You’ll quilt all lines going in one direction first, then cross them with perpendicular lines.
Starting Your First Set of Lines
Begin with your marked diagonal line. Roll or fold the excess quilt to fit through your machine’s throat space.
Start sewing from one edge, keeping steady speed. Don’t rush – consistent speed creates even stitches.
Handling Quilt Bulk
Large quilts get heavy. Support the weight on your extension table or nearby surface. Let the quilt’s weight work with you, not against you.
Maintaining Consistent Spacing
After your first line, use your walking foot edge as a spacing guide. Line it up with your previous quilting line to maintain even spacing.
Some walking feet have adjustable guides. These help you keep parallel lines without constant measuring.
Dealing with Spacing Drift
Lines might gradually drift closer or farther apart as you work across the quilt. Check your spacing every few lines and adjust as needed.
Completing the Second Direction
Once you finish all lines in one direction, rotate your quilt and start the crossing lines. These should intersect at 90-degree angles for classic crosshatching.
The intersections might feel slightly bulky under your needle. Sew slowly through these areas to maintain even stitches.
Troubleshooting Common Crosshatching Problems
Even experienced quilters run into challenges with crosshatching. Here’s how to fix the most common issues.
Puckering and Bunching
Puckering usually means your thread tension is too tight or you’re pulling the fabric while sewing.
Let your walking foot do the work. Guide the fabric gently without tugging or pushing.
Tension Adjustment Tips
Lower your top tension slightly if you see puckering. Test on scraps first to find the sweet spot for your machine and thread combination.
Uneven Line Spacing
If your spacing varies, mark more guidelines. It’s better to mark extra lines than try to fix uneven spacing later.
You can also use quilting tape as a temporary guide. Apply it parallel to your previous line, quilt along the edge, then remove it.
Thread Breaks and Skipped Stitches
Change your needle if thread keeps breaking. Quilting through three layers dulls needles quickly.
Use a quilting needle designed for multiple fabric layers. Size 90/14 works well for most cotton quilts.
Finishing Touches for Professional Results
Clean finishing makes your crosshatching look professional. Take time with these final steps.
Securing Thread Ends
Pull all thread tails to one side of the quilt. Thread them through a hand needle and bury them in the batting layer.
Don’t just trim thread ends flush. They’ll work loose over time and create messy fraying.
The Proper Burial Technique
Insert your threaded needle about an inch away from where the thread emerges. Bring it up through just the batting and backing, then trim the excess.
Advanced Crosshatching Variations
Once you master basic crosshatching, try these variations for more visual interest.
Double Crosshatching
Add a second set of crosshatch lines between your first set. This creates smaller diamonds and more texture.
Space the second set halfway between your original lines. The result looks complex but uses the same basic technique.
Echo Crosshatching
Quilt additional lines parallel to your original crosshatch, spaced about 1/2 inch away. This creates a ripple effect around your basic grid.
Conclusion
Perfect crosshatching comes down to preparation and patience. Set up your machine properly, choose appropriate spacing, and maintain steady speed throughout your quilting.
Remember that small imperfections add character to handmade quilts. Focus on overall consistency rather than perfection in every single line. Your crosshatched quilt will become a treasured piece that showcases both traditional technique and your personal quilting journey.
Start with a small practice piece if you’re new to crosshatching. Once you feel confident with the process, move on to larger projects. Each quilt will improve your technique and build your confidence for future quilting adventures.
How far apart should crosshatch lines be on a baby quilt?
Baby quilts work well with 1 to 1.5-inch spacing between crosshatch lines. This closer spacing provides better durability for frequent washing while still being manageable for quilting. The smaller scale also looks more proportionate on baby-sized quilts.
Can you crosshatch without a walking foot?
Yes, but it’s much more challenging. Use your hands to keep all three quilt layers aligned as you sew. Work slowly and stop frequently to check for shifting. Consider using more basting to help hold layers in place if you must work without a walking foot.
What’s the best batting for crosshatch quilting?
Low-loft cotton or cotton-poly blend batting works best for crosshatching. These battings lie flat and don’t create excess bulk at line intersections. Avoid high-loft or wool batting, which can make the intersections too thick for smooth machine quilting.
How do you fix crooked crosshatch lines after quilting?
You can’t easily fix significantly crooked lines without removing stitches. For slightly wavy lines, the overall crosshatch pattern often disguises minor imperfections. If lines are very crooked, carefully remove the stitching with a seam ripper and re-quilt that section.
Should crosshatch lines extend into the border area?
This depends on your quilt design. If your border is plain fabric, extending crosshatch lines creates unity. If your border has complex patterns or different quilting motifs, stop crosshatching at the border seam and quilt the border separately with complementary patterns.