Echo quilting on your sewing machine creates flowing, curved lines that follow the outline of your quilt design at consistent distances.
You can master this technique by adjusting your machine’s tension, using the right foot, and practicing steady hand movements to create beautiful ripple effects across your fabric.
What Is Echo Quilting?
Echo quilting mimics the ripple effect you see when a stone drops into calm water. Each curved line flows around your main design element, getting progressively larger as it moves outward.
Think of it like drawing concentric circles around a rock, but with graceful curves instead. The spacing between each “echo” stays the same throughout your design, creating visual rhythm and texture.
Why Choose Echo Quilting
This quilting style adds movement to your projects without competing with your main focal points. It works beautifully around appliqué work, embroidered designs, or pieced blocks.
From what I read, many quilting experts recommend echo quilting for beginners because it’s forgiving. Small imperfections actually add to the handmade charm.
Essential Equipment for Success
You don’t need expensive specialty tools to start echo quilting. Your regular sewing machine can handle this technique with a few simple adjustments.
Machine Setup Requirements
First, drop your feed dogs or cover them with a plate. This lets you move the fabric freely in any direction under the needle.
Install a darning foot or free-motion quilting foot. These feet hover slightly above the fabric, giving you better visibility while maintaining proper tension.
Thread and Needle Selection
Use cotton quilting thread in the top and bobbin for best results. The thread weight should match your fabric – typically 40 or 50 weight thread works well.
Choose a size 90/14 quilting needle. It’s strong enough to penetrate multiple layers without creating large holes in your fabric.
Marking Tools You Need
Water-soluble fabric markers help you draw your first few echo lines as guides. After that, you’ll eyeball the spacing.
Quilting rulers with curved edges can help you establish consistent spacing, especially when you’re learning the technique.
Preparing Your Quilt Sandwich
Layer your quilt top, batting, and backing fabric as usual. Pin or spray-baste the layers together, keeping the center area smooth.
Start with a smaller practice piece before tackling a full quilt. A 12-inch square gives you enough space to practice without overwhelming complexity.
Batting Choice Matters
Low-loft cotton or cotton-poly blend batting works best for echo quilting. Thick batting makes it harder to maneuver smoothly around curves.
I found that many quilters prefer needle-punched batting because it doesn’t shift as much during free-motion quilting.
Step-by-Step Echo Quilting Process
Begin by identifying your starting point – usually the edge of an appliqué shape or pieced block. This becomes your first “echo line” to follow.
Creating Your First Echo
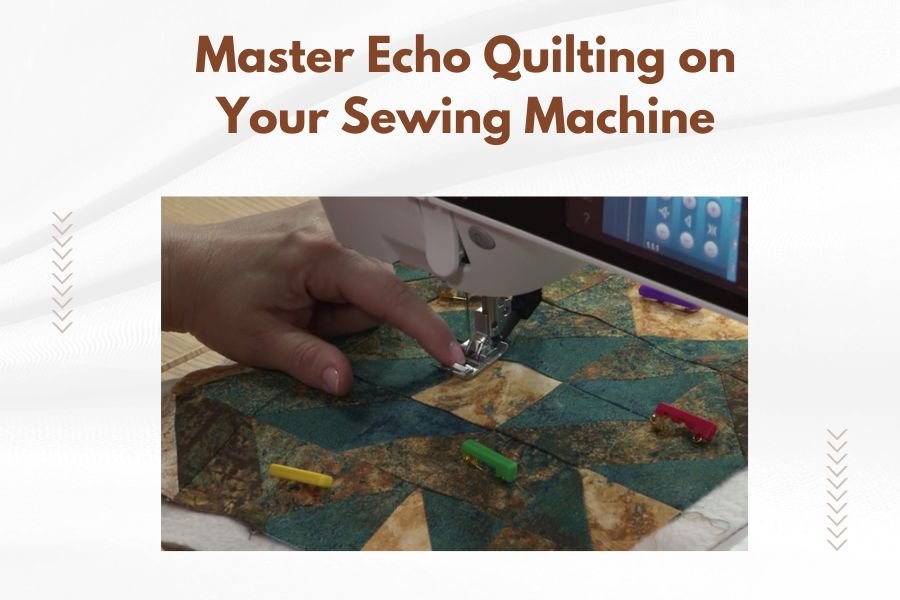
Position your quilt under the needle about 1/4 inch away from your starting shape. Lower the presser foot and take one stitch to bring up the bobbin thread.
Hold both thread tails and begin stitching slowly. Move the fabric smoothly to create gentle curves that follow the shape of your design element.
Maintaining Consistent Speed
Keep your machine running at a steady, moderate pace. Moving the fabric too fast creates large stitches. Moving too slow creates tiny, dense stitches.
The goal is 10-12 stitches per inch. This creates smooth lines without thread buildup.
Adding Subsequent Echo Lines
After completing your first echo, start the second line the same distance away from the first line as your first was from the original shape.
Don’t worry about perfect spacing. Slight variations actually make the design more interesting and natural-looking.
Connecting Echo Lines Smoothly
When you reach your starting point, overlap the stitching by about 1/4 inch. This secures the thread without creating obvious start and stop points.
Move outward to begin your next echo line, maintaining the same gentle curves and spacing.
Common Mistakes and Quick Fixes
Even experienced quilters face challenges with echo quilting. Here are the most common issues and simple solutions.
Uneven Spacing Problems
If your echo lines start bunching together or spreading too far apart, stop and reassess. Place a finger on your last completed line and use it as a spacing guide.
Remember, slight imperfections add character. Don’t rip out stitching unless the spacing is dramatically off.
Tension Issues
Puckering fabric usually means your top tension is too tight. Reduce the tension gradually until the fabric lays flat.
Loops on top indicate loose bobbin tension or too-loose top tension. Check both and adjust accordingly.
Thread Breaking Solutions
Thread breaks often happen when you’re moving the fabric too quickly or using old, brittle thread. Slow down your fabric movement and check your thread quality.
A dull needle can also cause thread breaks. Change needles after every 8-10 hours of quilting time.
Advanced Echo Quilting Techniques
Once you master basic echo quilting, you can try variations that add extra visual interest to your projects.
Double Echo Method
Create two echo lines close together, then leave a larger space before the next pair. This creates a rhythmic pattern that draws the eye around your design.
Research shows this technique works especially well on large quilts where single echo lines might look too sparse (Quilting Arts Magazine).
Graduated Echo Spacing
Start with narrow spacing near your central design, then gradually increase the space between echo lines as you move outward. This creates depth and dimension.
Echo Quilting Around Multiple Elements
When echo quilting around several design elements, let the echo lines intersect and flow into each other. This creates organic, water-like patterns.
Don’t try to keep each element’s echoes separate. The overlapping lines add movement and unity to your overall design.
Troubleshooting Table
| Problem | Likely Cause | Quick Fix |
|---|---|---|
| Fabric puckering | Tension too tight | Reduce top tension setting |
| Uneven stitches | Inconsistent fabric speed | Practice steady movement |
| Thread nests on bottom | Loose top tension | Increase tension slightly |
| Needle keeps breaking | Wrong needle size/type | Switch to quilting needle |
Practice Projects to Build Skills
Start with simple shapes to build your confidence and muscle memory. A single appliqué flower or heart gives you manageable curves to follow.
Beginner-Friendly Designs
Large, simple shapes work best for first attempts. Avoid intricate designs with lots of points or tight curves until you’re comfortable with the basic motion.
I found online that many quilting teachers recommend practicing on paper first. Draw a simple shape, then practice drawing echo lines around it to train your eye.
Building Muscle Memory
Consistent practice, even just 15 minutes a day, builds the muscle memory you need for smooth echo quilting. Your hands learn to move naturally around curves.
Design Ideas for Echo Quilting
Echo quilting works beautifully around many different design elements. Here are some ideas to spark your creativity.
Around Appliqué Work
Flowers, leaves, and other organic shapes naturally lend themselves to echo quilting. The curved lines complement the soft edges of appliqué pieces.
Geometric Shapes
Even squares and triangles can look stunning with echo quilting around them. The curves soften the hard edges and add movement.
Border Applications
Echo quilting can fill large border areas beautifully. Start with a vine or swag design, then echo around it to fill the space.
Many quilters use this technique to connect the main body of the quilt with its borders visually.
Conclusion
Echo quilting transforms your sewing machine into a tool for creating flowing, artistic designs that add movement and texture to any quilt project. With practice and patience, you’ll develop the steady hand control needed to create beautiful ripple effects around your favorite design elements.
Start small, be patient with yourself, and remember that slight imperfections add handmade charm to your finished quilts. Soon you’ll be adding this versatile technique to quilts of all sizes and styles.
How far apart should echo quilting lines be spaced?
Most echo quilting lines are spaced 1/4 to 1/2 inch apart, but you can vary this based on your design and quilt size. Larger quilts can handle wider spacing, while smaller projects look better with closer lines.
Can I use echo quilting on a regular home sewing machine?
Yes, any sewing machine with drop feed dogs or a feed dog cover can handle echo quilting. You’ll also need a darning foot or free-motion quilting foot for best results.
What’s the best way to end echo quilting lines neatly?
Overlap your stitching by about 1/4 inch where lines meet, then pull threads to the back and tie them off. This creates invisible starts and stops without bulk on the quilt front.
Should I mark all my echo lines before quilting?
Only mark the first one or two echo lines as guides. After that, use your eye to judge spacing – this creates more natural-looking results than perfectly measured lines.
How do I echo quilt around sharp points and corners?
Soften sharp points by rounding them slightly in your echo lines. This prevents awkward direction changes and creates smoother, more flowing designs around angular shapes.