Quilting a baby quilt on your home machine takes 3-6 hours using straight-line or echo quilting patterns with cotton batting and a walking foot.
You’ll need fabric quarters, batting, backing fabric, and basic quilting supplies to create a beautiful handmade baby quilt at home.
What You Need Before Starting
Getting your supplies ready makes the whole process smoother. I found that having everything laid out before you start saves tons of time later.
Your fabric needs include four to six fat quarters for the top, one yard of backing fabric, and crib-size batting. Pick soft cotton fabrics that can handle frequent washing.
Essential Tools and Supplies
Your sewing machine needs a walking foot attachment. This prevents fabric layers from shifting while you quilt.
- Rotary cutter and cutting mat
- Quilting ruler (at least 6 inches wide)
- Safety pins or quilting clips
- Cotton thread in neutral colors
- Seam ripper (trust me, you’ll need it)
- Quilting gloves for better grip
Choosing the Right Batting
Cotton batting works best for baby quilts because it’s breathable and safe. Polyester batting is also fine, but avoid wool or silk for babies.
Low-loft batting (thin) is your friend here. It’s easier to handle on a home machine and creates a soft, cuddly quilt.
Planning Your Baby Quilt Design
Simple designs work best when you’re starting out. A basic patchwork or strip quilt looks beautiful and stays manageable.
Size Guidelines for Baby Quilts
| Quilt Type | Size | Best For |
|---|---|---|
| Receiving blanket | 30″ x 30″ | Swaddling, tummy time |
| Crib quilt | 36″ x 45″ | Crib use, toddler bed |
| Play mat | 42″ x 42″ | Floor play, wall hanging |
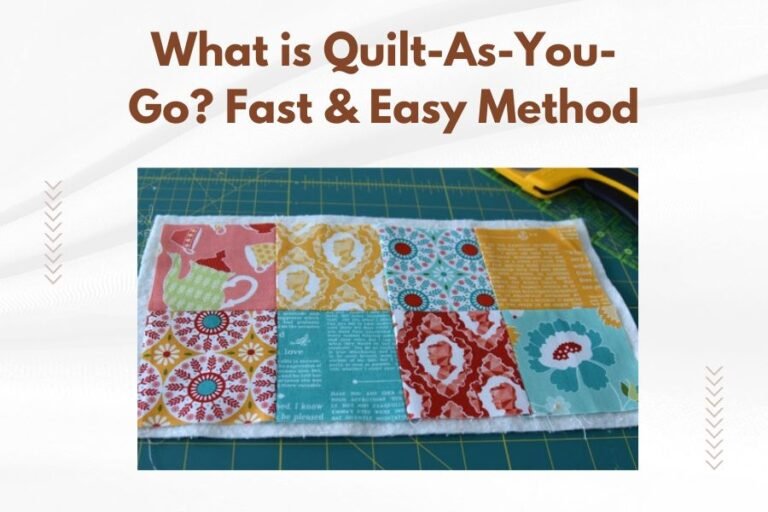
Easy Beginner Patterns
Strip quilts are perfect for first-timers. Cut fabric into strips, sew them together, then quilt with straight lines.
Four-patch blocks also work well. You’re just sewing squares together in groups of four, then joining the blocks.
Preparing Your Quilt Top
Accuracy matters here, but don’t stress about perfection. Babies won’t notice if your seams are off by an eighth of an inch.
Cutting Your Fabric
Wash and iron your fabrics first. Pre-shrinking prevents surprises after the quilt’s first wash.
Use a rotary cutter for straight, clean cuts. Your quilting ruler helps keep everything square and even.
Piecing the Top Together
Sew with a quarter-inch seam allowance. Most quilting patterns assume this measurement.
Press seams as you go. I found that pressing toward the darker fabric helps hide the seam lines better.
Joining Blocks and Strips
Pin at seam intersections to keep everything lined up. Take your time here – rushing leads to wonky blocks.
Check your block sizes as you work. All blocks should measure the same before you join them together.
Creating the Quilt Sandwich
This step determines how easy your actual quilting will be. A well-made sandwich stays smooth while you sew.
Laying Out Your Layers
Start with the backing fabric face-down on a large table or clean floor. Smooth out any wrinkles with your hands.
Add the batting next, centering it over the backing. The batting should be about two inches larger than your quilt top on all sides.
Basting the Layers Together
Place your quilt top face-up on the batting. Double-check that everything lies flat and smooth.
Pin every 4-6 inches across the entire quilt. Start in the center and work outward to avoid puckering.
Alternative Basting Methods
Quilting clips work faster than pins for some people. They don’t poke you while you’re maneuvering the quilt.
Spray basting is another option, but I found it can be messy and expensive for beginners.
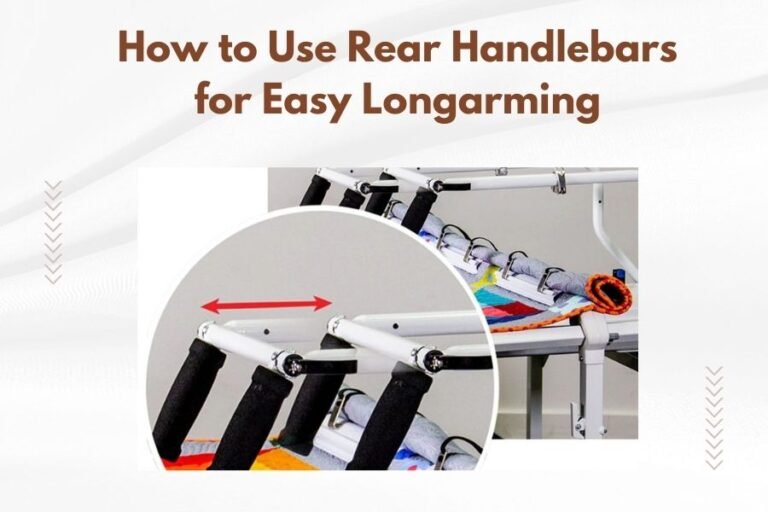
Setting Up Your Home Machine
Your machine setup makes or breaks this project. Get it right, and quilting becomes much more enjoyable.
Installing the Walking Foot
The walking foot feeds all quilt layers through at the same rate. Without it, you’ll get puckers and shifted fabric.
Follow your machine’s manual for installation. Most walking feet attach where your regular presser foot goes.
Thread and Tension Settings
Use the same thread in the bobbin and on top for the most consistent stitches. Cotton or poly-cotton blend works well.
Test your tension on fabric scraps first. The stitches should look balanced on both sides of the fabric.
Needle Selection
A size 90/14 universal needle handles most quilting jobs. Change to a fresh needle before starting your project.
Quilting needles have a slightly different point that penetrates layers more easily.
Quilting Techniques for Beginners
Simple quilting patterns look just as lovely as fancy ones. Start with techniques you can handle confidently.
Straight Line Quilting
This is your best friend as a beginner. Quilt in straight lines across your entire quilt, spacing them 1-3 inches apart.
You can quilt diagonally, vertically, or horizontally. Mix directions for visual interest.
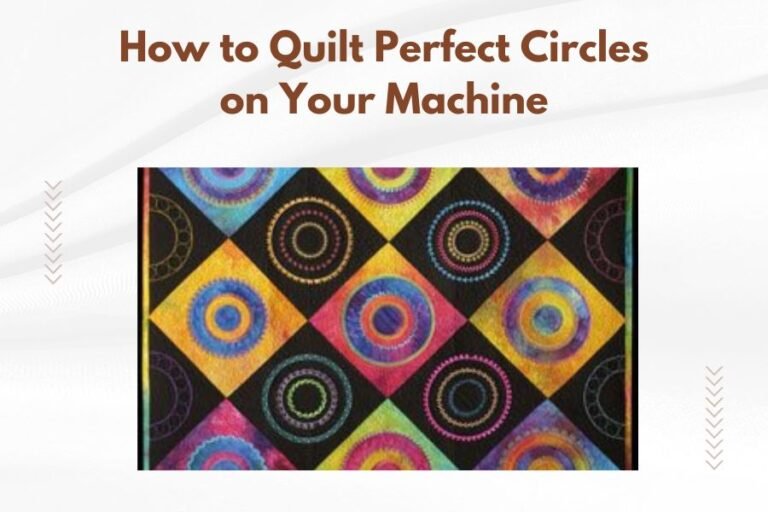
Echo Quilting
Quilt around your pieced shapes, then add lines that “echo” those shapes at regular intervals.
This technique works beautifully around applique shapes or large pieced blocks.
Stitch in the Ditch
Quilt right along your seam lines. This technique secures the layers without adding much visual texture.
Use thread that matches your fabric so the quilting lines nearly disappear.
Managing the Quilt While Sewing
Baby quilts are small enough to handle easily, but you still need good technique to avoid frustration.
Supporting the Quilt Weight
Set up a card table to the left of your machine. This supports the quilt’s weight and prevents pulling.
Roll up sections of the quilt that aren’t being sewn. Quilting clips hold the rolls in place.
Keeping Lines Straight
Use your machine’s seam guides or add painter’s tape as a guide line. Keep the fabric edge against your guide.
Go slowly at first. Speed comes with practice, but accuracy matters more than speed.
Troubleshooting Common Problems
Every quilter runs into snags. Knowing how to fix them keeps you moving forward.
Fabric Puckering
Puckers usually mean your layers shifted during quilting. Check that your walking foot is working properly.
Loosen your grip on the fabric. Let the walking foot do its job of feeding the layers through evenly.
Thread Breaking
Old thread breaks more often. Use fresh, high-quality thread for better results.
Check your needle too. A dull or damaged needle can cause thread problems.
Uneven Stitches
Tension problems cause uneven stitches. Test on scraps and adjust until the stitches look balanced.
Sewing too fast can also create uneven stitches. Slow down and let the machine work at its own pace.
Finishing Your Baby Quilt
The binding gives your quilt clean, finished edges that can handle lots of washing and loving.
Trimming the Excess
Trim the batting and backing even with your quilt top using a rotary cutter. Square up the corners carefully.
Leave about a quarter-inch of batting and backing beyond the quilt top edges for the binding.
Adding the Binding
Cut binding strips 2.5 inches wide. You’ll need enough strip length to go around your quilt plus 10 inches extra.
Sew the binding to the front first, then fold it around to the back and hand-stitch it down.
Care Instructions for Baby Quilts
Baby quilts need gentle care to stay soft and beautiful through lots of use.
Washing Guidelines
Wash in cool water on a gentle cycle. Harsh detergents can irritate baby’s sensitive skin.
Air dry when possible, or use low heat in the dryer. High heat can shrink cotton fabrics unevenly.
Conclusion
Making a baby quilt on your home machine is totally doable with the right preparation and patience. Start with simple designs and basic quilting techniques to build your confidence. Remember that handmade gifts come from the heart – small imperfections just add character and show the love you put into every stitch. The baby who receives your quilt will treasure it for years to come, and you’ll have learned skills that open the door to many more quilting adventures.
How long does it take to quilt a baby quilt on a home machine?
A simple baby quilt typically takes 3-6 hours of actual sewing time, spread over several days. This includes piecing the top, basting, quilting, and binding. Your first quilt may take longer as you learn techniques.
Can I quilt a baby quilt without a walking foot?
While possible, quilting without a walking foot makes the job much harder and can cause fabric shifting and puckers. Walking feet cost $25-50 and make an enormous difference in your results.
What’s the best batting thickness for a baby quilt?
Low-loft batting (1/8 to 1/4 inch thick) works best for baby quilts. It’s easier to quilt on a home machine, creates less bulk, and makes a cuddly finished quilt that’s safe for babies.
Should I pre-wash fabrics before making a baby quilt?
Yes, always pre-wash fabrics for baby quilts. This removes manufacturing chemicals, prevents shrinkage after the quilt is finished, and ensures the fabrics are clean and safe for baby’s sensitive skin.
How do I fix puckering that happens while quilting?
Stop sewing immediately when you notice puckering. Remove the problem stitches with a seam ripper, smooth the layers, and re-baste if needed. Check that your walking foot is installed correctly and reduce pressure on the fabric as you guide it.