Replacing a worn quilting machine belt requires removing the machine cover, loosening the motor mount, sliding off the old belt, and installing the new one with proper tension.
Most quilting machine belts need replacement every 2-3 years depending on usage, and the process typically takes 30-60 minutes with basic tools.
Signs Your Quilting Machine Belt Needs Replacement
Your quilting machine will tell you when its belt is wearing out. You just need to know what to look for.
The most obvious sign is slipping. When you press the foot pedal, the machine sounds like it’s working but the needle moves slowly or stops completely. It’s like trying to ride a bike with a loose chain.
Visual Signs of Belt Wear
Take a peek under your machine’s cover. A healthy belt looks smooth and uniform. A worn belt shows these problems:
- Cracks running along the length
- Frayed or fuzzy edges
- Shiny, glazed appearance
- Missing chunks or pieces
- Stretched appearance when compared to a new belt
Performance Issues That Signal Belt Problems
Your machine’s behavior changes when the belt starts failing. Watch for these warning signs:
- Inconsistent stitching speed
- Squealing or squeaking sounds during operation
- Complete loss of needle movement
- Burning rubber smell
- Excessive vibration during quilting
Tools and Materials You’ll Need
Gathering the right tools makes this job much easier. Most of these items are probably already in your toolbox.
Essential Tools
- Screwdriver set (Phillips and flathead)
- Adjustable wrench or socket set
- Flashlight or work light
- Clean rags or paper towels
- Camera or smartphone for reference photos
Safety Equipment
Safety comes first when working on any machine. You’ll want:
- Safety glasses
- Work gloves
- Non-slip shoes
Optional but Helpful Items
- Belt installation tool (makes stretching easier)
- Degreaser for cleaning pulleys
- Small brush for removing debris
Choosing the Right Replacement Belt
Not all belts are created equal. Using the wrong belt can damage your machine or create new problems.
Finding Your Belt Specifications
Your machine’s manual lists the exact belt size. Can’t find the manual? Check these places:
- Manufacturer’s website using your model number
- The old belt itself (size is often printed on it)
- Inside the machine cover (specifications sticker)
- Your local sewing machine dealer
Belt Types and Materials
Most quilting machines use V-belts made from rubber or synthetic materials. Research shows that synthetic belts last longer and resist stretching better than pure rubber (Manufacturing Engineering Society).
| Belt Material | Lifespan | Cost | Performance |
|---|---|---|---|
| Standard Rubber | 1-2 years | Low | Good for light use |
| Synthetic Rubber | 2-3 years | Medium | Better heat resistance |
| Kevlar-Reinforced | 3-5 years | High | Best for heavy use |
Preparing Your Machine for Belt Replacement
Preparation prevents accidents and makes the job go smoother.
Safety First
Always unplug your machine before starting any repair work. This might seem obvious, but many accidents happen when people forget this simple step.
Remove any quilting projects and clear your work area. You’ll need space to move around the machine and set parts down safely.
Taking Reference Photos
Snap photos of the belt routing before you remove anything. These pictures will save you headaches when it’s time to install the new belt.
Take shots from different angles. Focus on how the belt wraps around each pulley and any tensioning mechanisms.
Step-by-Step Belt Replacement Process
Now for the main event. Take your time and don’t rush through these steps.
Removing the Machine Cover
Most quilting machine covers attach with screws around the perimeter. Some models have snap-on covers that lift off easily.
Keep track of screws by placing them in a small bowl. Different screws might go in different locations, so organizing them saves time later.
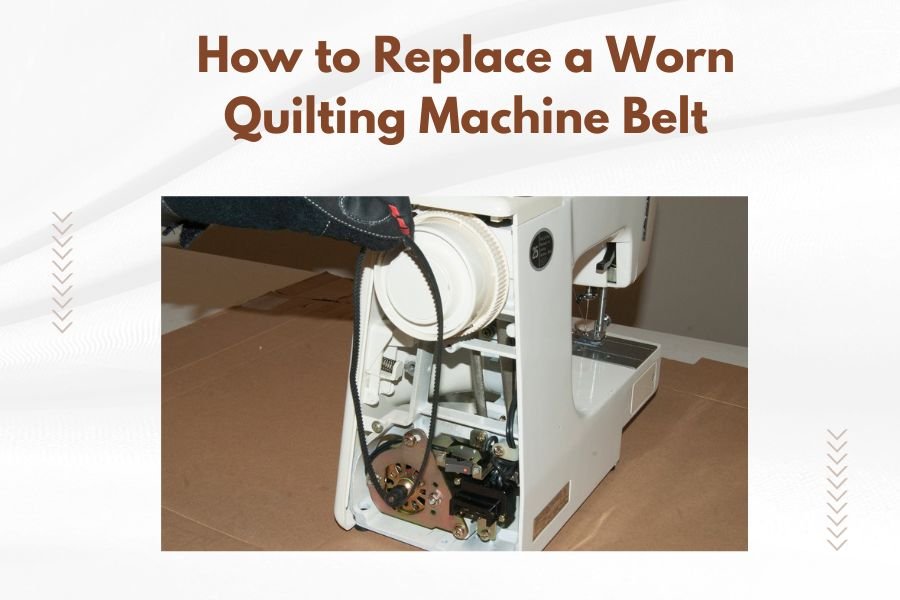
Accessing the Belt System
With the cover removed, you’ll see the motor, pulleys, and belt. The setup varies by manufacturer, but most follow a similar pattern.
Look for the motor mount. This usually has adjustment bolts that control belt tension. You’ll need to loosen these before removing the old belt.
Loosening the Motor Mount
The motor mount typically pivots to adjust belt tension. Locate the adjustment bolts and loosen them just enough to create slack in the belt.
Don’t remove the bolts completely unless your manual says to do so. You’re just creating room to work.
Removing the Old Belt
With tension released, the old belt should slide off the pulleys easily. If it’s stuck, gently work it off by rotating the pulleys by hand.
Check the pulleys while you have them exposed. Clean off any rubber residue or debris with a rag.
Inspecting Related Components
This is a good time to check pulley alignment and condition. Worn or misaligned pulleys will eat up your new belt quickly.
Installing the New Belt
Installation is basically the reverse of removal, but with a few important considerations.
Routing the New Belt
Follow your reference photos to route the new belt correctly. The belt should sit in the grooves of each pulley, not ride on the edges.
Start by placing the belt on the larger pulley, then work it onto the smaller ones. This approach puts less stress on the belt.
Setting Proper Tension
Belt tension is critical. Too loose and it will slip. Too tight and it will wear out quickly or damage bearings.
The general rule is that you should be able to press the belt down about half an inch at its longest span between pulleys. This gives the right balance of grip and flexibility.
Testing Belt Tension
After adjusting tension, try turning the main pulley by hand. It should rotate smoothly without excessive resistance. The belt shouldn’t slip or make noise.
Fine-Tuning and Testing
Don’t button everything up just yet. Test your work first.
Initial Test Run
Replace the cover temporarily and plug in your machine. Run it slowly without any fabric to check for proper operation.
Listen for unusual noises. Watch for smooth, consistent needle movement. If something seems off, stop and recheck your work.
Full Speed Testing
Once basic operation looks good, test at higher speeds. The machine should respond smoothly to foot pedal pressure without hesitation or slipping.
Load Testing with Fabric
Finally, test with actual quilting. Use scraps of your typical fabric combinations. The machine should handle normal quilting loads without belt slipping.
Common Mistakes to Avoid
Learn from others’ mistakes to save yourself time and frustration.
Wrong Belt Size
Using a belt that’s too long or too short creates problems. A too-long belt won’t maintain proper tension. A too-short belt puts excessive stress on components.
Incorrect Tension
New belt installers often make belts too tight. They think tighter means better performance, but that’s wrong.
Over-tightened belts wear out motor bearings and create excessive friction. Follow the manufacturer’s tension specifications.
Ignoring Pulley Condition
Installing a new belt on worn pulleys is like putting new tires on bent wheels. The underlying problem will destroy your new belt quickly.
Maintenance Tips to Extend Belt Life
A little prevention goes a long way toward avoiding future belt replacements.
Regular Cleaning
Keep the belt area clean and free of lint buildup. Fabric fibers can work their way into the belt grooves and cause premature wear.
Monthly cleaning with compressed air or a soft brush removes most debris.
Proper Storage
If you store your machine for extended periods, reduce belt tension slightly. This prevents the belt from taking a permanent set in one position.
Climate Control
Extreme temperatures and humidity affect rubber belts. Store your machine in a stable environment when possible.
When to Call a Professional
Some situations are beyond typical DIY comfort levels.
If your machine has multiple belts or complex tensioning systems, professional service might be worth the cost. The same goes if you discover other problems during belt replacement.
Bearing noise, shaft wobble, or pulley damage requires more extensive repair that most home quilters shouldn’t attempt.
Cost Considerations
Professional belt replacement typically costs between $75-150 depending on your location and machine complexity. DIY replacement costs $15-30 for the belt plus your time.
Troubleshooting Post-Installation Issues
Sometimes new problems appear after belt replacement. Here’s how to address them.
Belt Slipping
If your new belt slips, the tension is probably too low. Readjust according to your machine’s specifications.
Persistent slipping might indicate glazed pulleys that need cleaning or replacement.
Excessive Noise
New belts sometimes squeak initially as they break in. This usually stops after a few hours of operation.
Continued noise suggests misalignment or incorrect tension.
Vibration Problems
New vibration after belt replacement often means the belt isn’t seated properly in the pulley grooves. Recheck the installation.
Conclusion
Replacing a worn quilting machine belt is a manageable DIY project that saves money and keeps your machine running smoothly. The key is taking your time, using the right parts, and following proper procedures. With basic tools and careful attention to detail, most quilters can complete this repair in under an hour. Regular maintenance and proper belt tension will help your new belt last for years of quilting enjoyment.
How often should I replace my quilting machine belt?
Replace your quilting machine belt every 2-3 years with regular use, or sooner if you notice slipping, cracking, or performance issues. Heavy users may need annual replacement while occasional quilters might go 4-5 years between changes.
Can I use any V-belt as long as the size matches?
No, always use belts designed for sewing machines or the exact manufacturer specification. Generic automotive or industrial belts may have different compounds that don’t work well with the lower speeds and precision requirements of quilting machines.
What causes quilting machine belts to wear out quickly?
The main causes of premature belt wear include incorrect tension, dirty or worn pulleys, misalignment, excessive heat from poor ventilation, and using the wrong belt type. Lint buildup and oil contamination also accelerate belt deterioration.
Is it normal for a new belt to slip initially?
A properly installed new belt should not slip, even initially. If your new belt slips, check the tension adjustment and ensure it’s seated correctly in all pulley grooves. Some synthetic belts may need a brief break-in period but shouldn’t slip during normal operation.
Should I replace other parts when changing the belt?
Inspect pulleys, motor mounts, and tensioning hardware during belt replacement, but they don’t need routine replacement like the belt does. Replace these components only if you find damage, excessive wear, or alignment problems that could damage your new belt.