Clean your hook race by removing the bobbin case, brushing out lint and thread debris, and using compressed air to clear hard-to-reach areas.
Regular hook race cleaning prevents thread jams, reduces tension problems, and keeps your quilting machine running smoothly for years.
What Is a Hook Race and Why Does It Matter?
Your hook race sits at the heart of your sewing machine. It’s the curved track where your hook travels to catch the upper thread and form stitches.
Think of it like a tiny racetrack. When lint builds up on this track, your hook can’t move smoothly. This causes skipped stitches, thread breaks, and that annoying clicking sound.
I found that most quilting problems trace back to a dirty hook race. Many sewing machine repair shops report this as the top cause of service calls.
Signs Your Hook Race Needs Cleaning
Thread Issues
Does your thread keep breaking? Are you seeing loose or uneven stitches? These are red flags.
When thread debris clogs your hook race, it creates rough spots. Your thread catches on these spots and snaps.
Tension Problems
Suddenly having tension issues that won’t fix with dial adjustments? Your hook race might be the culprit.
Lint buildup changes how your thread moves through the machine. This throws off your carefully balanced tension settings.
Strange Noises
Listen to your machine. Do you hear grinding, clicking, or scraping sounds?
A clean hook race should run almost silently. Any unusual noise means something is blocking the smooth movement.
Essential Tools for Hook Race Cleaning
You don’t need expensive equipment. Most items are probably in your sewing room already.
- Small brush (old toothbrush works great)
- Compressed air can
- Lint brush or tweezers
- Soft cloth
- Sewing machine oil (if recommended by your manual)
- Good lighting or flashlight
What About Cleaning Products?
Skip the harsh chemicals. I researched this topic and found that most sewing machine manufacturers warn against using solvents or cleaning fluids.
Plain compressed air and a dry brush handle 99% of cleaning jobs safely.
Step-by-Step Hook Race Cleaning Process
Step 1: Power Down and Remove the Needle
Always unplug your machine first. Safety comes before everything else.
Remove your needle and presser foot. You need clear access to work comfortably.
Step 2: Remove the Bobbin and Bobbin Case
Take out your bobbin. Then lift out the bobbin case.
Some machines have a latch you flip up. Others require you to grab a small tab and pull straight up.
Can’t Remove Your Bobbin Case?
Check your manual. Some newer machines have fixed bobbin cases that don’t come out.
You can still clean around them, but be extra gentle.
Step 3: Inspect the Hook Race Area
Shine a light into the hook race. What do you see?
Look for thread bits, fabric fibers, and that grayish lint that loves to hide in corners.
I found that dark fabrics and batting create more lint than light colors. If you quilt with lots of dark materials, expect more buildup.
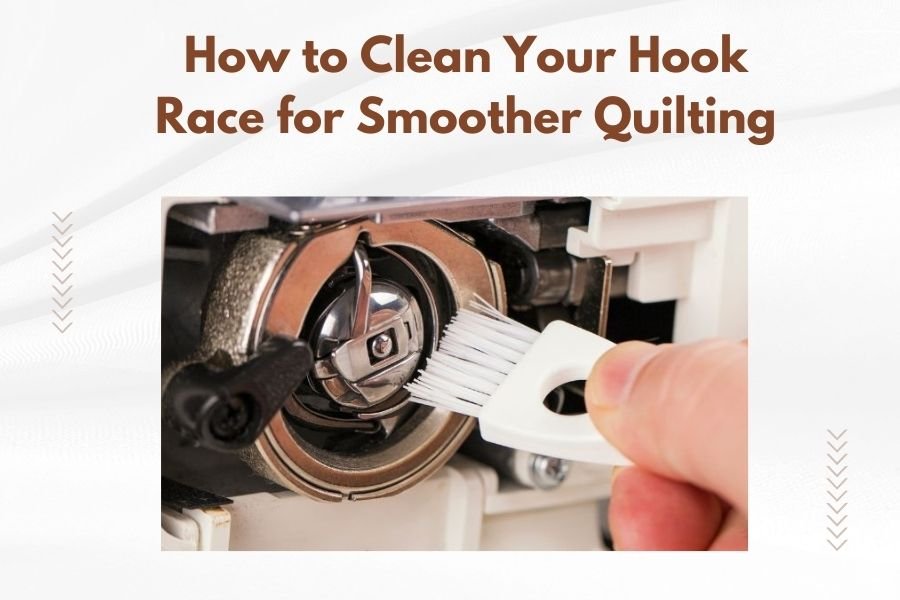
Step 4: Brush Out Loose Debris
Use your small brush to sweep out the obvious stuff. Work gently.
Brush in the same direction the hook travels. This prevents pushing debris deeper into tight spots.
Pro Tip for Stubborn Lint
Tweezers work great for grabbing thread tails that won’t brush out. Just don’t scratch the metal surfaces.
Step 5: Use Compressed Air
Hold the compressed air can upright. Short bursts work better than long sprays.
Blow air in different directions to dislodge hidden lint. You’ll be amazed what comes flying out.
Compressed Air Safety
Keep the can at least 6 inches away from your machine. Too close can damage delicate parts.
Never tip the can sideways. This can spray liquid propellant instead of air.
Step 6: Clean the Bobbin Case
Don’t forget this part. Your bobbin case collects lots of lint too.
Use your brush to clean inside and outside the case. Check the tension spring area especially.
Step 7: Final Inspection
Look again with your light. The hook race should look shiny and smooth.
Run your finger gently around the race. You shouldn’t feel any rough spots or catch any lint.
When to Oil Your Hook Race
This depends on your machine type. Many modern machines are self-lubricating.
Check your manual first. Some manufacturers void warranties if you oil parts that don’t need it.
If Your Manual Says to Oil
Use only sewing machine oil. One tiny drop goes a long way.
Put the oil where your hook rides in the race. Avoid getting oil on tension springs or rubber parts.
Reassembling Everything
Step 1: Replace the Bobbin Case
The bobbin case should drop in easily. Don’t force it.
Make sure any alignment tabs or notches line up correctly.
Step 2: Insert Your Bobbin
Thread should pull out smoothly with gentle tension. Too loose or too tight means something’s wrong.
Step 3: Replace Needle and Presser Foot
A fresh needle never hurts after a cleaning session. Dull needles create more lint and thread problems.
How Often Should You Clean Your Hook Race?
This varies based on how much you sew and what materials you use.
| Usage Level | Cleaning Frequency | Signs to Watch For |
|---|---|---|
| Heavy daily use | Every 2-3 days | Visible lint buildup |
| Regular quilting | Weekly | Thread tension changes |
| Occasional sewing | Monthly | Unusual machine sounds |
| Rare use | Before big projects | Dust accumulation |
Batting Makes a Difference
Polyester batting sheds more than cotton. Wool batting creates the least lint.
If you work with high-shed materials, clean your hook race more often.
Common Cleaning Mistakes to Avoid
Using the Wrong Tools
Metal tools can scratch your hook race. Stick to plastic, wood, or soft brushes.
I heard from repair technicians that scratched hook races cause ongoing thread problems.
Rushing the Process
Take your time. Missing a hidden clump of lint wastes all your effort.
Good lighting helps you spot problems before they become bigger issues.
Forgetting to Check Timing
If you accidentally move the hook while cleaning, your timing might be off.
Test with scrap fabric before starting your next project.
Troubleshooting After Cleaning
Machine Still Makes Noise
You might have missed some lint. Check again with better lighting.
Sometimes debris hides behind the hook or in feed dog areas.
Thread Problems Continue
Try a new needle and fresh thread. Old thread can cause issues that look like machine problems.
Check your needle size matches your thread weight too.
Preventing Future Buildup
Choose Quality Thread
Cheap thread sheds more fibers. It’s not worth the savings if you’re constantly cleaning lint.
Many experts recommend sticking with name-brand threads for regular quilting.
Maintain Consistent Tension
Wrong tension causes thread to fray and shed more. Keep your settings balanced.
Replace Needles Regularly
Dull needles tear fabric fibers instead of cutting them cleanly. This creates more lint.
Change needles every 8-10 hours of sewing time, or with each new project.
When to Call a Professional
Some problems need expert help. Don’t feel bad about seeking professional service.
Call a technician if you notice timing issues, bent hooks, or damage to the race itself.
Annual professional cleaning catches problems you might miss at home.
Conclusion
Cleaning your hook race isn’t glamorous work, but it makes a huge difference in your quilting experience. This simple maintenance task prevents most common sewing machine problems and extends your machine’s life.
Remember to work slowly, use the right tools, and clean regularly based on your usage. Your machine will thank you with smooth, consistent stitches and fewer frustrating interruptions to your creative time.
Start checking your hook race weekly and you’ll be amazed how much better your machine performs. Clean machines make happy quilters.
Why does my hook race get dirty so quickly?
Polyester threads and batting shed more fibers than natural materials. Dark fabrics also create more visible lint. Consider switching to higher-quality materials if buildup happens very fast.
Can I use a vacuum cleaner instead of compressed air?
Small handheld vacuums work well for loose lint, but compressed air reaches tighter spaces better. Some quilters use both methods together for thorough cleaning.
What if my bobbin case won’t come out after cleaning?
Don’t force it. Check that you’ve removed all lint from the edges and that any locking mechanisms are properly released. When in doubt, consult your manual or call a technician.
Is it normal to find metal shavings in my hook race?
Small amounts of metal dust can be normal in older machines, but larger shavings suggest wear or damage. Stop using the machine and have it inspected by a professional.
How do I know if I’ve damaged something during cleaning?
Test your machine with scrap fabric after cleaning. Watch for skipped stitches, timing issues, or unusual noises. If something seems wrong, stop sewing and get professional help.