Tighten loose longarm handlebars by adjusting the tension screws or bolts that connect the handlebars to the machine head – most machines have 2-4 adjustment points.
You can usually fix wobbly handlebars in under 10 minutes using basic tools like an Allen wrench set or screwdriver, depending on your machine model.
Nothing kills your quilting flow quite like handlebars that wiggle and shake with every stitch. When your longarm handlebars feel loose, you lose control over your stitching path. Your beautiful quilting patterns turn into wobbly messes.
The good news? Most handlebar problems stem from simple loosened hardware that you can tighten yourself. No need to call a repair tech for this common issue.
Why Longarm Handlebars Get Loose Over Time
Your longarm machine vibrates constantly during quilting. All that movement gradually loosens the bolts and screws holding your handlebars in place.
Temperature changes in your sewing room make metal parts expand and contract. This natural process can work screws loose over months of use.
Heavy quilting sessions put extra stress on handlebar connections. The more you quilt, the more likely you’ll need periodic tightening.
Signs Your Handlebars Need Attention
You’ll notice these warning signs before handlebars become dangerously loose:
- Slight wiggle when you grip the handles
- Vibration that feels different than normal
- Handlebars that shift position during quilting
- Unusual noise from the handle area
- Less precise control over stitching direction
Tools You’ll Need for the Job
Most handlebar adjustments require basic tools you probably already own. Gather these items before you start:
- Allen wrench set (most common sizes: 3mm, 4mm, 5mm, 6mm)
- Phillips head screwdriver
- Flathead screwdriver
- Small adjustable wrench
- Flashlight or phone light
Safety First
Always turn off your longarm machine before making any adjustments. Unplug the power cord if your machine has electronic features.
Never work on handlebars while the machine head can move freely. Lock the carriage in place or have someone hold it steady.
Step-by-Step Handlebar Tightening Process
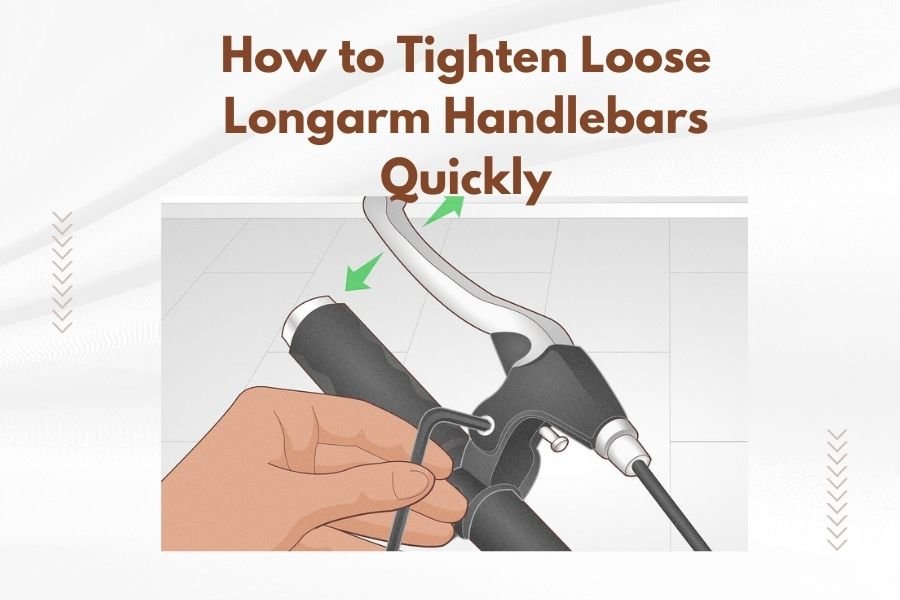
Start by examining where your handlebars connect to the machine head. Most longarm machines have two main connection points – one on each side of the head.
Step 1: Locate All Connection Points
Look for visible screws, bolts, or clamps where handlebars attach. Some machines hide these connections under small covers or plates.
Check both the front and back handlebar mounts. Many quilters forget about rear connections that also need periodic tightening.
Step 2: Test Each Connection
Gently try to wiggle each handlebar attachment point. You want to identify which specific connections feel loose.
Don’t force anything that feels tight already. Over-tightening can strip threads or crack mounting brackets.
What to Look For
Loose connections often show small gaps between metal parts. You might see scratches or wear marks where pieces have shifted.
Sometimes you’ll hear a slight rattle when you tap near a loose connection.
Step 3: Choose the Right Tool
Most modern longarm machines use Allen bolts (hex screws) for handlebar connections. Try different sizes until you find the perfect fit.
Older machines might use standard Phillips or flathead screws. Don’t force the wrong tool into a screw head.
Step 4: Tighten Gradually
Turn each screw or bolt clockwise in small increments. Go about a quarter turn, then test the connection.
Work on one connection point at a time. This helps you avoid over-tightening any single point.
The Right Amount of Tightness
Aim for “snug plus a little more” – tight enough that nothing moves, but not so tight you risk damaging threads.
Think of it like closing a pickle jar. You want it secure, but someone should still be able to open it later.
Common Handlebar Connection Types
Different longarm brands use various handlebar mounting systems. Here’s what I found from researching popular models:
Clamp-Style Connections
These use a clamp that wraps around the handlebar tube. You’ll see one or two bolts that squeeze the clamp tight.
Loosen these bolts to adjust handlebar height or angle. Tighten them to secure the position.
Bolt-Through Connections
Some machines run bolts completely through the handlebar and machine head. These create very strong connections.
You’ll typically find nuts on the back side that need tightening along with the front bolts.
Quick-Release Systems
Newer machines sometimes feature tool-free adjustment systems. These use lever-operated clamps or twist-lock mechanisms.
Even quick-release systems can develop play over time and need adjustment.
Troubleshooting Stubborn Problems
What if tightening doesn’t solve your wobbly handlebar problem? Sometimes you need to dig deeper.
Worn Mounting Hardware
Screws and bolts can wear out over years of use. Examine threads closely for damage or stripping.
Replace any hardware that looks worn. Most sewing machine dealers stock common bolts and screws.
Bent or Damaged Mounting Brackets
Heavy use or accidents can bend the metal brackets that hold handlebars. Look for obvious damage or cracks.
Small bends might be repairable. Large damage usually requires professional repair or bracket replacement.
When to Call a Professional
If you find cracked metal, stripped screw holes, or badly worn parts, stop working and contact your dealer.
Don’t attempt to weld or heavily modify mounting hardware yourself. These parts handle significant stress during quilting.
Preventing Future Handlebar Problems
Regular maintenance keeps handlebars tight and extends their life. Build these habits into your quilting routine:
Monthly Quick Checks
Spend two minutes each month testing handlebar tightness. Catch small problems before they become big ones.
Keep your Allen wrenches near your longarm machine for quick adjustments.
Proper Quilting Technique
Avoid putting excessive side pressure on handlebars during quilting. Let the machine do the work – you just guide it.
Don’t lean heavily on handlebars or use them to support your body weight.
Smart Storage Practices
If you store your longarm in an unheated space, expect more frequent handlebar adjustments due to temperature changes.
Cover your machine to reduce dust buildup around connection points.
Brand-Specific Tips
From what I researched online, different longarm brands have their own quirks:
| Brand | Common Tool Size | Special Notes |
|---|---|---|
| Handi Quilter | 5mm Allen | Check rear connections too |
| APQS | 1/4″ Allen | Some models have quick-release |
| Innova | Phillips screws | Look under plastic covers |
| Gammill | 6mm Allen | Two-bolt system per side |
Check Your Manual
Your owner’s manual shows exactly where to find adjustment points on your specific model. Keep it handy for reference.
Many manufacturers also post video tutorials online showing proper adjustment techniques.
What Not to Do
Avoid these common mistakes that can damage your longarm machine:
Over-Tightening Bolts
More isn’t always better. Extremely tight bolts can crack mounting brackets or strip screw threads.
If a connection still feels loose after reasonable tightening, the problem might be worn hardware, not insufficient tightness.
Using Wrong Tools
Don’t use pliers on Allen bolts or force screwdrivers into hex screws. Wrong tools damage hardware and make future adjustments harder.
Invest in a good Allen wrench set. Your longarm machine will thank you.
Ignoring Other Components
While you’re working on handlebars, check nearby components too. Loose handlebars often indicate that other connections need attention.
Look at machine head mounting points and carriage wheels for signs of looseness.
Conclusion
Loose longarm handlebars are annoying but easily fixed with basic tools and a few minutes of work. Regular monthly checks prevent small problems from becoming major headaches. Remember to tighten gradually, use the right tools, and don’t overdo it. Your quilting precision depends on solid, stable handlebars that respond to your every move. Take care of them, and they’ll take care of your quilting for years to come.
Can I adjust handlebar height while fixing loose connections?
Yes, most handlebar systems let you adjust height and angle during tightening. Loosen connections, set your preferred position, then retighten. Mark your ideal settings with tape for future reference.
How often should I check my longarm handlebars for tightness?
Check handlebar connections monthly if you quilt regularly, or every few months for occasional users. Heavy quilting schedules might need weekly checks during busy periods.
What if my handlebars still wobble after tightening everything?
Persistent wobbling usually means worn bushings, bent brackets, or damaged mounting hardware. These problems need professional repair or part replacement from your dealer.
Is it normal for new longarm handlebars to need retightening?
Yes, new machines often need handlebar adjustments during the first few months as parts settle in. This is normal break-in behavior, not a defect.
Can loose handlebars damage my quilting projects?
Loose handlebars make precise stitching nearly impossible and can cause uneven tension or skipped stitches. Fix them before starting any important quilting project to avoid disappointing results.