Your take-up spring adjusts thread tension during the sewing cycle by creating the right amount of pull when the needle moves up and down.
A properly adjusted take-up spring prevents thread breaks, skipped stitches, and loose tension that ruins your quilting projects.
What Is a Take-Up Spring and Why Does It Matter
Think of your take-up spring as the conductor of your sewing machine’s thread orchestra. It works with the needle to create smooth, even stitches by controlling thread flow at just the right moments.
When your needle goes down into the fabric, the spring releases thread. When the needle comes back up, the spring pulls the thread tight to form a perfect stitch. Without proper adjustment, this dance falls apart.
Signs Your Take-Up Spring Needs Adjustment
You’ll know something’s wrong when these problems show up in your quilting:
- Thread keeps breaking during sewing
- Stitches look loose or uneven
- Your machine skips stitches randomly
- Thread pools or bunches under the fabric
- Top thread doesn’t pull tight enough
Tools You’ll Need for Spring Adjustment
Gather these items before you start working on your machine:
- Small screwdriver set (usually Phillips head)
- Needle-nose pliers
- Good lighting or flashlight
- Your sewing machine manual
- Test fabric scraps
- Thread for testing
Safety First
Always unplug your sewing machine before making any adjustments. You don’t want the machine to start while your fingers are near moving parts.
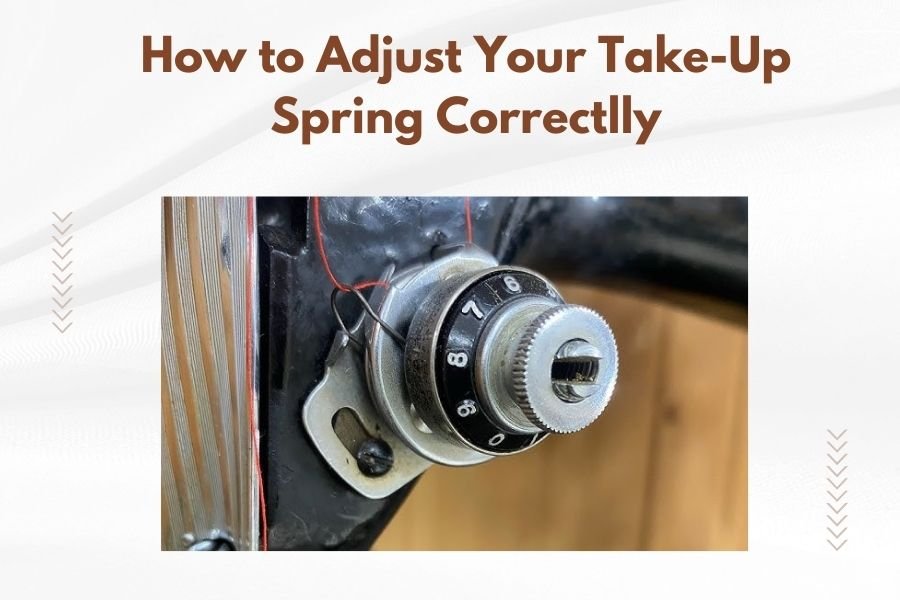
Finding Your Take-Up Spring
The take-up spring sits inside your machine’s front panel, usually near the top thread path. On most quilting machines, you’ll find it close to where the thread goes from the tension discs to the needle.
Locating the Spring on Different Machine Types
Each brand puts the spring in a slightly different spot. Here’s where to look:
Brother Machines
Look for a small coiled spring behind the front cover panel. It’s often visible through a small opening without removing covers.
Janome and Elna Models
The spring usually sits near the thread guide post. You might need to remove the front face plate to access it clearly.
Singer and Pfaff Machines
Check inside the upper thread path area. The spring often connects to a small lever mechanism.
Step-by-Step Spring Adjustment Process
Now let’s walk through the actual adjustment. Take your time with each step.
Step 1: Remove the Necessary Panels
Most machines require removing the front cover or side panel. Your manual shows exactly which screws to remove. Keep track of these tiny screws in a small bowl.
Step 2: Examine the Current Spring Position
Look at how the spring connects to its mounting points. Take a photo with your phone so you remember the original setup.
The spring should have gentle tension – not stretched tight, but not completely loose either.
Step 3: Test Current Tension
Gently press the spring with your finger. It should compress about halfway with light pressure. If it feels too stiff or too loose, adjustment is needed.
Too Tight Spring Symptoms
A spring that’s too tight will break threads constantly. You’ll hear a sharp snapping sound when threads break under too much tension.
Too Loose Spring Problems
A loose spring creates sloppy stitches. Your thread won’t pull tight enough to form proper knots between the top and bottom threads.
Making the Actual Adjustments
Here’s where the real work happens. Most take-up springs adjust in one of three ways.
Screw-Type Adjustments
Many machines use a small screw to change spring tension. Turn clockwise to increase tension, counterclockwise to decrease it.
Make tiny adjustments – just a quarter turn at a time. Test after each small change.
Position-Based Adjustments
Some springs hook onto different positions on a small post or bracket. Moving the spring to a higher position increases tension.
How to Reposition Safely
Use needle-nose pliers to unhook the spring. Move it one position at a time. Never force a spring into position – it should hook on easily.
Lever Mechanism Adjustments
Newer machines sometimes use a small lever connected to the spring. These levers usually have numbered positions or small adjustment screws.
Testing Your Adjustments
After each adjustment, you need to test the results. Thread your machine and sew some test stitches on scrap fabric.
What Good Stitches Should Look Like
Perfect stitches have the top and bottom threads meeting right in the middle of the fabric. The thread tension looks even and smooth.
From what I found online, most quilting experts recommend testing on the same fabric weight you plan to use for your actual project.
Troubleshooting Common Issues
If your test stitches still look wrong, here’s what to check:
Stitches Too Loose
Increase spring tension slightly. The spring needs more pull to tighten the thread properly.
Thread Still Breaking
Reduce spring tension. Too much pull will snap your thread, especially with delicate quilting threads.
Uneven Stitch Formation
Check that the spring moves smoothly through its full range. Sometimes lint or oil buildup interferes with spring movement.
Maintaining Your Take-Up Spring
Regular maintenance keeps your spring working smoothly for years. Clean around the spring area every few months.
Cleaning Best Practices
Use a small brush to remove lint and thread pieces. A drop of sewing machine oil on the spring’s pivot points helps it move freely.
Many experts say that proper maintenance prevents most tension problems before they start.
When to Replace Your Spring
Springs don’t last forever. Replace yours if you notice these warning signs:
- The spring looks stretched out of shape
- Metal fatigue creates cracks or breaks
- Adjustment no longer fixes tension problems
- The spring doesn’t return to its original position
Advanced Tips for Different Quilting Techniques
Different quilting styles need different spring settings. Here’s what I found works best for common techniques.
Free Motion Quilting
Free motion work usually needs slightly looser spring tension. This prevents the thread from fighting against your hand movements.
Piecing and Construction
Piecing needs consistent, firm tension. Set your spring for reliable, even stitches that won’t come apart under stress.
Heavy Batting Considerations
Thick batting requires more thread to penetrate all layers. Adjust your spring to allow slightly more thread flow without losing stitch quality.
Professional vs DIY Adjustments
Should you adjust your own spring or take it to a repair shop? Here’s how to decide.
When DIY Works Fine
Simple tension adjustments are usually safe to do yourself. If you can see the adjustment mechanism clearly and your manual explains the process, go for it.
When to Call a Professional
Get professional help if your machine needs major disassembly to reach the spring. Also, warranty repairs should always go to authorized service centers.
| Problem Type | DIY Difficulty | Professional Recommended |
|---|---|---|
| Simple tension adjustment | Easy | No |
| Spring replacement | Moderate | Maybe |
| Internal mechanism repair | Hard | Yes |
| Warranty-covered issues | Any | Yes |
Conclusion
Adjusting your take-up spring correctly transforms your quilting experience from frustrating to enjoyable. Start with small adjustments, test frequently, and don’t rush the process.
Remember that every machine is different, and what works for one project might need tweaking for another. Keep notes about your successful settings for different thread and fabric combinations.
With practice, you’ll develop an instinct for when your spring needs attention. Your stitches will become more consistent, your thread will break less often, and your finished quilts will show the quality you’ve been working toward.
How often should I check my take-up spring adjustment?
Check your spring every 6 months or whenever you notice tension problems. Heavy quilters who sew daily might need monthly checks, while occasional sewers can go longer between adjustments.
Can I use different thread weights without adjusting the spring?
Light weight changes usually work fine with the same spring setting. But switching from regular thread to heavy topstitching thread or delicate silk will likely need spring adjustments for best results.
What happens if I adjust the spring too far in either direction?
Too much tension breaks threads constantly and can damage your machine’s timing. Too little tension creates loose, sloppy stitches that come apart easily. Both problems are fixable by readjusting back to the middle range.
Why does my spring adjustment work great one day but poorly the next?
Temperature and humidity changes affect thread behavior. Also, different fabric types, batting thickness, or thread brands can make the same spring setting feel different. Minor readjustment usually fixes this.
Is it normal for the spring to make noise during sewing?
A quiet clicking or light tapping is normal as the spring moves with each stitch. Loud banging, grinding, or squealing sounds indicate problems that need immediate attention from a repair technician.