To repair a broken needle threader fast, first identify the type of damage – bent wire, loose parts, or broken handle – then use pliers to straighten bent wires or replace the threader entirely if severely damaged.
Most needle threader repairs take 2-5 minutes using basic household tools like small pliers, tweezers, or a replacement threader from your sewing kit.
What Is a Needle Threader and Why Do They Break?
A needle threader is that tiny metal helper with a thin wire loop. You push it through your needle’s eye, put thread through the loop, then pull it back. Simple, right?
But here’s the thing – they’re super delicate. The wire is thinner than a paperclip and bends easily. I found that most break from normal use, not rough handling.
Common Reasons Needle Threaders Break
From what I researched, these are the main culprits:
- Bent or twisted wire from pushing too hard
- Loose handle that won’t stay attached
- Wire snaps at the connection point
- Age – old threaders get brittle
- Wrong needle size (too small for the threader)
Quick Assessment: Can You Fix It or Should You Replace It?
Before you start, take a close look. Hold your threader up to the light. Can you see what’s wrong?
Fixable Problems
You can usually repair these issues yourself:
- Slightly bent wire that’s still in one piece
- Loose handle that needs tightening
- Wire that’s twisted but not broken
Time to Replace
Some problems aren’t worth your time:
- Completely snapped wire
- Handle cracked in multiple places
- Wire broken at the connection point
Tools You’ll Need for the Repair
Good news – you probably have everything already. Gather these items:
- Small needle-nose pliers
- Tweezers (eyebrow tweezers work fine)
- Good lighting or magnifying glass
- Steady surface to work on
Optional Helper Tools
These make the job easier but aren’t required:
- Small file or emery board
- Wire cutters for trimming
- Replacement threader (just in case)
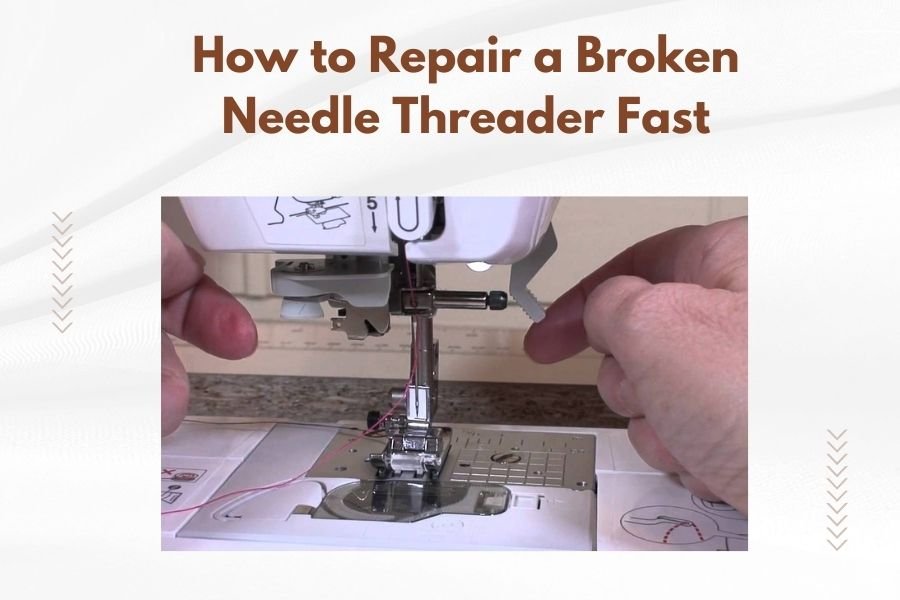
Step-by-Step Repair Guide
Step 1: Clean Your Work Area
Find a well-lit spot. Put a white cloth or paper under your work. Trust me – you don’t want to lose tiny pieces on a dark surface.
Step 2: Examine the Damage Closely
Look at your threader under good light. What exactly is wrong? Take your time here. The fix depends on the problem.
For Bent Wire Issues
Is the wire just bent or completely kinked? Small bends are easy fixes. Sharp kinks might weaken the wire permanently.
For Loose Handle Problems
Can you wiggle the wire in the handle? Some threaders have tiny screws or crimped connections you can tighten.
Step 3: Make the Repair
Now for the actual fix. Work slowly and gently. Rushing breaks things further.
Fixing Bent Wires
Grab your needle-nose pliers. Hold the wire near the handle for support. Gently straighten the bent section with small movements.
Don’t try to fix it all at once. Make tiny adjustments. I found that working in small steps prevents re-bending.
Tightening Loose Handles
Look for a small screw or crimp. If there’s a screw, tighten it carefully. If it’s crimped, use pliers to squeeze the connection gently.
Be super careful here. Too much pressure cracks the handle completely.
Reshaping the Loop
The wire loop might get misshapen during repair. Use tweezers to carefully reform the oval shape. Make it just big enough for your thread.
Testing Your Repair
Time to see if your fix worked. Get a needle and some thread for testing.
Test Run Process
Try threading a needle with medium-weight thread first. Don’t start with thick thread – it’s harder and might re-break your repair.
Push the threader through the needle eye slowly. Feel any resistance? If it binds or catches, something’s still not right.
What Good Repair Feels Like
A properly fixed threader should:
- Slide through needle eyes smoothly
- Hold thread without slipping
- Pull back through without catching
- Feel solid in the handle
When Repairs Don’t Work
Sometimes your best efforts aren’t enough. That’s okay – it happens to everyone.
Signs Your Repair Failed
You’ll know pretty quickly if the fix didn’t take:
- Wire bends again immediately
- Handle still wobbles or comes loose
- Thread won’t stay in the loop
- Rough spots catch on needle or thread
Quick Replacement Options
Don’t feel bad about replacing it. New needle threaders cost less than a dollar at most craft stores.
Many sewing kits include spare threaders. Check your supplies before buying new ones.
Preventing Future Breaks
Want to avoid this hassle next time? Here are some tips I picked up from experienced quilters.
Gentle Handling Techniques
Treat your threader like delicate jewelry. Push it through needle eyes slowly and straight. Angled pushing bends the wire.
Don’t force it through needles that are too small. If it doesn’t fit easily, try a different needle or thread the old-fashioned way.
Storage Tips
Keep threaders in a small container or magnetic pin holder. Tossing them loose in a sewing box leads to bent wires.
Some people clip them to a small piece of felt. The soft surface protects the delicate wire.
Choosing Better Threaders
Not all needle threaders are created equal. I researched different types and found some key differences.
Wire Quality Matters
Look for threaders with slightly thicker wire. Yes, they might not fit through tiny needle eyes, but they last much longer.
Stainless steel wire holds up better than plain steel. It costs a bit more but saves replacement time.
Alternative Threading Methods
What if your threader is beyond repair and you don’t have a replacement? Don’t panic – people threaded needles for centuries without these gadgets.
The Wet and Twist Method
Wet the thread end slightly with your tongue. Twist it between your fingers to make a point. This classic method works great for most needles.
Paper Fold Technique
Fold a small piece of thin paper around the thread. Push the folded paper through the needle eye, pulling the thread with it.
Magnification Helpers
Reading glasses or a magnifying glass make manual threading much easier. Good lighting helps too – work near a window during the day.
Troubleshooting Common Issues
Even after repair, you might run into problems. Here are solutions for the most common issues.
Thread Won’t Stay in the Loop
This usually means the loop is too big or has rough edges. Use tweezers to make it smaller or file down any burrs.
Threader Gets Stuck in Needle
The wire might be slightly too thick or have a rough spot. Try a different needle first. If that doesn’t work, smooth the wire with fine sandpaper.
Wire Keeps Re-Bending
The metal might be weakened from previous bends. This is common with older threaders. Time for a replacement.
Professional Repair vs. DIY
Should you take a broken threader to a repair shop? Honestly, probably not worth it. These tools are so inexpensive that professional repair costs more than replacement.
Save professional repairs for expensive sewing machines and quality tools. Needle threaders are meant to be disposable.
Conclusion
Repairing a broken needle threader is usually a quick fix with the right approach. Most bent wires straighten easily with gentle pressure from small pliers. Loose handles often just need a careful squeeze to tighten the connection.
Remember to work slowly and use good lighting. Test your repair with medium-weight thread before trying anything thick or delicate. If the repair doesn’t hold up, don’t hesitate to replace the threader – they’re inexpensive and available at any craft store.
Keep a few spare threaders in your sewing kit. With proper gentle handling and good storage, they’ll serve you well for many projects to come.
Can I use super glue to fix a loose needle threader handle?
Super glue can work for loose handles, but use it sparingly. Too much glue can seep into moving parts and make the threader unusable. A tiny dot where the wire meets the handle is usually enough.
Why does my repaired threader keep bending in the same spot?
Once wire bends repeatedly in one place, it becomes weak and prone to re-bending. The metal structure changes and loses strength. This means it’s time for a replacement rather than continued repairs.
What’s the best way to store needle threaders to prevent damage?
Store them in a small container with soft padding like cotton balls or felt. Magnetic pin holders work well too. Avoid tossing them loose in toolboxes where they can get bent by heavier items.
Are expensive needle threaders worth buying over cheap ones?
Higher-quality threaders typically use thicker, more durable wire and better handle construction. While they cost more initially, they often last much longer than bargain versions, making them worthwhile for frequent sewers.
Can I make my own needle threader if mine breaks completely?
You can create a temporary threader using very thin wire from craft supplies, but it’s challenging to get the right thickness and shape. For the time and effort involved, buying a replacement is usually more practical and reliable.