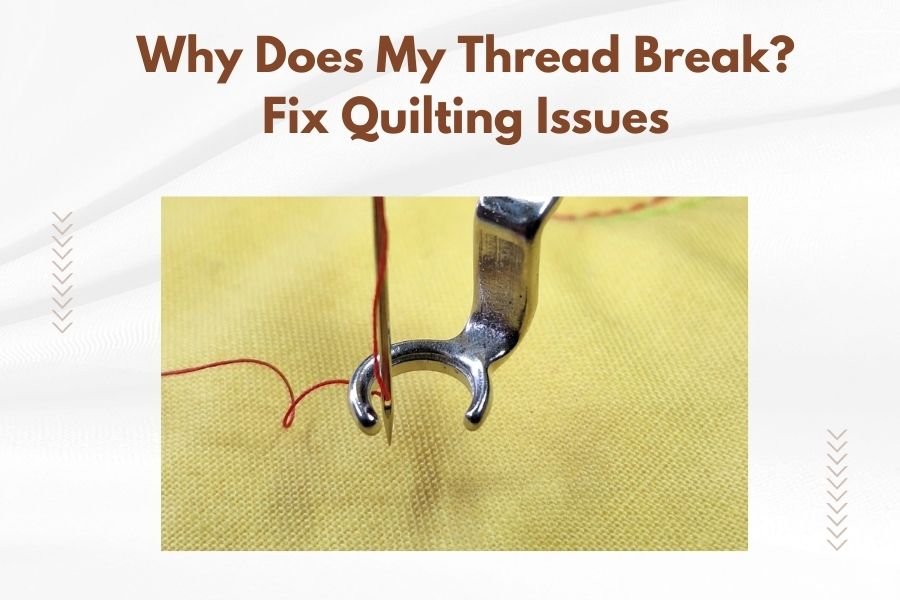
Thread breaks during quilting happen mainly due to incorrect tension settings, poor thread quality, or using the wrong needle size for your fabric and thread combination.
You can fix most thread breaking issues by adjusting your machine tension, switching to high-quality thread, and matching your needle size to your thread weight.
The Main Causes of Thread Breaking
When your thread keeps snapping mid-stitch, it feels like your quilting project is fighting against you. I researched the most common reasons why this happens, and found that most problems come down to four main issues.
Your machine tension might be too tight. Think of thread tension like a handshake – too firm and something breaks. When the upper thread tension pulls too hard, the thread can’t flow smoothly through the needle eye.
Poor thread quality causes breaks too. Cheap thread often has weak spots and uneven thickness. It’s like trying to lift heavy boxes with a rope that has thin sections – it’ll snap at the weakest point.
Tension Problems
Most quilting machines have a tension dial numbered from 1 to 9. Normal quilting tension usually sits between 3 and 5. If your thread breaks constantly, your tension might be set too high.
Test your tension with scrap fabric first. Make a few test stitches and check both sides of the fabric. The top and bottom threads should meet right in the middle of the fabric layers.
Upper Thread Tension Signs
You’ll know upper tension is too tight when the bobbin thread shows on top of your quilt. The fabric might pucker or gather along the stitch line. Your thread will feel like it’s fighting to move through the machine.
Lower Thread Tension Issues
Bottom tension problems are less common but still happen. If your bobbin case is too tight, it can put extra stress on the needle thread. This creates a tug-of-war that often ends with a broken thread.
Thread Quality Matters
I found that many quilters try to save money on thread, but this often backfires. Quality thread costs more upfront but breaks less and creates better stitches.
Good quilting thread has consistent thickness and strength. It flows smoothly through your machine without catching or snagging. Cheap thread often has fuzzy fibers that create friction.
Cotton vs Polyester Thread
Cotton thread works great for cotton quilts but can be less forgiving with tension. Polyester thread is stronger and more flexible. It handles tension changes better than cotton.
Many experts recommend starting with quality polyester thread while you learn proper tension settings. Once you get comfortable, you can try different thread types.
Needle Size and Type Problems
Using the wrong needle is like trying to thread a garden hose through a drinking straw. Your needle eye needs to be big enough for your thread to pass through easily.
Thread weight and needle size work together. Thicker threads need bigger needles. Thinner threads work better with smaller needles. The wrong combination creates friction that leads to breaks.
Needle Size Chart for Thread Weights
| Thread Weight | Needle Size | Best For |
|---|---|---|
| 50 weight | 80/12 | Piecing, general quilting |
| 40 weight | 90/14 | Decorative quilting |
| 30 weight | 100/16 | Bold quilting designs |
| 12 weight | 110/18 | Heavy decorative work |
Needle Condition
Dull or damaged needles cause thread breaks too. A needle should pierce fabric cleanly without pulling or tearing. When needles get dull, they push thread through roughly instead of cutting a clean path.
Change your needle after every 8 hours of quilting or when starting a new project. This simple step prevents many thread problems before they start.
Signs You Need a New Needle
- Thread breaks more often than usual
- Popping or pulling sounds when stitching
- Uneven or skipped stitches
- Visible burr or bend on the needle point
- Holes in fabric look rough or torn
Machine Maintenance Issues
Lint buildup in your machine creates friction that stresses thread. Think of it like trying to slide down a playground slide covered in sand – everything moves harder and rougher.
Clean your machine after every project or every 8 hours of use. Pay special attention to the bobbin area, feed dogs, and thread path.
Cleaning Your Machine
Remove the needle plate and bobbin case. Use a small brush to clean out lint and thread bits. Compressed air works great for blowing out hard-to-reach spots.
Check your thread guides too. Sometimes thread can catch on rough spots or bent guides. Run your finger along the thread path to feel for snags.
Timing Problems
If cleaning doesn’t help, your machine timing might be off. This happens when the needle and hook don’t meet at exactly the right moment. You’ll need a professional to fix timing issues.
Threading Problems
Wrong threading causes more problems than most people realize. I found that even experienced quilters sometimes miss steps when threading in a hurry.
Follow your machine’s threading diagram exactly. Each thread guide serves a purpose in controlling thread flow and tension. Skipping guides creates uneven thread delivery.
Common Threading Mistakes
Threading with the presser foot down is a big mistake. The tension discs need to be open to accept thread properly. Always lift the presser foot before threading.
Make sure thread sits properly in all guides and tension discs. Pull gently on the thread – it should have some resistance but move smoothly.
Bobbin Threading
Wind bobbins at moderate speed. Fast winding can stretch thread and create uneven tension. The thread should lay evenly on the bobbin without loose spots.
Insert the bobbin so it unwinds in the right direction. Most machines want bobbin thread to come off counterclockwise, but check your manual.
Fabric and Batting Considerations
Thick or dense fabrics put extra stress on thread. When your needle works harder to pierce fabric, thread experiences more pulling and friction.
High-loft batting can grab thread as the needle moves up and down. This creates tiny tugs that weaken thread over time.
Fabric Weight Solutions
Use a larger needle size for heavy fabrics. The bigger hole reduces friction as thread passes through. A sharp needle point also helps pierce dense weaves cleanly.
Slow down your stitching speed on thick areas. Fast stitching on heavy fabric stresses both thread and needle.
Batting Types
Cotton batting is easier on thread than polyester. Polyester batting can be grabby, especially if it’s high-loft. Low-loft batting of any type creates less thread stress.
Quick Troubleshooting Steps
When thread breaks, don’t just rethread and continue. Take a minute to check these things in order.
First, lower your tension setting by one number. Test on scrap fabric. If thread still breaks, lower it one more number.
The Five-Minute Fix
- Check thread quality and age
- Change to a fresh needle
- Clean lint from bobbin area
- Rethread completely with presser foot up
- Test stitch on scrap fabric
When to Get Professional Help
If thread keeps breaking after trying these fixes, your machine might need professional service. Timing problems, worn parts, or damaged tension discs require expert repair.
Don’t ignore persistent problems. Small issues can become expensive repairs if left alone.
Prevention Tips
Store thread in a cool, dry place away from direct sunlight. Heat and UV light can weaken thread over time. Old thread becomes brittle and breaks easily.
Use thread nets or caps on thread spools. These prevent thread from tangling or catching as it unwinds.
Regular Maintenance Schedule
Clean your machine after every project. Oil it according to manufacturer recommendations. Replace needles regularly, even if they look fine.
Keep spare bobbins wound with your most-used thread colors. This saves time and reduces the chance of winding problems when you’re in a hurry.
Conclusion
Thread breaking doesn’t have to ruin your quilting experience. Most problems come from simple issues like wrong tension, poor thread quality, or dull needles. Start with the basics – check your tension, use quality thread, and change your needle regularly. Clean your machine often and thread it properly every time. These simple steps will solve most thread breaking problems and get you back to enjoying your quilting projects. Remember that prevention works better than fixing problems after they start.
Why does thread break only when I quilt but not when I piece?
Quilting involves thicker layers and more thread manipulation than piecing. The extra fabric layers and batting create more resistance, which stresses thread more. You might need to lower tension or use a larger needle for quilting.
Can old thread cause breaking even if it looks fine?
Yes, thread deteriorates over time even when stored properly. Thread older than 5 years often becomes brittle and weak. Heat, humidity, and light all break down thread fibers gradually.
Should I use the same tension for all thread weights?
No, different thread weights need different tension settings. Thicker threads usually need slightly lower tension. Start with your normal setting and adjust down if needed.
How often should I change needles while quilting?
Change needles every 8 hours of quilting time or when starting each new project. Dull needles stress thread and can cause breaks even when they still look sharp.
Why does thread break more on certain areas of my quilt?
Seam intersections and thick areas put extra stress on thread. These spots require more force to penetrate, creating friction and tension. Slow down when quilting over bulky areas.