Quilting software interfaces are digital control panels that let you create, edit, and manage embroidery and quilting designs on your computer or machine’s touchscreen.
Modern quilting software interfaces typically include design libraries, editing tools, stitch controls, and project management features that work together to streamline your creative process.
You’ve probably stared at a quilting software screen and felt overwhelmed. Those buttons, menus, and mysterious icons can make anyone’s head spin. Don’t worry – I’ve been there too.
Learning quilting software interfaces doesn’t have to feel like solving a puzzle. Once you understand the basic layout and common features, you’ll find these digital tools become your best quilting friends.
What Makes Up a Quilting Software Interface
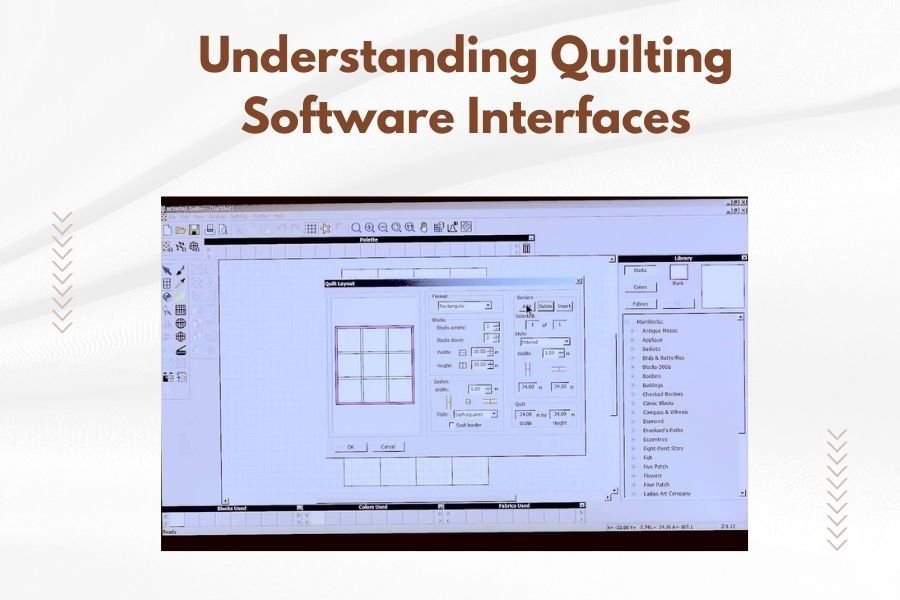
Think of your quilting software interface like a car dashboard. Everything has its place for a reason. The most important controls sit right where you need them.
Most interfaces share similar elements. You’ll find a main workspace in the center, tool panels on the sides, and menu bars across the top. This layout keeps your designs visible while giving you easy access to editing tools.
The Main Design Canvas
Your design canvas is where the magic happens. This central area shows your current project in real-time. You can zoom in to work on tiny details or zoom out to see the big picture.
Many software programs let you customize the canvas background color. I found that choosing a contrasting color makes it easier to see your thread colors and design elements clearly.
Tool Panels and Palettes
Tool panels usually dock along the edges of your screen. These contain your most-used functions like thread colors, stitch types, and design elements.
Most programs let you move these panels around. You can hide the ones you don’t use often and keep your favorites visible. This customization helps create a workspace that fits your style.
Common Interface Elements Across Different Programs
While each program looks different, most share basic features. Understanding these common elements helps you switch between software programs more easily.
Menu Bars and Ribbons
The top menu bar contains your main commands. File operations, edit functions, and view options typically live here. Some newer programs use ribbon interfaces similar to Microsoft Office.
I researched various quilting software programs and found that ribbon interfaces often group related tools together. This makes finding specific functions faster once you get used to the layout.
Property Panels
Property panels show details about your selected design element. When you click on a shape or text, these panels display options like size, color, and stitch settings.
These panels update automatically based on what you select. This context-sensitive approach keeps relevant options at your fingertips without cluttering the interface.
Quick Access Toolbars
Many programs include customizable quick access toolbars. You can add your most-used commands here for one-click access. Think of it as your personal shortcut collection.
Understanding Design Libraries and File Management
Your design library is like a digital fabric stash. Good organization here saves you time and frustration later. Most interfaces include built-in browsing and sorting tools.
Built-in Design Collections
Software programs often come with hundreds or thousands of pre-made designs. These appear in categorized folders within your interface. Look for sections like florals, borders, or seasonal designs.
You can usually preview designs before opening them. This thumbnail view lets you browse quickly without loading each file individually.
Import and Export Functions
Import tools let you bring in designs from other sources. Common file formats include PES, DST, and JEF. The interface typically shows compatible formats clearly.
Export functions work in reverse. You can save your finished designs in different formats depending on your machine or intended use.
File Format Indicators
Most interfaces use small icons to show file formats. A tiny embroidery hoop might indicate machine files, while a computer icon could represent software-specific formats.
Editing Tools and Their Interface Locations
Editing tools transform basic designs into personalized creations. These functions usually group together in logical sections of the interface.
Selection and Transform Tools
Selection tools let you choose specific parts of your design. Transform tools change size, rotation, or position. These often appear as the first icons in your toolbar.
Most programs use familiar symbols. An arrow for selection, curved arrows for rotation, and corner handles for resizing. These visual cues make tools easier to identify.
Text and Lettering Controls
Text tools usually get their own section or panel. You’ll find font selection, size controls, and alignment options grouped together. Some programs include special lettering effects like arching or perspective.
From what I read online, text controls often include live previews. You can see how different fonts look before applying them to your design.
Font Management Interfaces
Font panels typically show available fonts with sample text. You can often type your own preview text to see exactly how words will look in different styles.
Stitch Settings and Control Panels
Stitch controls determine how your design actually sews out. These settings directly affect your final results, so their interface placement is usually prominent.
Density and Coverage Options
Density controls adjust how closely stitches pack together. These often appear as slider bars or numeric input fields. Lower numbers create lighter coverage, while higher numbers make denser fills.
Many interfaces include visual indicators showing density levels. Some use color coding or pattern previews to help you understand the settings.
Stitch Type Selectors
Different areas of your design might need different stitch types. Fill areas use satin or tatami stitches, while outlines typically use running stitches.
Most interfaces display stitch types with small icons or sample patterns. This visual approach makes it easier to choose the right option for each design element.
Underlay and Push-Pull Compensation
Advanced stitch settings often hide in submenus or expandable sections. These include underlay patterns and compensation adjustments that help designs sew more accurately.
Color and Thread Management Interfaces
Color selection affects both the visual appeal and practical aspects of your quilting projects. Most interfaces make color changes straightforward and visual.
Thread Color Palettes
Thread palettes show available colors for your designs. Many programs include popular thread brand colors like Madeira, Gutermann, or Coats & Clark.
You can usually switch between different thread brands within the same interface. This flexibility helps you work with whatever threads you have on hand.
Color Sorting and Sequencing
Good interfaces let you adjust the color sequence for efficient sewing. You can move colors up or down in the list to minimize thread changes during stitching.
Some programs automatically suggest optimal color sequences. These smart features analyze your design and recommend the most efficient sewing order.
| Interface Element | Primary Function | Typical Location |
|---|---|---|
| Design Canvas | Display and edit designs | Center of screen |
| Tool Palette | Access editing functions | Left or right panel |
| Property Panel | Adjust selected elements | Right or bottom panel |
| Thread Palette | Manage colors | Docked panel |
| Menu Bar | File and program functions | Top of screen |
Navigation and View Controls
Getting around your design efficiently makes the whole process more enjoyable. Most interfaces include several ways to navigate and view your work.
Zoom and Pan Functions
Zoom controls let you get close for detail work or step back to see the whole design. Look for magnifying glass icons or percentage displays showing your current zoom level.
Pan functions move your view around without changing zoom levels. You might drag with a hand tool or use scroll bars around the canvas edges.
View Mode Options
Different view modes serve different purposes. Design view shows your work in full color, while stitch view displays actual thread paths. Some programs include realistic 3D previews.
Many experts recommend switching between view modes regularly. Each one reveals different aspects of your design that might need attention.
Grid and Snap Settings
Grid overlays help align design elements precisely. Snap settings make objects automatically align to grid points or other objects. These precision tools usually toggle on and off easily.
Machine Connection and Output Settings
Connecting your software to your quilting machine often requires specific interface settings. These controls handle the communication between your computer and machine.
USB and Wireless Connection Panels
Connection panels show the status of your machine link. Green indicators usually mean everything’s working, while red suggests connection problems.
Most interfaces include connection wizards that walk you through the setup process. These step-by-step guides make initial setup much less intimidating.
Export Format Selection
Different machines accept different file formats. Your interface should clearly show which formats work with your specific machine model.
I found that many programs include machine-specific presets. Selecting your machine model automatically configures the correct export settings.
Customizing Your Software Interface
Most quilting software lets you customize the interface to match your working style. These personalization options can make your software feel more comfortable and efficient.
Panel Arrangements and Docking
You can usually move panels around by dragging their title bars. Panels often snap into place along screen edges or float freely over your workspace.
Try different arrangements to find what works for your projects. Some people prefer all tools on one side, while others like panels spread around the screen edges.
Toolbar Customization
Adding your most-used commands to custom toolbars saves time and mouse clicks. Look for toolbar customization options in the settings or view menus.
Start with just a few essential tools. You can always add more as you discover your personal workflow patterns.
Keyboard Shortcut Setup
Creating keyboard shortcuts for common actions speeds up your work considerably. Most programs let you assign custom key combinations to frequently used commands.
Troubleshooting Common Interface Issues
Sometimes interfaces don’t behave as expected. Understanding common problems and their solutions keeps you productive when issues arise.
Missing Panels and Reset Options
Panels sometimes disappear or get moved off-screen accidentally. Most programs include a “reset interface” option that restores the default layout.
Look for these reset commands in the View or Window menus. This quick fix solves most layout problems without affecting your actual design files.
Performance and Display Problems
Slow response or display glitches often indicate graphics driver issues. Updating your computer’s graphics drivers frequently resolves these problems.
Some interfaces include performance settings that adjust graphics quality for smoother operation on older computers.
Learning Resources and Help Systems
Most quilting software includes built-in help systems accessible through the interface. These resources often provide the most accurate and up-to-date information.
Built-in Tutorials and Wizards
Interactive tutorials walk you through common tasks step-by-step. These guided lessons often highlight relevant interface elements as you learn.
Many programs include project wizards that automate complex tasks. These tools guide you through multi-step processes while teaching you about the underlying interface elements.
Context-Sensitive Help
Context-sensitive help explains whatever you’re currently working with. Pressing F1 or clicking help buttons often displays information about your current tool or panel.
This targeted approach means you get relevant answers without searching through entire manuals.
Conclusion
Understanding quilting software interfaces opens up a world of creative possibilities for your projects. While these digital tools might seem overwhelming at first, breaking them down into logical sections makes them much more approachable.
Remember that every expert started as a beginner. Take time to explore different interface elements and don’t be afraid to experiment. Most programs include undo functions that let you try things without permanent consequences.
The key to mastering any quilting software interface is regular practice and patience with yourself. Start with simple projects and gradually work up to more complex designs as your comfort level grows.
How do I find specific tools in unfamiliar quilting software?
Most programs include search functions in their help menus that locate specific tools or commands. You can also look for tool tips that appear when you hover over interface elements, and many programs group similar functions together in logical menu sections.
Can I use the same interface skills across different quilting software programs?
Yes, most quilting software shares common interface conventions like toolbars, property panels, and design canvases. Once you understand these basic elements in one program, switching to another becomes much easier since the core concepts remain similar.
What should I do if my interface looks different from tutorial videos?
Software interfaces often change between versions, and many programs allow extensive customization. Look for version information in your help menu and check if the tutorial matches your software version. You can also try resetting your interface to default settings if panels have been moved around.
How can I speed up my workflow with interface shortcuts?
Learn the keyboard shortcuts for your most-used commands, customize toolbars with frequently accessed tools, and organize your design libraries with clear folder structures. Most programs also allow you to create custom workspace layouts optimized for different types of projects.
Why does my quilting software interface run slowly on my computer?
Slow interfaces often result from insufficient RAM, outdated graphics drivers, or too many background programs running. Try closing other applications, updating your graphics drivers, and check if your software includes performance optimization settings that reduce graphics quality for smoother operation.