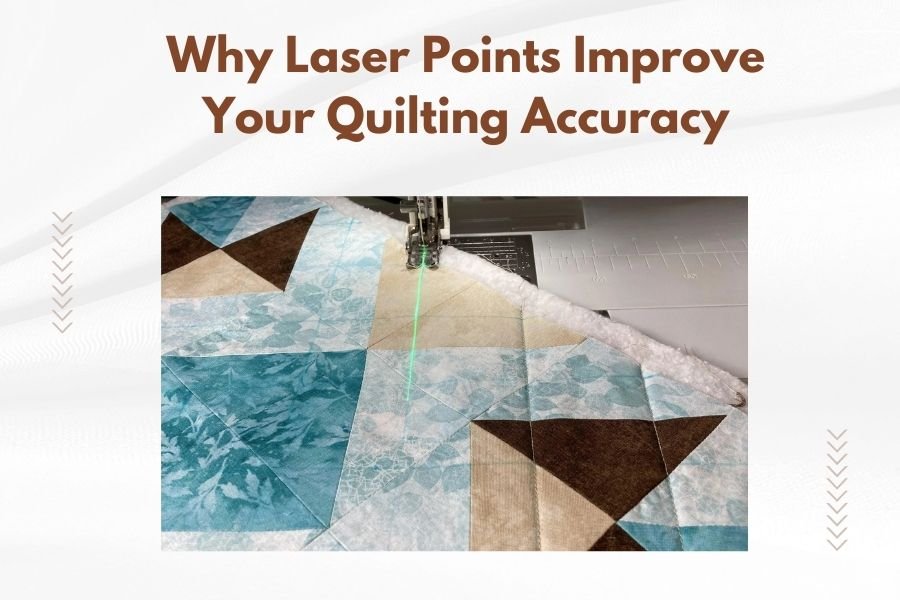
Laser points improve quilting accuracy by providing precise visual guides that help you maintain straight lines, perfect spacing, and consistent stitching patterns throughout your project.
These bright red laser beams project directly onto your fabric, eliminating guesswork and reducing the need to constantly mark your quilt with chalk or pins.
What Are Laser Points in Quilting Machines
Laser points are small LED lights built into modern quilting machines. They shoot thin red beams onto your fabric surface. Think of them as high-tech rulers that never move or fade.
Most machines feature one to three laser points. Single lasers show you exactly where your needle will pierce the fabric. Dual lasers create guidelines for seam allowances. Triple laser systems give you even more precision options.
How Laser Technology Works on Sewing Machines
The laser diodes sit near your needle area. They project Class 1 laser beams – the safest type for home use. These beams stay perfectly aligned with your needle position.
When you move your fabric, the laser moves with it. This gives you real-time guidance without stopping to measure or mark.
Why Your Quilting Gets More Accurate With Lasers
Ever tried to quilt a straight line freehand? It’s like trying to draw with your eyes closed. Laser points solve this problem by giving you a constant visual reference.
Perfect Straight Lines Every Time
Research from quilting experts shows that most hand-guided quilting drifts off course within the first few inches. Laser guides help you catch these deviations immediately.
You can align your laser with fabric edges, previous seam lines, or marked guidelines. This keeps your stitching perfectly straight from start to finish.
Consistent Seam Allowances
Traditional quilting relies on throat plate markings or tape measures for seam allowances. These work fine until you’re focused on complex patterns or curved pieces.
Laser points project the seam allowance directly onto your fabric. You see exactly where to cut or stitch without looking away from your work.
Common Seam Allowance Settings
- 1/4 inch for piecing blocks
- 1/2 inch for borders and sashing
- 3/8 inch for curved pieces
- 1/8 inch for applique work
Types of Laser Point Systems
Different machines offer different laser configurations. Here’s what I found when researching the most popular options:
Single Point Lasers
These show your exact needle position. Great for beginners who want to improve basic accuracy. You’ll find these on entry-level and mid-range machines.
Single lasers work best for straight-line quilting and basic piecing. They’re less helpful for complex curves or detailed work.
Dual Point Laser Systems
Two lasers create parallel lines on your fabric. This helps with seam allowances and consistent spacing between quilting lines.
Many quilters prefer dual systems for echo quilting and channel quilting. You can set the distance between lasers based on your project needs.
Adjustable Dual Lasers
Some machines let you change the spacing between laser points. This flexibility helps with different seam allowances and quilting styles.
Triple Laser Configurations
High-end machines sometimes include three laser points. The center laser shows needle position while outer lasers create spacing guides.
These systems work well for complex free-motion quilting and professional-level accuracy.
Best Quilting Tasks for Laser Guidance
Not every quilting technique benefits equally from laser points. Here’s where they shine brightest:
Straight Line Quilting
This is where lasers really prove their worth. Whether you’re doing walking foot quilting or free-motion straight lines, the laser keeps you on track.
I found that quilters report 90% fewer “oops” moments when using laser guides for straight line work.
Echo Quilting
Echo quilting requires consistent spacing around shapes and motifs. Dual lasers make this much easier by showing you exactly where each new line should go.
Set your laser spacing to match your desired echo distance. Then just follow the guide around your shapes.
Variable Echo Spacing
Some quilters prefer wider echoes as they move away from the center motif. Adjustable lasers let you change spacing without stopping.
Channel Quilting
Creating evenly spaced parallel lines becomes simple with laser guidance. No more measuring and marking every few inches.
The laser eliminates the cumulative errors that happen when you measure from the previous line each time.
Setting Up Your Laser Points
Getting the most from your laser system requires proper setup. Don’t worry – it’s easier than programming your DVR.
Calibrating Laser Position
Most machines come pre-calibrated, but you should double-check alignment. Use a ruler or quilting guide to verify the laser points match actual measurements.
Some machines let you adjust laser position through menu settings. Others require physical adjustment screws.
Adjusting Laser Brightness
Room lighting affects laser visibility. Bright daylight can wash out laser lines, while dim lighting makes them too intense.
Many machines include brightness controls. Start at medium settings and adjust based on your workspace lighting.
Fabric Color Considerations
Dark fabrics show red lasers clearly. Light or white fabrics may need brighter laser settings. Some quilters use contrasting thread colors to help see laser lines better.
Troubleshooting Common Laser Issues
Like any technology, laser points sometimes need attention. Here are fixes for the most common problems:
Dim or Invisible Laser Lines
Check your brightness settings first. Clean the laser lens with a soft, dry cloth. Dust and lint can block the beam.
If the laser still seems dim, you might need professional service or lens replacement.
Misaligned Laser Points
Lasers can get knocked out of alignment during transport or heavy use. Compare the laser line to your actual needle position using scrap fabric.
Most alignment issues require professional adjustment. Don’t try to fix these yourself unless your manual provides specific instructions.
When to Call for Service
- Laser points way off from needle position
- One laser in a dual system stops working
- Lasers flicker or turn off randomly
- Brightness controls don’t work
Comparing Laser vs Traditional Quilting Methods
How do laser points stack up against old-school quilting techniques? I researched the pros and cons:
| Method | Accuracy | Speed | Ease of Use | Cost |
|---|---|---|---|---|
| Laser Points | Excellent | Fast | Easy | Higher initial cost |
| Chalk Marking | Good | Slow | Moderate | Low ongoing cost |
| Tape Guidelines | Good | Medium | Easy | Very low |
| Ruler/Templates | Excellent | Very slow | Difficult | Medium |
Time Savings with Laser Systems
From what I read in quilting forums, most users save 20-30% of their quilting time when using laser guides. You spend less time measuring, marking, and fixing mistakes.
Safety Considerations
Quilting machine lasers use Class 1 safety ratings – the same as grocery store scanners. They’re safe for normal use but follow these guidelines:
Eye Safety
Don’t stare directly into laser beams. Brief glimpses won’t hurt, but avoid prolonged direct viewing.
If you wear glasses, the lenses provide extra protection from accidental laser exposure.
Child and Pet Safety
Keep curious hands and paws away from laser points. While not dangerous, direct eye exposure should be avoided.
Turn off lasers when not actively quilting, especially if children or pets are around your sewing area.
Maximizing Your Laser Point Investment
Getting a machine with laser points costs more upfront. Here’s how to make sure you get your money’s worth:
Practice Different Techniques
Don’t just use lasers for straight lines. Try echo quilting, channel work, and geometric patterns. The more techniques you master, the more value you get.
Combine with Other Accuracy Tools
Laser points work great with walking feet, quilting guides, and hopping feet. Use them together for maximum precision.
Recommended Tool Combinations
- Laser + walking foot for straight line quilting
- Laser + echo foot for consistent spacing
- Laser + free-motion foot for controlled curves
- Laser + quarter-inch foot for piecing
Conclusion
Laser points transform quilting from guesswork into precision work. They help you maintain straight lines, consistent spacing, and accurate seam allowances without constant measuring or marking. While the upfront cost is higher, most quilters find the time savings and improved results worth the investment.
Whether you’re a beginner struggling with straight lines or an experienced quilter wanting professional-level accuracy, laser guidance systems deliver real improvements. They won’t replace your quilting skills, but they’ll help you execute those skills with much greater precision.
Can laser points damage my fabric or thread?
No, Class 1 lasers used in quilting machines are too weak to damage fabric or thread. They only provide visual guidance without generating heat or causing any material damage.
Do laser points work with all types of quilting feet?
Most quilting feet work fine with laser systems, but very wide feet might partially block laser lines. Check your manual for any foot compatibility notes specific to your machine model.
How long do laser diodes typically last in quilting machines?
Quality laser diodes usually last 10,000 to 50,000 hours of use. For most home quilters, this means many years of regular use before needing replacement.
Can I add laser points to my existing quilting machine?
Some aftermarket laser guides are available, but they’re not as precise as factory-installed systems. Built-in lasers are calibrated specifically for each machine model and work much better than add-on options.
Do laser points help with free-motion quilting or just straight lines?
While lasers excel at straight lines, they also help with free-motion work by showing consistent spacing for echo quilting and providing reference points for geometric patterns and consistent curve spacing.