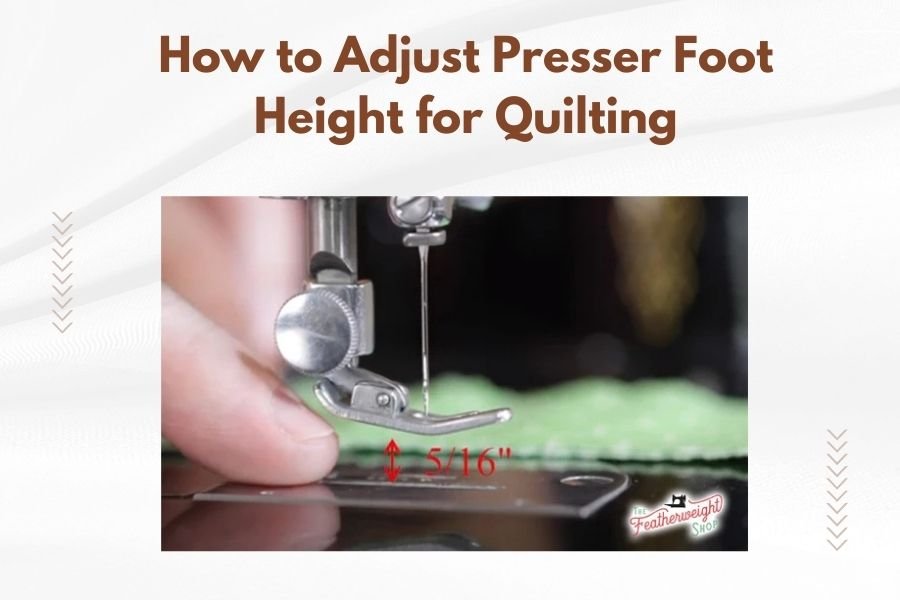
To adjust presser foot height for quilting, locate the presser foot lift lever on your machine and use it to raise or lower the foot to accommodate thick batting and fabric layers.
Most quilting machines allow presser foot height adjustments through either a manual lever system or digital controls, with proper height preventing fabric bunching and ensuring smooth stitching.
Getting your presser foot height just right can make the difference between a beautiful quilt and a frustrating mess. You’ve probably experienced that sinking feeling when your fabric bunches up or your stitches look uneven. The good news? This common quilting challenge has a simple solution.
Understanding Presser Foot Height Basics
Your presser foot acts like a gentle hand holding fabric steady while you sew. Think of it as your quilting buddy that keeps everything in place. When the height is wrong, it’s like having a friend who holds too tight or barely touches your work.
The right height creates just enough pressure to guide fabric without crushing your batting. Too high, and your fabric shifts around. Too low, and you’ll struggle to move thick layers smoothly.
Why Proper Height Matters for Quilting
Quilting involves multiple fabric layers plus batting. This creates a much thicker sandwich than regular sewing. Your machine needs to handle this bulk without fighting you every step of the way.
I found that most quilting problems trace back to incorrect presser foot pressure. Experts at the International Quilt Study Center often point to this as the top beginner mistake.
Types of Presser Foot Height Adjustments
Manual Lever Systems
Most traditional sewing machines use a simple lever system. You’ll find a dial or numbered scale near your presser foot mechanism. Lower numbers mean less pressure, higher numbers increase it.
These systems work great once you understand your machine’s personality. Each brand has slightly different settings, so don’t worry if your friend’s machine uses different numbers.
Digital Control Systems
Modern quilting machines often feature digital pressure controls. These give you precise adjustments through your machine’s display screen. You can save settings for different projects too.
From what I’ve read, digital systems offer more consistency. You won’t accidentally bump a dial and lose your perfect setting mid-project.
Automatic Pressure Systems
High-end machines sometimes adjust pressure automatically based on fabric thickness. Sensors detect your quilt sandwich and make real-time adjustments.
While convenient, many quilters prefer manual control. You know your fabric better than any sensor can guess.
Step-by-Step Adjustment Process
Preparing Your Test Setup
Grab scraps that match your actual quilt layers. Use the same fabric weight, batting type, and thread you’ll use for your real project. This test sandwich tells you exactly what your machine will experience.
Cut pieces about 6 inches square. That’s large enough to test properly but won’t waste much material.
Creating Your Test Sandwich
Layer your backing fabric face-down, add batting, then place your top fabric face-up. Pin or baste these together just like you would for quilting.
Many experts suggest marking a simple straight line to stitch along. This helps you focus on the pressure adjustment rather than complex patterns.
Finding Your Starting Point
Check your machine’s manual for recommended starting settings. Most manufacturers provide pressure guidelines for different fabric types. Use their quilting recommendation as your baseline.
If you can’t find this information, start at medium pressure. This gives you room to adjust in either direction.
Making Your First Test Stitch
Sew a few inches along your marked line at medium speed. Watch how the fabric moves. Does it feed smoothly? Are your stitches even?
Don’t judge based on one or two stitches. Give your machine a chance to show you its rhythm.
Common Signs Your Height Needs Adjustment
Too Much Pressure Warning Signs
When your presser foot presses too hard, you’ll notice several telltale problems. Your fabric becomes difficult to guide, especially around curves. The layers might separate or pucker.
You’ll also hear your machine working harder. That struggling sound means something’s not right.
Stitch Quality Issues
Excessive pressure creates uneven stitches. Your top thread might look tight while the bottom appears loose. Thread tension problems often start with pressure issues, not actual tension settings.
I’ve found that fixing pressure first solves many mysterious stitch problems. Save yourself hours of tension dial tweaking.
Too Little Pressure Problems
Insufficient pressure lets your fabric wander. Straight lines become wobbly. Your layers shift apart, creating gaps in your quilt sandwich.
You might notice the machine skipping stitches too. Without enough pressure, the fabric doesn’t stay positioned properly for each needle penetration.
Feed Dog Engagement Issues
Your feed dogs need the presser foot’s help to move fabric consistently. Too little pressure means poor coordination between these two systems.
Think of it like trying to walk on ice wearing smooth shoes. Without proper grip, nothing moves where it should.
Fine-Tuning Your Settings
Making Small Adjustments
Change pressure settings gradually. Move one number or setting at a time, then test again. Big jumps make it hard to find that sweet spot.
Many quilters get impatient and make dramatic changes. This usually creates new problems instead of solving the original issue.
Testing Each Change
After each adjustment, sew another test line. Compare the results to your previous attempts. Keep notes if that helps you remember what worked.
Some people take photos of their test stitching with the pressure setting written next to each line. Visual references beat trying to remember later.
Considering Different Quilt Areas
Your quilt isn’t uniform thickness everywhere. Seam intersections create thicker areas. Borders might use different fabrics. Plan for these variations.
Professional quilters often adjust pressure as they work. Don’t feel locked into one setting for an entire project.
Pressure Settings for Different Quilting Styles
| Quilting Type | Typical Pressure Level | Key Considerations |
|---|---|---|
| Straight Line Quilting | Medium to Medium-High | Need consistent fabric feed |
| Free Motion Quilting | Low to Medium-Low | Must allow fabric movement |
| Walking Foot Quilting | Medium | Walking foot provides extra control |
| Applique Work | Medium-High | Need precise edge control |
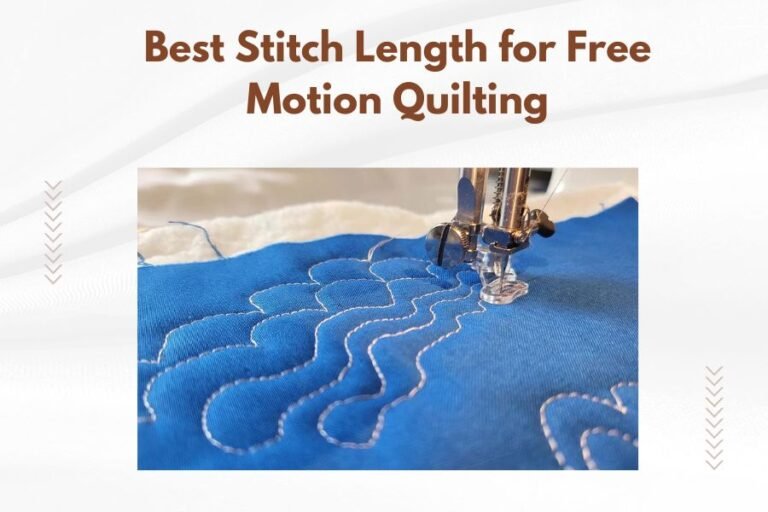
Free Motion Quilting Considerations
Free motion work requires lower pressure than most other techniques. You’re moving the fabric manually, so the presser foot should barely kiss your quilt sandwich.
Research from quilting guilds shows that many free motion struggles come from too much pressure. Your hands fight the machine instead of working together.
Building Muscle Memory
Once you find the right pressure for free motion, practice regularly. Your hands need to learn how that setting feels. Consistency comes from repetition.
Start with simple meandering patterns. Save complex designs until your pressure adjustment becomes second nature.
Troubleshooting Common Adjustment Problems
Pressure Settings Won’t Change
Sometimes your adjustment dial seems stuck or ineffective. Check if your machine has multiple pressure systems that need coordinating.
Some machines have both a pressure dial and a presser foot lift that affects pressure. Both settings work together to create your final result.
Mechanical Issues
Lint buildup around the pressure mechanism can cause problems. Clean this area regularly, following your manual’s maintenance guidelines.
If cleaning doesn’t help, your machine might need professional service. Don’t force stuck adjustment mechanisms.
Settings Keep Changing
Vibration from quilting can gradually shift loose adjustment dials. Check that your settings haven’t moved if your stitching quality changes mid-project.
Some quilters mark their preferred settings with tape or permanent marker. This makes it easy to spot unwanted changes.
Advanced Pressure Techniques
Pressure Mapping Your Projects
Complex quilts benefit from pressure planning. Map out areas where you might need different settings. Mark seam intersections, borders, and applique sections.
This advance planning prevents surprises and helps you work more efficiently. You’ll know when to pause and adjust settings.
Creating Pressure Notes
Keep a quilting journal with pressure settings for different fabric combinations. Note what worked well and what didn’t.
Future projects become easier when you can reference successful settings from similar work.
Seasonal and Environmental Factors
Humidity affects fabric behavior. Your perfect pressure setting might need tweaking in different seasons.
I found online discussions where quilters mentioned adjusting pressure slightly for summer versus winter projects. Fabric feels different in various humidity levels.
Maintaining Your Pressure System
Regular Cleaning Schedule
Clean around your pressure adjustment mechanism monthly if you quilt regularly. Fabric fibers and oil can accumulate in these precise mechanical parts.
Use appropriate cleaning tools for your machine type. Some areas need special brushes or compressed air.
Lubrication Requirements
Follow your manufacturer’s lubrication schedule. Proper maintenance keeps pressure adjustments smooth and accurate.
Never use household oils or lubricants. Sewing machines require specific products designed for precision mechanisms.
When to Seek Professional Help
Persistent Problems
If pressure adjustments don’t improve your stitching quality, other mechanical issues might exist. Timing problems or worn parts can mimic pressure issues.
Professional technicians can diagnose complex problems that simple adjustments won’t fix.
Safety Considerations
Never force stuck adjustment mechanisms. You might damage delicate internal parts or create safety hazards.
Modern machines have safety features that can malfunction if internal mechanisms get damaged by excessive force.
Conclusion
Mastering presser foot height adjustment transforms your quilting experience from frustrating to enjoyable. Start with your machine’s recommended settings, then fine-tune based on your specific fabric combinations. Remember that different quilting techniques need different pressure levels, and don’t hesitate to adjust settings as you work through various sections of your project. With practice, you’ll develop an intuitive feel for the right pressure, making every quilting session more successful and satisfying.
How often should I clean my presser foot pressure mechanism?
Clean the pressure mechanism monthly if you quilt regularly, or after every major project. Fabric fibers and lint can build up in these precise mechanical parts, affecting adjustment accuracy and smooth operation.
Can I use the same pressure setting for all batting types?
No, different batting materials require pressure adjustments. Polyester batting often needs less pressure than cotton, while wool batting may need moderate pressure. Always test with scraps of your actual project materials to find the optimal setting.
Why do my pressure settings work differently in summer versus winter?
Humidity affects fabric behavior and machine performance. Summer’s higher humidity can make fabrics feel softer and more pliable, potentially requiring slight pressure adjustments compared to drier winter conditions when fabrics may feel stiffer.
Should I adjust pressure when switching from cotton to polyester thread?
Thread type usually doesn’t require pressure changes, but thread weight might. Heavier threads like 12-weight may need slightly less pressure to prevent excessive drag, while fine threads like 60-weight typically work well with standard pressure settings.
What’s the difference between presser foot pressure and presser foot height?
Presser foot pressure refers to how firmly the foot presses down on your fabric, while height refers to how far the foot lifts when raised. Both affect quilting performance, but pressure adjustment is what controls the force applied during actual sewing.